By Dave and Mary

Building Concrete Steps
for a Front Porch

Our How to Build Concrete Steps Guide

We hope our building concrete steps pictorial and guide will give you the necessary information upon which to decide if this project is within your capabilities.

As you will see, the most critical component is ensuring the framing is sufficient to hold the wet concrete in place until it dries. Mary and I have been documenting the process for constructing concrete flooring for a front porch, the concrete steps, and a walkway to give you an up close and pictorial view of exactly how it is done.

In this section, we will show you how to build concrete steps with an aggregate finish.


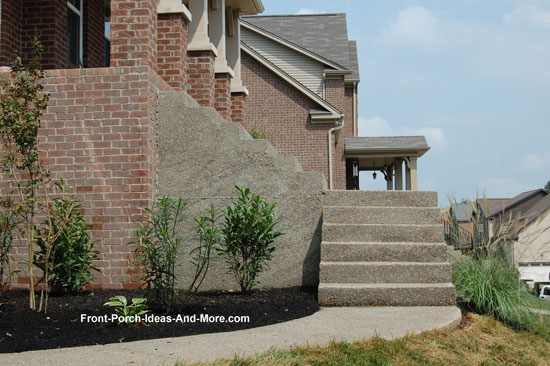
concrete steps on attractive front porch
We'll show you the steps taken to build these attractive concrete steps

Siting the Concrete Porch Steps

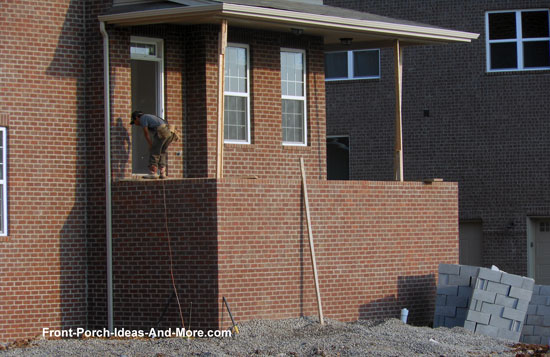
brick front porch before building concrete steps
Brick front porch prior to concrete step construction
The first step in the process was to squarely position the porch steps. In this case the homeowner wanted the steps positioned on the front door. Finding the midpoint of the front door opening and extrapolating that point to the outside porch wall will give you the center of the step.

Once you have marked the midpoint you can then find the outer edges of the porch steps.

The next step is to align a square down the front of the porch wall as shown below, keeping in mind that you have to allow for the plywood form.


siting porch steps centered on front door
Siting the concrete steps on brick wall
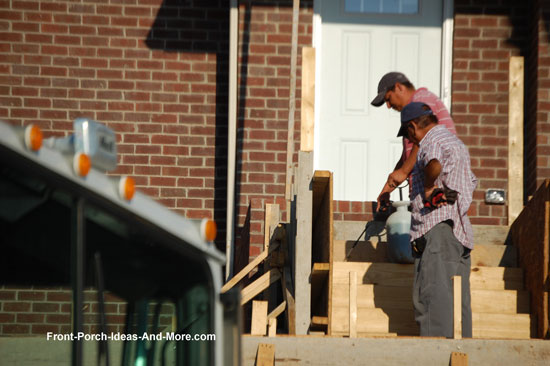
Draw a line down the wall and use that line to fasten 2x4 framing as shown. Repeat the process on the other side.


attaching 2x4s to brick porch wall for to begin framing
Attaching 2x4s to brick porch wall for framing and forms

Lay Out the Stringers for Concrete Steps

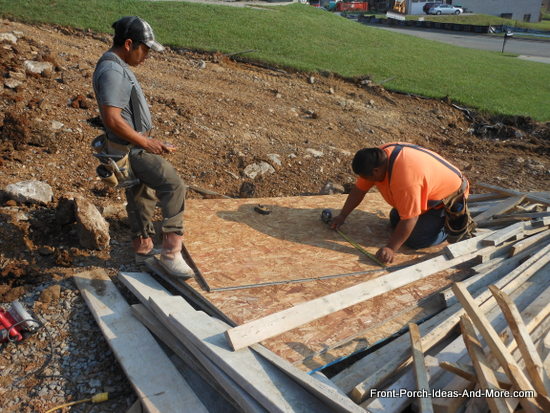
In lieu of erecting the plywood forms and then measuring and marking the rise and run for stringers when building concrete steps, it is easier to lay it out before fastening the plywood as shown below. This is a critical step in the process and if doing so yourself, recommend you measure more than once to make sure it is correct.


laying out the stringers for the concrete steps on plywood form
Laying out the stringers on forms before attaching to framing

Attach the Forms

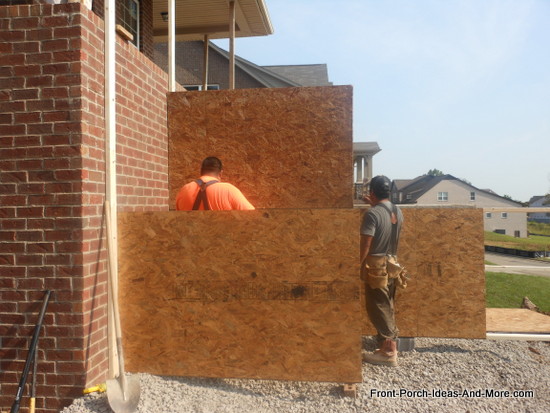
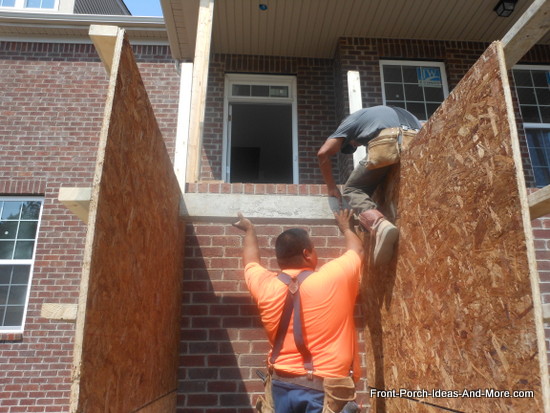
Now they began to attach the plywood to the 2x4 framing by nailing it in place. Because of the height of this porch, another section of plywood must be added. Again, they marked the stringer placement on the plywood before they attached it to the framing.


erecting first level of plywood form
Attaching first level of plywood form


attaching the second level of plywood to achieve desired height
Attaching second level of plywood form for desired height

Reinforce the Forms

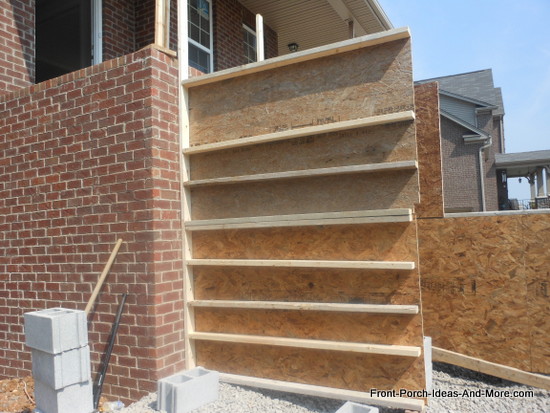
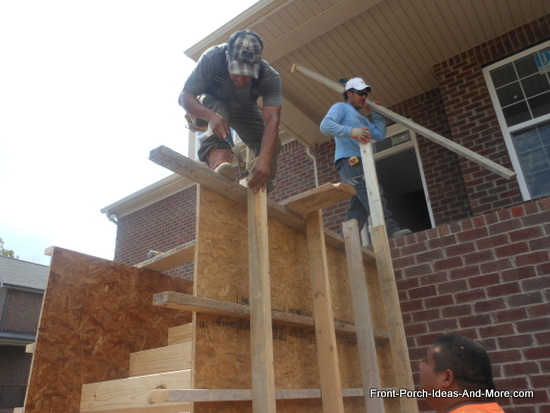
They began reinforcing the plywood sheets by attaching 2x4s horizontally across the plywood to prevent it from bowing until the concrete dries. Notice the 2x4 top plate. That is added onto which they will affix the upper plywood panel.


attachign 2x4s horizontally to keep form from bowing
Reinforcing plywood forms with 2x4s place horizontally


reinforced plywood form
Reinforced plywood form for concrete

Prepare Brick Porch Wall

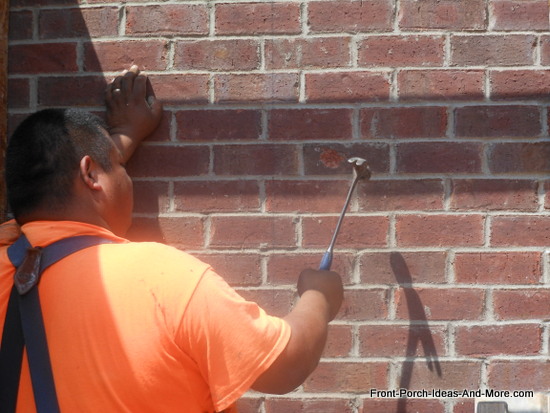
When building concrete steps it may be necessary to attach them to the brick facing on the porch. Once the plywood panels were in place, they began hammering out the brick along the the porch wall.

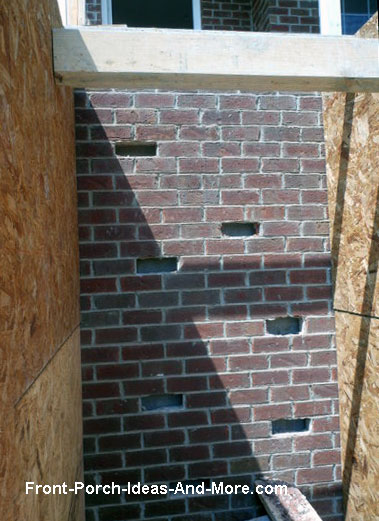
The holes, placed strategically down the wall will later be filled with concrete thereby attaching the steps to the porch's brick wall.


knocking out brick to accept concrete
Knocking out brick to accept concrete


knocking out brick to accept concrete
Brick wall ready to accept concrete


Position the Risers

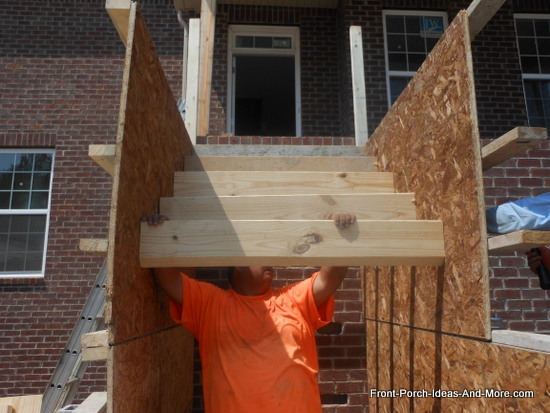
After erecting the plywood panels, they began installing the framing for the risers on the steps. Each piece is cut to length and nailed into position using the rise and run lines they had previously marked on the panels.


installing risers for concrete steps
Installing risers for concrete steps


risers positioned according to layout
Risers positioned according to layout
NOTE: Notice how the bottom of the risers are cut at a 45 degree angle. This is a necessary step as if not done, you won't be able to seamlessly join one to step to the other.


bottoms of risers cut at 45 degrees
Bottom of risers cut to 45 degrees


Reinforce Entire Structure

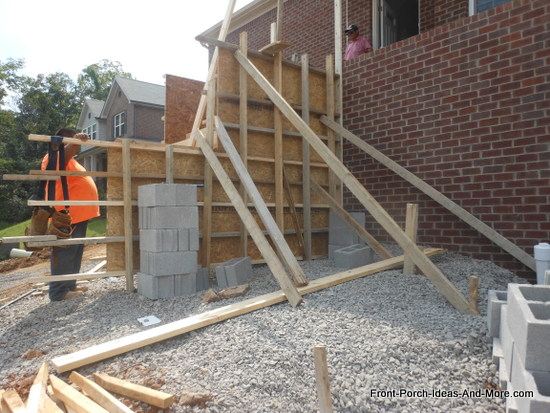
Once the risers and forms were in place they began reinforcing the entire structure by adding 2x4s vertically and bracing the walls as shown. This perhaps, is one of the most critical components in the process to ensure the concrete steps are formed correctly. No matter the size of your concrete steps you just can't brace too much.


reinforcing entire structure to hold concrete
Reinforcing structure to hold forms in place


installing both horizontal and vertical bracing
Bracing both horizontally and vertically

Constructing Lower Section of Porch Steps

They then began to build concrete steps for the lower section in the same manner as the upper portion.

erecting the lower section of forms and risers
Began erecting the lower section of the porch steps


lower section of concrete steps formed
Lower section of steps completed

Fill the Cavity When Building Concrete Steps

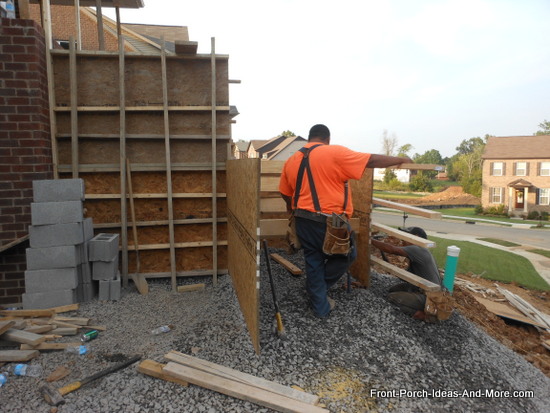
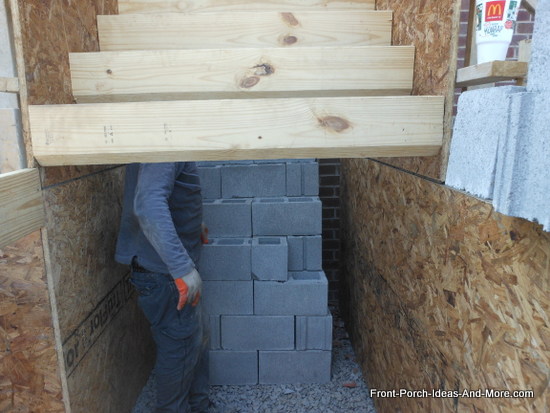
With the porch steps framed, the next step was to fill the cavities between the forms with concrete blocks onto which concrete will be poured. The concrete blocks only fill the center of the cavity from bottom to top.


area between forms filled with concrete blocks
Filling cavities with concrete blocks

When Building Concrete Steps - Reinforce One More Time

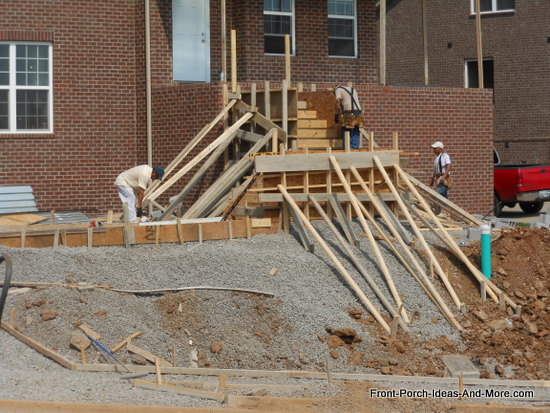
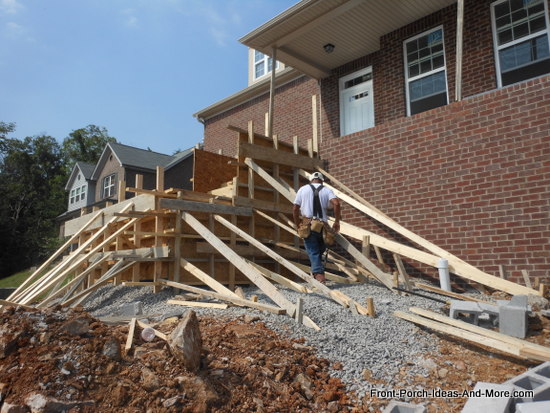
The last step in the concrete-porch-steps construction is to reinforce the entire structure. Once the concrete starts pouring, there is no recourse. Therefore, the structure must be substantially reinforced to hold the weight and not create any bulges, gaps, etc.


adding additional bracing for concrete
Additional bracing is added to support structure


bracing in every direction
Note how it is braced in every way imaginable


braced from every angle
Another view of the bracing

Ready for Concrete

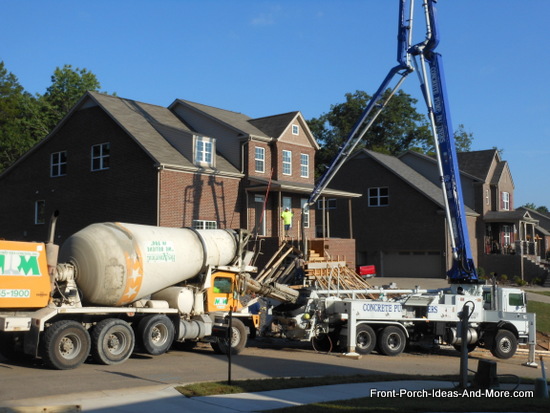
There is a lot of steps involved in building concrete steps so it is always good to see the concrete and pumping truck arrive.


concrete truck delivering concrete to the concrete pumping truck
Concrete pumping truck


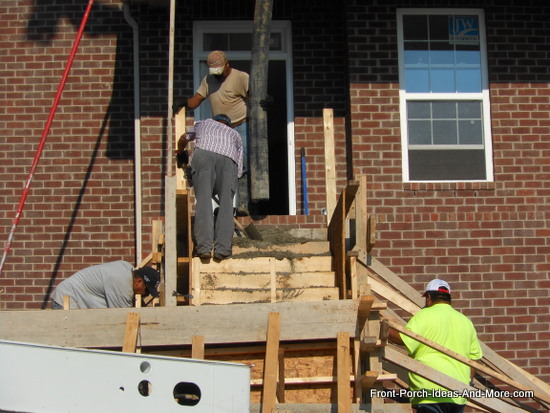
concrete being poured at the top of the steps
Pouring the top of the porch steps


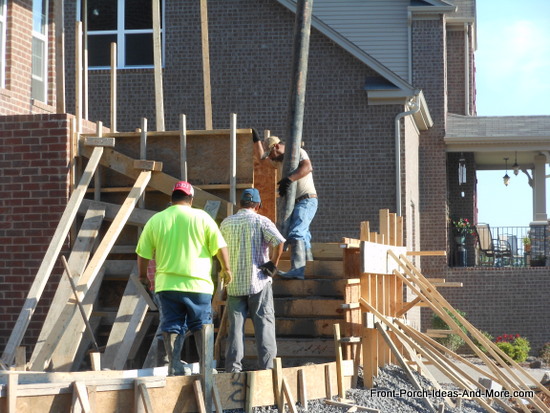
pouring concrete in lower porch step section
Working their way down the steps

Finishing the Concrete Pour

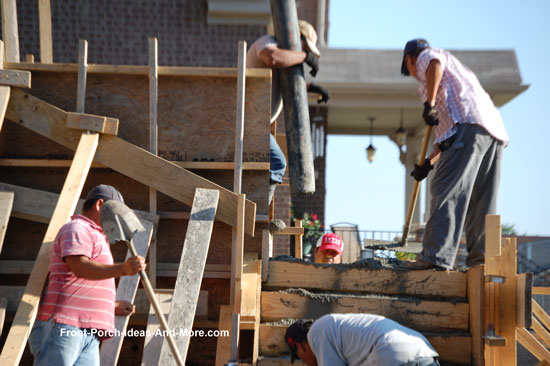
Almost done. As the concrete is being poured into the form, workers ensure it is spread evenly to fill any gaps or voids. Also note that workers also continue to monitor and add additional bracing as required to maintain the integrity of the form.


spreading concrete in form
Spreading concrete and monitoring the bracing


leveling concrete on porch steps
Leveling concrete on porch steps


Making It Aggregate

Since these are going to be aggregate porch steps, a concrete surface retarder is applied. This delays the hardening of the surface so it can later be hosed downed to expose the aggregate stone.

See our guide to concrete porch flooring for more information about applying the concrete surface retarder.


concrete retardant being sprayed over concrete
Applying concrete retardant

Finished Front Porch Steps

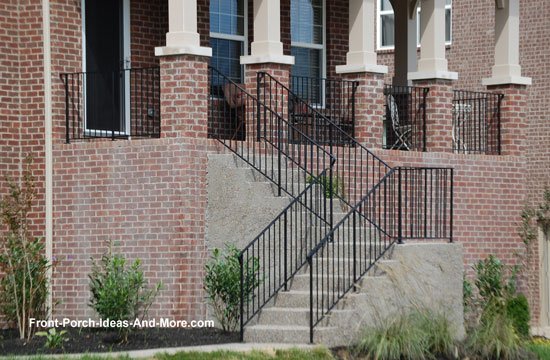
When the concrete hardens the forms are removed and the porch steps are exposed. As a finishing step, wrought iron railings were added.


finished concrete porch steps
Finished concrete porch steps


finished concrete porch steps with wrought iron railings
Finished concrete porch steps with wrought iron railings


Please Don't Go Yet!

Building concrete steps is quite a project and hopefully you now have a better understanding of what is involved. Be sure to see more of our concrete porch options below.


Mary and Dave, Founders of Front Porch Ideas and More
Hi! We're Mary and Dave, lifelong DIYers, high school sweethearts, and we both love porches. You've come to the right place for thousands of porch ideas.

Our Sponsors
The Porch Store


Shop for Porch Parts at Vintage Woodworks.


Use the PCA Visualizer to design your screen door

End Sponsors


Helpful Links

Enjoy shopping Amazon (affiliate link)

Popular Pages

What's New

Join Our Newsletter Family

Porch Designs

Porch Ideas for Mobile Homes

Find a Local Contractor

Build a Porch | Small Porches

Porch Columns | Porch Railings

Screened Porches

Porch Curtains | Porch Enclosures

Porch Landscaping | Vinyl Lattice

Porch Decorating | Porch Ideas

Shop

Navigation Aids

Home | Top of Page

Site Search | Site Map

Contact Us

Policies

Disclosure Policy | Privacy Policy

Legal Info


Please Join Us Here Also

Join us on Facebook for porch talk Join us on Pinterest Subscribe to get our updates. Thank you!


Get in touch with pre-screened local professionals for work you need done
Find a Trusted Local Pro


Copyright© 2008-2024
Front-Porch-Ideas-and-More.com All rights reserved.
No content or photos may be reused or reproduced in any way without our express written permission.

At no extra cost to you, we earn a commission by referring you to some products on merchant sites. See our disclosure policy.
We, Front Porch Ideas and More, confirm, as stated on our privacy policy, that we do not sell personal information.

All content here is solely for presenting ideas. We recommend consulting with a licensed, experienced contractor before you begin your project.
We make no guarantees of accuracy or completeness of information on our site or any links to other websites contained here.


Thank you for taking your time to stop by. See what's popular and new here.

small rocking chair


Mary and Dave, Founders of Front Porch Ideas and More
Hi! We're Mary and Dave, lifelong DIYers, high school sweethearts, and we both love porches. You've come to the right place for thousands of porch ideas.
--- Our Sponsors ---
The Porch Store

Use the PCA Visualizer to design your screen door

Shop for Porch Parts at Vintage Woodworks.

--- End Sponsors ---
Find Top-Rated Service Pros
Get in touch with pre-screened local professionals for work you need done

Our Newsletter, Front Porch Appeal
Learn more!


Thank you for being here!


small rocking chair
At no extra cost to you, we earn a commission by referring you to some products on merchant sites. See our disclosure policy.
We, Front Porch Ideas and More, confirm, as stated on our privacy policy, that we do not sell personal information.

All content here is solely for presenting ideas. We recommend consulting with a licensed, experienced contractor before you begin your project.
We make no guarantees of accuracy or completeness of information on our site or any links to other websites contained here.


Front Porch Home | Return to Top
Contact Us | About Us | Advertise with Us | Search | Site Map
Media | Privacy Policy | Disclosure | Legal Notice | What's New

XML RSS   Add to My Yahoo!  
By Mary and Dave Morris, Copyright © 2008-2024 Front-Porch-Ideas-and-More.com. All rights reserved.
No content or photos may be reproduced or copied in any way without our express written permission.

Page copy protected against web site content infringement by Copyscape