Porch Flooring Installation - Part 2Handling Corners, Rim Boards, and ThresholdsIn this section (Part 2) of our porch flooring installation series courtesy of Vintage Woodworks, their video shows how to install boards at a corner, how to address rim board issues, and how to install boards under a threshold.Normally, boards are mitered and butted against each other at a corner. However, Vintage Woodworks describes a bit different method that results in a much cleaner and more professional look. Watch their video below to learn how easy this is to do and for other tips that will make the job a lot easier. Video 2: How to Install Porch FloorsVideo Summary
We are including a summary of the video transcript for those unable to see the video and so you can refer back to the information
at your convenience.
In Porch Decking Part 1, Vintage Woodworks showed how to resolve foundation issues. In this section (Part 2), they address a few other important factors. Working a CornerIf you have a wrap-around porch you will need to join boards at the corner. Traditionally, boards are mitered against each other. However, here's another way to handle a corner that results in a cleaner look.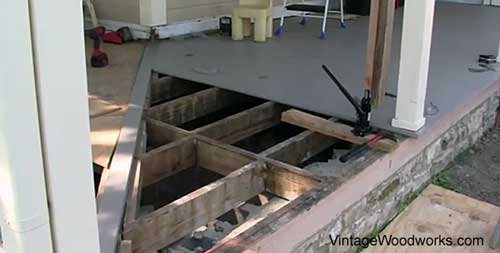
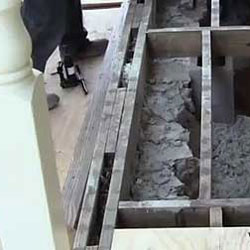
By using a diagonal floor board at the corner you can butt the porch boards directly against the diagonal board rather than each other. This creates a much cleaner and more professional look. 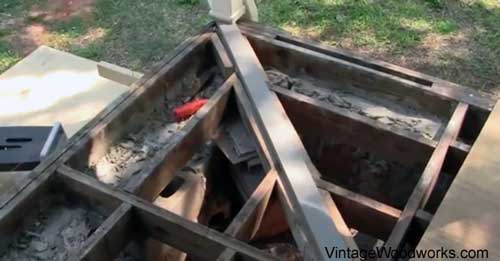 Be aware; however, you may need to attach additional blocking (as shown in the photo below) to support and attach the ends of the floor boards.
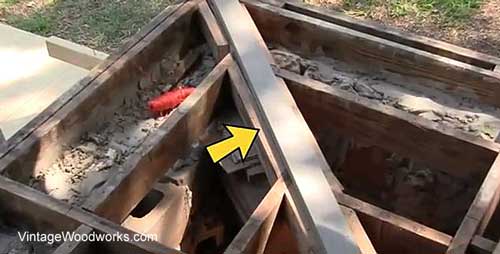
Dave's Note: If using treated lumber rather than AZEK porch boards (which don't shrink),
I like to ensure the
blocking is of sufficient width to accommodate screwing the floor board straight down into the treated wood
rather than toe nailing the board on the ends.
Treated lumber has a tendency to shrink on the ends and often times the toe nailed screws split the ends of the boards over time. AZEK building products include a full line of rim board covers and porch decking materials. All are available through Vintage Woodworks. Rim Joist Issues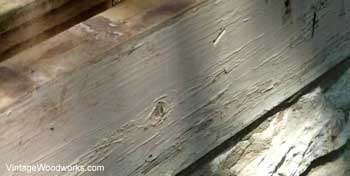 Rim joists made from treated lumber can deteriorate because they take the brunt of weather.
The rim boards on this porch are proof that weather takes a toll.
Rim joists made from treated lumber can deteriorate because they take the brunt of weather.
The rim boards on this porch are proof that weather takes a toll.
They had been painted but the surfaces deteriorated and the corner joints were no longer tight. 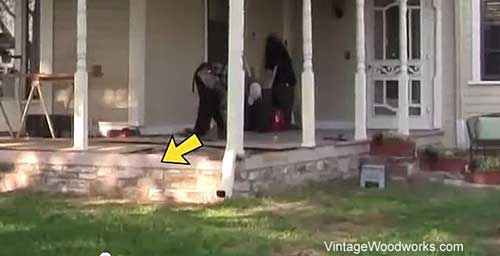
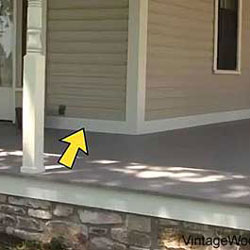
The owners decided to cover their rim joists with painted 3/4 inch AZEK trim boards. Because they are made from cellular PVC, they mimic the look of real wood but they won't rot. AZEK also makes rim joist covers to match their porch boards so you can have continuity of color. For this project, the rim joists were painted to match the house trim. They wanted to avoid the issue of damaged wood caused by the weather and opted for a slightly more expense option, the AZEK cellular PVC products. By doing so, they alleviate any future water issues and over time, possibly save money in replacement costs. Creating an OverhangYou will want your new porch floor to extend past your rim joist by at least an inch.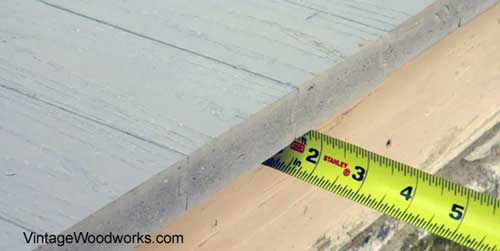
To achieve this consistently across your porch floor, you will have to account for width of the rim joist plus 1 inch. They show you two popular methods. The first method uses a string line. Set a string line 1 3/4 inches (3/4 inch rim board plus 1 inch overhang) from the edge of the rim board. Install your porch boards to that line without touching it. Pay particular attention to the string as any movement, by the boards or by other means, may cause the boards to be out of line. This method requires cutting each board to the exact length prior to installation. 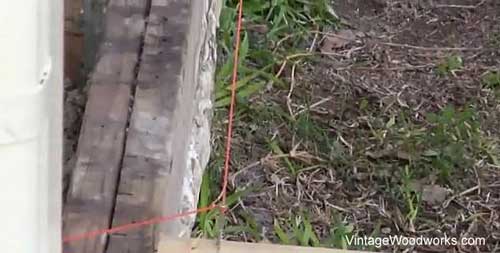
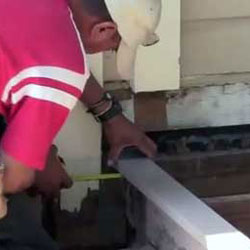
Another method, and probably the most popular and quickest, is to install the porch flooring longer than needed to get the 1-inch overhang. Then cut the ends to the right length with a circular saw. Just be careful to not cut them too short as there would be no easy remedy. Snap a chalk line to mark the cut. 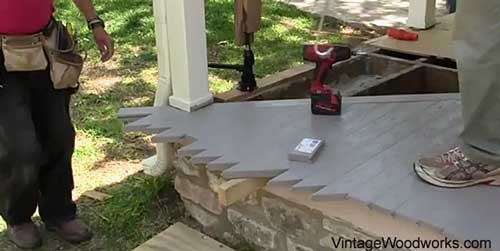
Not everyone can accurately cut against a chalk line. You can also use a straight edge against which you will place the bottom edge of the circular saw. Watch the chalk line as you cut to ensure your cut is accurate. 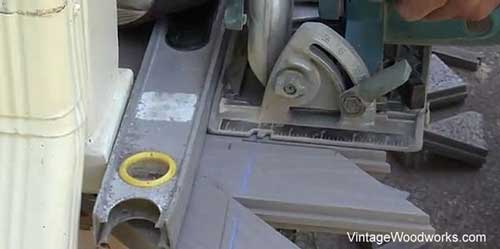
Dave's Note: For safety reasons, I prefer to use a long straight board as a guide in similar situations.
I position the board and then tack it down on each end (sometimes the middle depending on length) or clamp it in place if feasible.
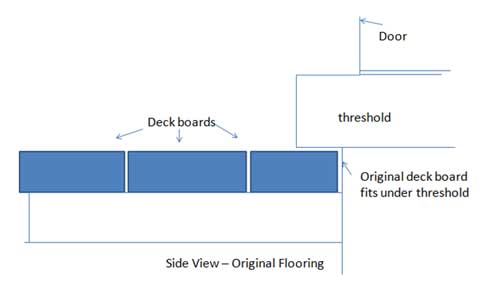
I prefer not to have my toes or hands near the rotating blade of a circular saw nor do I recommend you do so either. ThresholdsThe first board had to fit under the kitchen door threshold. If your new porch boards are the same thickness as the old ones, you shouldn't have any issue sliding the new one under the threshold.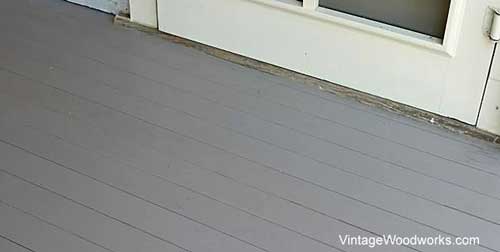
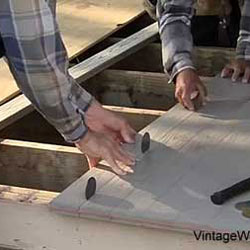
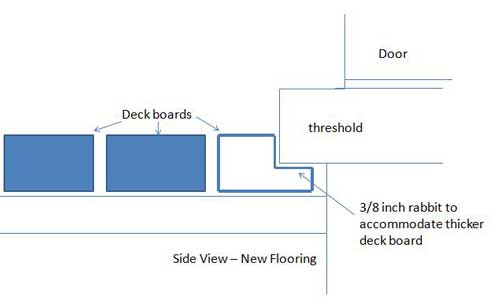
However, in this case, the new boards are thicker which is usually the case. Instead of removing the door casing and door jamb to reset it higher to accommodate the new board, it is easier to cut the new board to fit. By cutting a 3/8 inch rabbit (groove) on the top edge of the new board, the board can slip under the threshold. Before installing the board under the threshold, caulk the edge of the board. Owners used BASF brand sonolastic NP1 caulk for the edge and also under the front bottom edge of the threshold.
Dave's Note: You can cut the rabbit using a router or a table saw.
I've provided two diagrams to illustrate the cut and placement of the board.
Disclaimer: The information provided here is for informational purposes only.
Because every project is different and individual DIY skills vary, it's best to consult a licensed contractor about your specific project.
See All of Vintage Woodwork's Porch Flooring Videos(You just saw #2)
Disclaimer: The information provided here is for informational purposes only.
Because every project is different and individual DIY skills vary, it's best to consult a licensed contractor about your specific project.
< You Are Here:

Hi! We're Mary and Dave, lifelong DIYers, high school sweethearts, and we both love porches. You've come to the right place for thousands of porch ideas. Our Sponsors


End Sponsors Helpful LinksEnjoy shopping Amazon (affiliate link)Popular PagesWhat's NewJoin Our Newsletter Family Porch Designs Porch Ideas for Mobile Homes Find a Local Contractor Build a Porch | Small Porches Porch Columns | Porch Railings Screened Porches Porch Curtains | Porch Enclosures Porch Landscaping | Vinyl Lattice Porch Decorating | Porch Ideas Shop Navigation AidsHome | Top of PageSite Search | Site Map Contact Us PoliciesDisclosure Policy | Privacy PolicyLegal Info Please Join Us Here Also
Find a Trusted Local Pro Copyright© 2008-2024 Front-Porch-Ideas-and-More.com All rights reserved. No content or photos may be reused or reproduced in any way without our express written permission. At no extra cost to you, we earn a commission by referring you to some products on merchant sites. See our disclosure policy. We, Front Porch Ideas and More, confirm, as stated on our privacy policy, that we do not sell personal information. All content here is solely for presenting ideas. We recommend consulting with a licensed, experienced contractor before you begin your project. We make no guarantees of accuracy or completeness of information on our site or any links to other websites contained here. Thank you for taking your time to stop by. See what's popular and new here. |
Hi! We're Mary and Dave, lifelong DIYers, high school sweethearts, and we both love porches. You've come to the right place for thousands of porch ideas. --- Our Sponsors ---
--- End Sponsors ---Find Top-Rated Service Pros
Our Newsletter, Front Porch AppealLearn more!Thank you for being here! |
|
|
At no extra cost to you, we earn a commission by referring you to some products on merchant sites. See our disclosure policy.
We, Front Porch Ideas and More, confirm, as stated on our privacy policy, that we do not sell personal information. All content here is solely for presenting ideas. We recommend consulting with a licensed, experienced contractor before you begin your project. We make no guarantees of accuracy or completeness of information on our site or any links to other websites contained here. Front Porch Home | Return to Top Contact Us | About Us | Advertise with Us | Search | Site Map Media | Privacy Policy | Disclosure | Legal Notice | What's New 
|
||
|
No content or photos may be reproduced or copied in any way without our express written permission. | ||