Porch Flooring Installation - Part 4Installing the Boards and PostsIn this section (Part 4) of Vintage Woodworks porch flooring video series, tongue and groove porch decking is installed square to the house for a professional look.Using AZEK building products, specifically AZEK's porch boards, techniques for cheating the boards and installing boards under porch posts are illustrated in this video. The process is the same for almost all tongue and groove flooring. 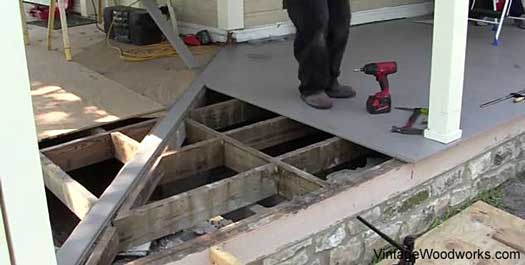
This is the stage at which you'll see all of your previous work pay off. If you haven't already, be sure to see Porch Decking Videos 1-3 which lay the groundwork for actually installing the boards. Enjoy the VideoVideo Summary
For those who may not be able to view the video or who would like to study the process, we're providing a summary of the video here for you.
Installing tongue and groove flooring, specifically, AZEK porch decking, is not difficult.  It is recommended that you use stainless steel screws (available through Vintage Woodworks) because
both the screws and the cellular PVC boards will last a very long time.
It is recommended that you use stainless steel screws (available through Vintage Woodworks) because
both the screws and the cellular PVC boards will last a very long time.
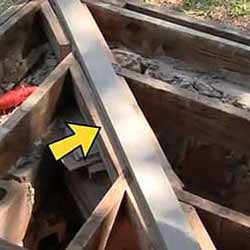
Stainless steel won't rust so you can be assured they will last as long as the boards. Your first tongue and groove board should be installed with the groove toward the outside either against a wall or the open end. In the video, they attached the first board to each joist by inserting a screw at the angle shown below.
Dave's Note: When installing wood tongue and groove it is sometimes advisable to drill a pilot hole first
so you don't split the tongue.
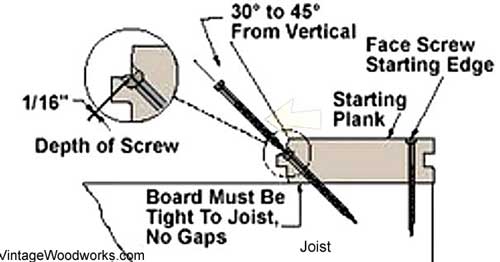
You will want to penetrate the board at least 1/16th inch to allow the groove of the next board to seat firmly when inserted onto the tongue. In this particular case, a baseboard will be installed over the grooved edge of the first board against the wall to secure the grooved edge.
Dave's Note: If installing the first board with the groove to the outside on an open end, I recommend you
cut the board so as to remove the groove. You can use a round-over bit on a router to smooth the cut edge.
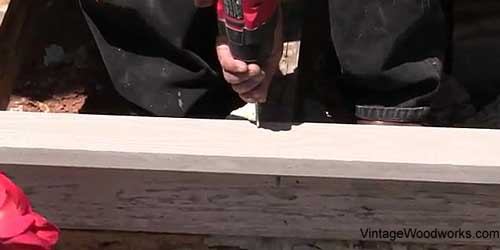
Screw each remaining board to the joists in the same manner. Each board is installed by inserting the grooved edge onto the tongue of the previous board. Use shims if you find differences in the framing that causes gaps between the joists and flooring boards. 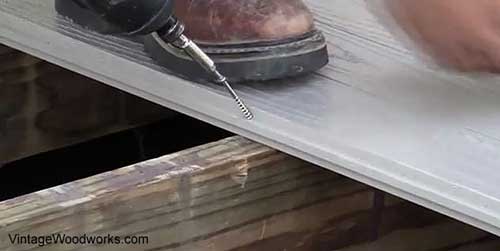
Sometimes you may have to "persuade" a board to ensure it seats firmly to the previous board. Apply only enough pressure required to make the fit; otherwise you could damage a board. When you reach the end on a rectangular porch, you may have to rip the final board to width in order to achieve the correct overhang and to remove the last tongue. Secure this board by screwing directly down into each joist.
Dave's Note: Although not addressed in the video, countersinking the screws gives a cleaner look.
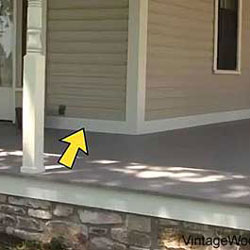
A major advantage of using AZEK cellular PVC porch flooring is that they are flexible until secured to the joists. This alleviates having to struggle with warped boards as normally occurs with wood boards. Align the first board against a tight string line to ensure its edge is straight. If you have to cheat the boards ensure each board is aligned with a straight edge; otherwise, you may incur a bow that increases as you install more boards. 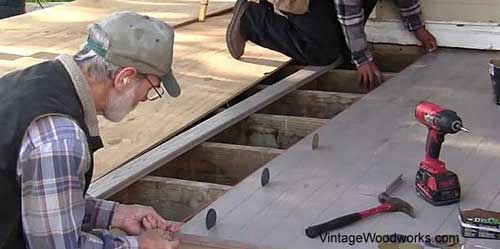
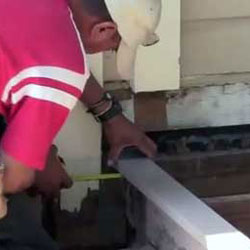
Recommend using roofing tin cap disks as spacers (shown below). These are available at home improvement and local hardware stores and are normally used to hold down felt paper on roofs during installation. 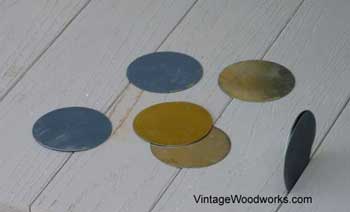 Because the porch was not square to the house, they used four disks together at the post end of the boards,
three toward the middle and then two beyond that.
Because the porch was not square to the house, they used four disks together at the post end of the boards,
three toward the middle and then two beyond that.
By using more spacers at the post end creates slightly more space at this end which corrects the out of square problem. You need to space the disks evenly along the board length to keep a straight edge. In the video; however, they had to use the spacing discussed above to correct a slight bow that had developed during installation. 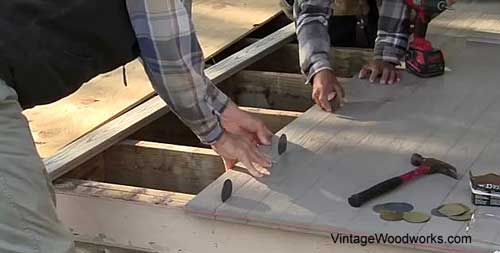
Measure the width of at least every five boards or so as you go. You want to make sure you are actually correcting the out-of-square issue before you reach the end. They also occasionally measured the distance from the last installed board to the temporary board to make they were making progress. 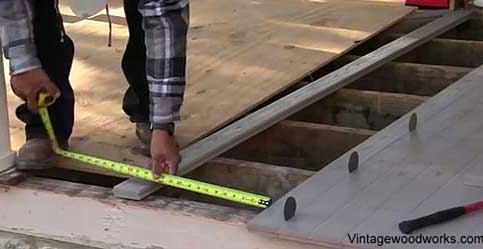
You will probably have to use less spacers as you go so as not to over correct the issue. Remember to space the disks evenly along the board length to ensure you maintain a straight edge. You may find you don't need any disks as you close in on the temporary board. 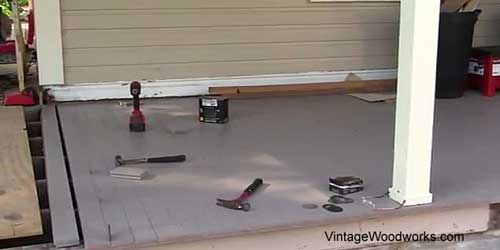
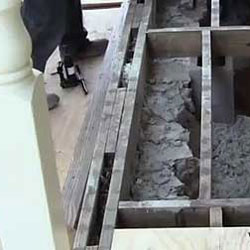
Installing Porch PostsFor this project, the porch posts were in the correct location and did not need to be moved. If you do have to reposition them, it is recommended you do so as you install the new floor as the posts actually rest on the porch flooring.
Leave a small piece of old flooring under the porch posts when you remove the existing porch decking material. Use a straight edge and mark the exact position of the existing post onto the new porch flooring nearest the post. 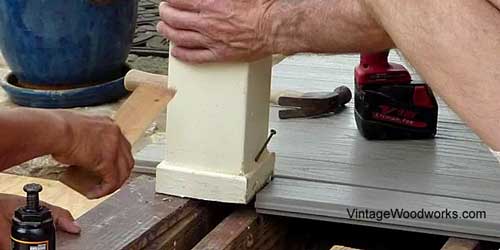
Use a jack and 2x4s to relieve the pressure from the post to the beam. Then uninstall the post mount blocking to free the post bottom. Recommend using a double 2x4, squared at each end, on the jack to lift the beam slightly. 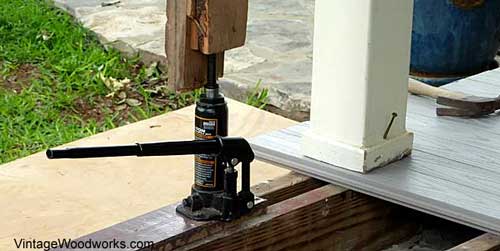
Nail a piece of wood (plywood) to the top of the 2x4s to protect the beam's surface. 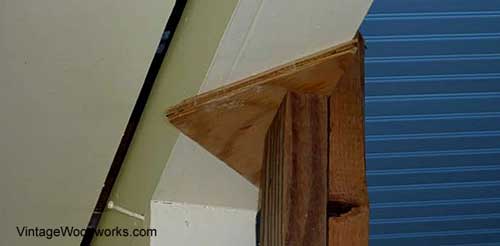
Raise the beam just enough to be able to chisel out the old porch flooring under the post. 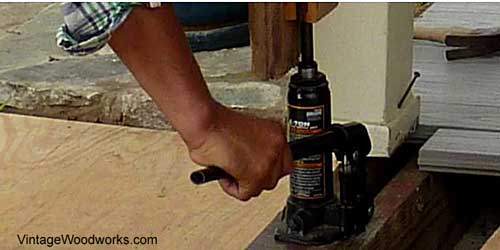
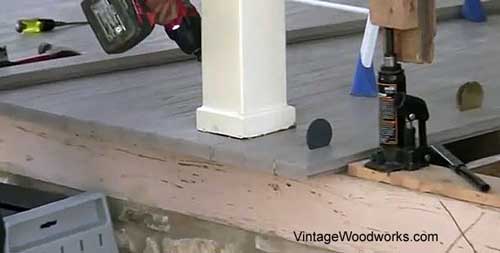
You may need to use a reciprocating saw to cut the old nails flush. Install the new porch flooring under the post and then release the pressure on the jack to lower the post to the floor. Ensure the post is aligned with the marks you previously made. If not, use the jack to lift the beam and then tap the post into the right position. Recommend you use two people for this job as you need to steady the post and hold the 2x4s on the jack. 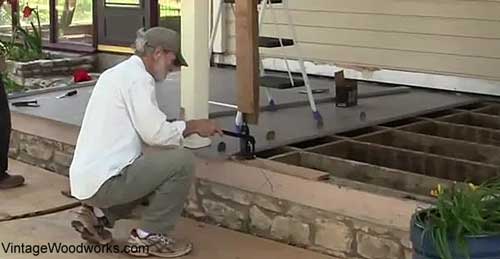
Repeat this same method for each post. See All of Vintage Woodwork's Porch Flooring Videos(You just saw #4)
Disclaimer: The information provided here is for informational purposes only.
Because every project is different and individual DIY skills vary, it's best to consult a licensed contractor about your specific project.
You Are Here:

Hi! We're Mary and Dave, lifelong DIYers, high school sweethearts, and we both love porches. You've come to the right place for thousands of porch ideas. Our Sponsors


End Sponsors Helpful LinksEnjoy shopping Amazon (affiliate link)Popular PagesWhat's NewJoin Our Newsletter Family Porch Designs Porch Ideas for Mobile Homes Find a Local Contractor Build a Porch | Small Porches Porch Columns | Porch Railings Screened Porches Porch Curtains | Porch Enclosures Porch Landscaping | Vinyl Lattice Porch Decorating | Porch Ideas Shop Navigation AidsHome | Top of PageSite Search | Site Map Contact Us PoliciesDisclosure Policy | Privacy PolicyLegal Info Please Join Us Here Also
Find a Trusted Local Pro Copyright© 2008-2024 Front-Porch-Ideas-and-More.com All rights reserved. No content or photos may be reused or reproduced in any way without our express written permission. At no extra cost to you, we earn a commission by referring you to some products on merchant sites. See our disclosure policy. We, Front Porch Ideas and More, confirm, as stated on our privacy policy, that we do not sell personal information. All content here is solely for presenting ideas. We recommend consulting with a licensed, experienced contractor before you begin your project. We make no guarantees of accuracy or completeness of information on our site or any links to other websites contained here. Thank you for taking your time to stop by. See what's popular and new here. |
Hi! We're Mary and Dave, lifelong DIYers, high school sweethearts, and we both love porches. You've come to the right place for thousands of porch ideas. --- Our Sponsors ---
--- End Sponsors ---Find Top-Rated Service Pros
Our Newsletter, Front Porch AppealLearn more!Thank you for being here! |
|
|
At no extra cost to you, we earn a commission by referring you to some products on merchant sites. See our disclosure policy.
We, Front Porch Ideas and More, confirm, as stated on our privacy policy, that we do not sell personal information. All content here is solely for presenting ideas. We recommend consulting with a licensed, experienced contractor before you begin your project. We make no guarantees of accuracy or completeness of information on our site or any links to other websites contained here. Front Porch Home | Return to Top Contact Us | About Us | Advertise with Us | Search | Site Map Media | Privacy Policy | Disclosure | Legal Notice | What's New 
|
||
|
No content or photos may be reproduced or copied in any way without our express written permission. | ||