Installing a Vinyl Beadboard Ceiling on PorchA Lesser-Known Fact About Beadboard Ceilings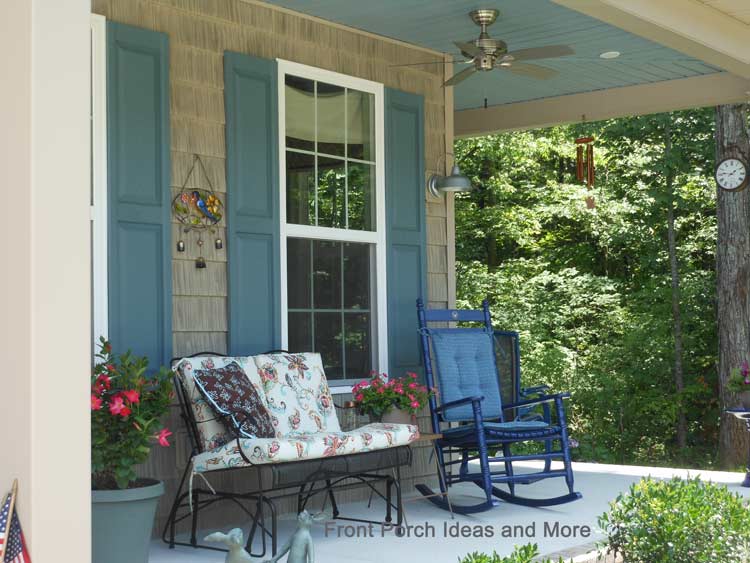
Beadboard ceilings are a popular choice for adding a touch of charm to your porch or three-season porch. You may understand about the basic concept of beadboard, but did you know beadboard ceilings have acoustic properties? Yes, due to the design and construction of the panels, beadboard ceilings can help improve sound insulation and reduce echo. The beadboard's tongue-and-groove construction, along with the small ridges or beads, creates subtle irregularities in the surface that can help diffuse sound waves and minimize sound reverberation. By incorporating beadboard ceilings into your interior design, you not only add visual appeal but also contribute to a more acoustically pleasant environment. Shelly's Story about Her Vinyl Beadboard CeilingOne of our site visitors, Shelly, contributed her Vinyl Beadboard Ceiling project through photographs and generously offered helpful information about her experience.Shelly told us the following:
Screw pattern is staggered so each course is screwed into every other strip. The cut ends (allow 1/4 on each end for expansion, and make sure the screws in the nailing flanges aren't so tight that the plank can't slide) are supported by J channel at the house (just the top of the J channel installed for the siding) and the carrying beam. 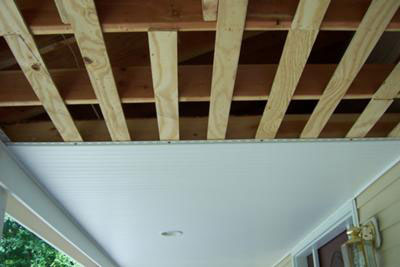
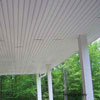
Hanging vinyl bead board on porch ceilingHere is a shot of the finished vinyl bead board ceiling. I still have to finish the bottom of the beam, the other side of the beam (vented soffit) and replace some siding, then I'll share pictures of the whole porch!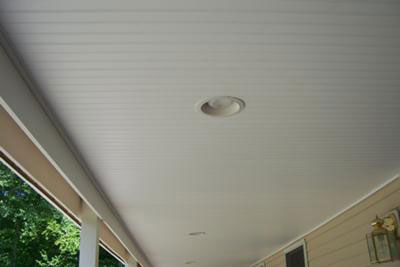
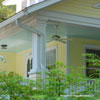
Completed vinyl bead board on porch ceilingShelly, we are very appreciative of you sharing how you installed your vinyl beadboard ceiling on your porch. It is very true that the right porch ceiling adds a lot of charm to any porch. Your front porch is a shining example. To learn more about how Shelly installed vinyl bead board ceiling on her porch, see this instructional aid. Comments for Vinyl Beadboard Ceiling on PorchCeiling looks great!by: Mary Thanks, Shelly. You're doing a fantastic job on your porch ceiling. You can email us with additional pictures when you are done. I sent you an email so you will have our email address. We love your project. Thanks! Clean look by: Anonymous I like the look of your vinyl bead board ceiling. Very clean and fresh looking. I will consider this when we remodel our porch. Thanks a lot for sharing this. Check out the full story! by: Anonymous Thanks - Mary and Dave have put the entire process on a link on their porch ceiling page. Check it out! Purchase of bead board ceiling by: Anonymous Can someone tell me where I can buy vinyl bead board ceiling material in the Richmond VA area? I want to install it myself but cannot find it anywhere in my area. by: Dave Thanks much for visiting our site. Took a little while to find it but call Allied Building Products, 804-233-6200. They are located at 2701 Bells Road, Richmond, VA. Ask for it by T-2 panels. Certain Teed makes it. Dave Bead Board Ceiling Colors by: Dave Not sure if they make it in that color but you can paint it. You'll have to contact Allied Building Products, 804-233-6200. They are located at 2701 Bells Road, Richmond, VA. Ask if their T-2 panels come in your chosen color. Bead Board Ceilings by: Anonymous Are your porch bead board ceilings available in a almond/bisque color? Painting Vinyl by: Anonymous Can you really paint the vinyl bead board? by: Mary Yes, you can. Just be sure to use paint specifically designed for use on exterior vinyl surfaces. Good question. Removing Bead board Panel by: Anonymous We need help on hanging a porch swing with bead board ceiling. How can a panel be removed to add structural support to hold the swing? Yes you can paint vinyl bead board Removing by: Mary and Dave You ask a great question. It depends upon how your bead board ceiling was installed. Is it screwed in place or snapped in place? Either way, you will need to disassemble it in the area where you want to hang your porch swing. If it is snapped in place like vinyl siding, there is a tool you can get to release the panels. It looks a bit like the tool you use to open paint cans. You can probably get one at a home improvement store. Have fun with your porch swing and just reply to this if you still have questions. Thanks! Mary & Dave Are There Special Hangers for Bead board Ceilings by: Anonymous Hi. I have vinyl bead board soffits on my porches. I know how to use a stud finder to locate wood so I can screw in a cup holder to hang my hummingbird. However, I'd rather not make any holes in my new bead board. Are there any hangers made to insert between the panels that would be strong enough to hold a feeder with 16 ounces of food? Thank you! We like the no-hole hooks by: Mary and Dave You ask a great question about how to hang your hummingbird feeder from your vinyl soffits without making a hole. We too have a vinyl porch ceiling and we have enjoyed using the No-Hole hooks (http://www.noholehook.com/) You may want to visit their website. They have their phone number listed and might be a good idea to give them a call and tell them what you have in mind. Our packages say that the hooks hold up to 5 pounds. We hope you get a lot of hummingbirds! Mary and Dave Another option for your vinyl soffit by: Mary and Dave Another idea Dave just came up with for your vinyl soffit is to go up through one of the existing holes until you find one that is beneath a stud. Then you could put in an eye-screw and hang your feeder from that. Hope that helps! Mary Here are the first pictures of Shelly's porch ceilings that she shared with us.

Hi! We're Mary and Dave, lifelong DIYers, high school sweethearts, and we both love porches. You've come to the right place for thousands of porch ideas. Our Sponsors


End Sponsors Helpful LinksEnjoy shopping Amazon (affiliate link)Popular PagesWhat's NewJoin Our Newsletter Family Porch Designs Porch Ideas for Mobile Homes Find a Local Contractor Build a Porch | Small Porches Porch Columns | Porch Railings Screened Porches Porch Curtains | Porch Enclosures Porch Landscaping | Vinyl Lattice Porch Decorating | Porch Ideas Shop Navigation AidsHome | Top of PageSite Search | Site Map Contact Us PoliciesDisclosure Policy | Privacy PolicyLegal Info Please Join Us Here Also
Find a Trusted Local Pro Copyright© 2008-2024 Front-Porch-Ideas-and-More.com All rights reserved. No content or photos may be reused or reproduced in any way without our express written permission. At no extra cost to you, we earn a commission by referring you to some products on merchant sites. See our disclosure policy. We, Front Porch Ideas and More, confirm, as stated on our privacy policy, that we do not sell personal information. All content here is solely for presenting ideas. We recommend consulting with a licensed, experienced contractor before you begin your project. We make no guarantees of accuracy or completeness of information on our site or any links to other websites contained here. Thank you for taking your time to stop by. See what's popular and new here. |
Hi! We're Mary and Dave, lifelong DIYers, high school sweethearts, and we both love porches. You've come to the right place for thousands of porch ideas. --- Our Sponsors ---
--- End Sponsors ---Find Top-Rated Service Pros
Our Newsletter, Front Porch AppealLearn more!Thank you for being here! |
||||
|
At no extra cost to you, we earn a commission by referring you to some products on merchant sites. See our disclosure policy.
We, Front Porch Ideas and More, confirm, as stated on our privacy policy, that we do not sell personal information. All content here is solely for presenting ideas. We recommend consulting with a licensed, experienced contractor before you begin your project. We make no guarantees of accuracy or completeness of information on our site or any links to other websites contained here. Front Porch Home | Return to Top Contact Us | About Us | Advertise with Us | Search | Site Map Media | Privacy Policy | Disclosure | Legal Notice | What's New 
|
|||||
|
No content or photos may be reproduced or copied in any way without our express written permission. | |||||