Have Fun Building a Screened In PorchOn Your Existing Porch or DeckIf you are building a screened in porch on an existing porch, use our helpful tips to become better informed.
This is a project that can be done by a do-it-yourselfer and requires basic to intermediate carpentry tools in most cases.
What if you are not very handy? No worries. Check for a qualified, experienced local contractor.
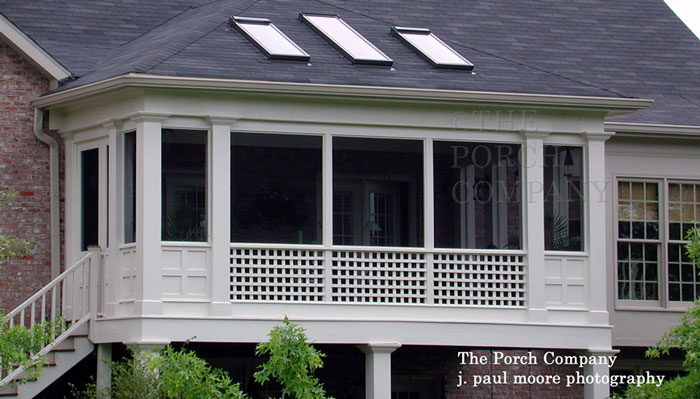
Custom designed screen porch by The Porch Company of Nashville TN
The information on this page is solely intended to give you the basic steps required to build a screen porch on an existing porch or deck.
Every porch is different in some way so it is impossible to address every issue here.
After reading through our steps, you should be able to decide if you can do it yourself or if you should hire a qualified, experienced contractor instead. This material is not a "how-to" guide. Use it for information only. Before We Begin....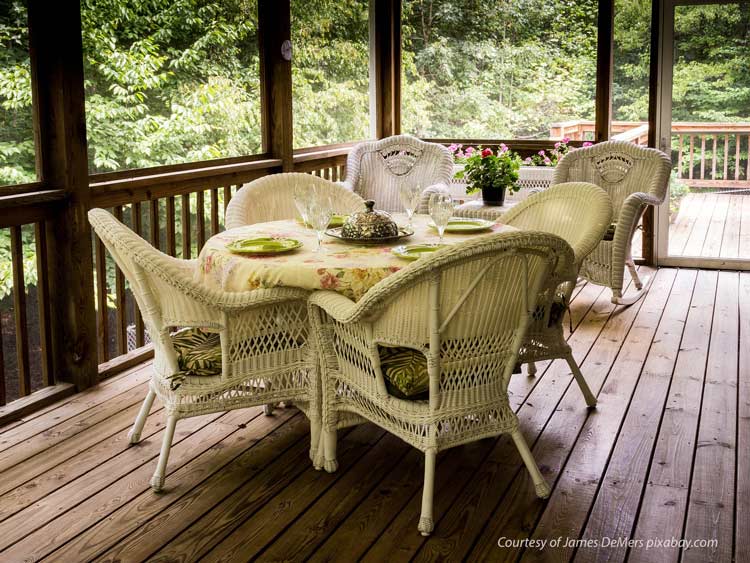
Are you considering building a screened in porch?Building a screened-in porch is a delightful way to enjoy the outdoors from the comfort of your home.Not only will your porch protect you from weather and bugs, but you'll get to enjoy nature's sounds and lovely breezes. To begin with, here are [perhaps] some surprising things you need to remember in your screen porch plans...
Steps to Building a Screened In Porch on Your DeckStep 1 - Have a Screen Porch PlanTo build a screened porch from an existing porch, you must start with a plan. Here are some porch plans popular with our readers. Your plan for building a screened in porch need not be too detailed at this point but should contain at least a basic scale drawing and measurements (very important).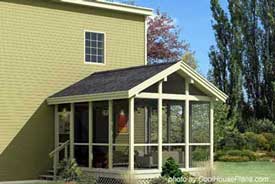 If you don't have a plan, Mary and I recommend you check out
our Screen Porch Plans Section; you will be surprised
at the many options you have (like the one at right).
If you don't have a plan, Mary and I recommend you check out
our Screen Porch Plans Section; you will be surprised
at the many options you have (like the one at right).
You can use these as is or modify them to fit your needs. 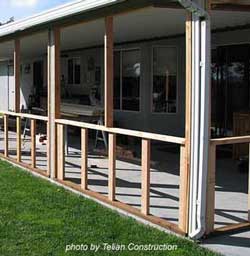 Note the width between existing columns.
This distance will either be spanned by a screen frame or divided to accommodate two or more screen frames.
Note the width between existing columns.
This distance will either be spanned by a screen frame or divided to accommodate two or more screen frames.
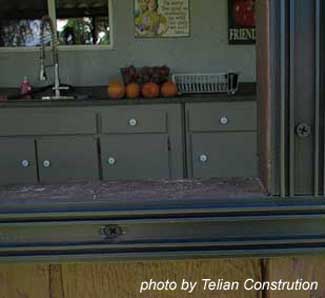
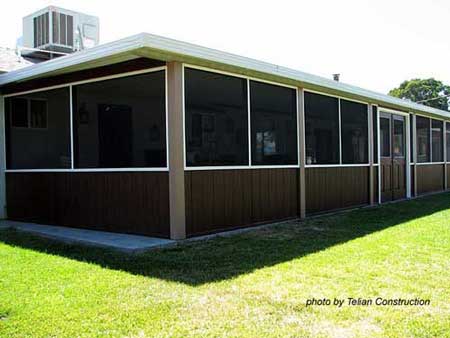
The picture at right, courtesy of Telian Construction Company, shows the space between the columns divided to accommodate two screen frames above a knee wall. When building a screened in porch you have options. For example, you could have as easily divided this same space from ceiling to floor and not used a knee wall or you could have installed a railing instead.
IMPORTANT TIP: If you plan to make it a 3-season porch in the future, you will need to ensure your framing is more substantial
in order to replace screen panels with glass panel inserts.
Step 2 - Codes, Building Permits, Home Owner AssociationsConsult your local codes department if you are building a screened in porch to see if you need to pull any permits. Chances are you won't need any to build a screened porch unless you are adding additional electrical or structural features.Also check with your homeowner's association and read your subdivision's covenants if that applies to you. Be a good neighbor and potentially save yourself a lot of grief!
If you are hesitant about consulting with your codes department please read our
page on what you need to know about building permits before proceeding.
When building a screened in porch or other structures, building permits not only protect you but can also save you money. Step 3 - Determine If You Need Railings or Knee Wall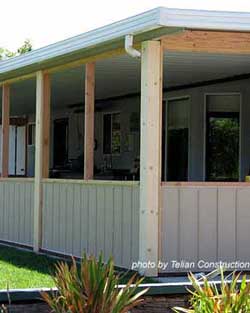 If you have a balustrade (railings) or knee wall (a solid bottom portion) on your porch decide if you are going to keep it.
Exterior siding is placed over the framing to create a knee wall on the screened in porch at right. The picture at top of page shows screened porch with a railing instead. For safety reasons and to comply with building codes, your porch most likely will require some type of safety railing.
IMPORTANT TIP : Take precautions when building a screened in porch especially if your porch is elevated.
A screen will not stop a child (or pets) from running through it. It's possible to retain the railings and build to the outside of them; however, in some cases you might have to remove the railings, build your screening, and then reinstall the railings. Otherwise, you can attach screen frames directly to your porch columns and floor. Step 4 - Choose Your Screening MaterialDetermine your screening material. Use our handy screening materials guide to acquaint you with several options for selecting the right screening for your porch.There's screening available to meet every need, from preventing no-see-um bites to handling rowdy pets!  Next determine the width of the materials and compare that to your column widths in Step 1 above.
You will need to build the frames accordingly to fit your design.
Next determine the width of the materials and compare that to your column widths in Step 1 above.
You will need to build the frames accordingly to fit your design.
IMPORTANT TIP : It's usually more convenient and cost effective to use standard sizes when building a screened in porch rather
than custom fitting your frames.
However, see our favorite option below. My favorite option: Purchase screen framing kits. This avoids having to build your own frames which may not last as long and also require some skill to make. A wide range of screen frame colors are available and vary by size frame. They are designed for easy installation so that almost anyone can use them. Heavier gauge screen frames are available for applications such as solar screens and very large screens when no cross bar is desired to interfere with the view. Use heavier gauge frames when you are spanning long distances. How About Screens that Are Retractable?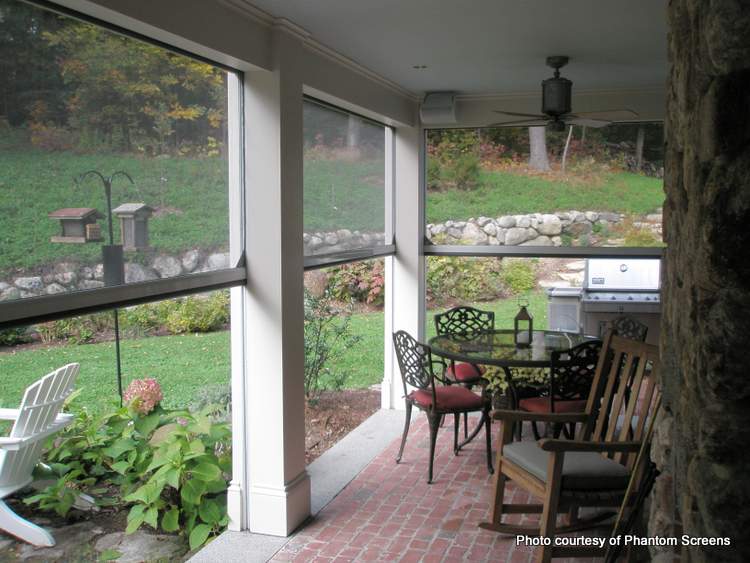
Consider retractable screens also!
If you're planning for a screened in porch, one option to consider is retractable screens.
Why retractable? Because then you can decide whether you want the screens down - or up for total fresh air.
Please stop by our retractable screens page please to explore this type of screens for your porch.
|
||||||
Visit Related TopicsRoof designs and other exterior features need to be architecturally correct; get the right info... |
 Screen Porch Considerations
See why knowing how your porch will be used is critical to your overall porch design... |
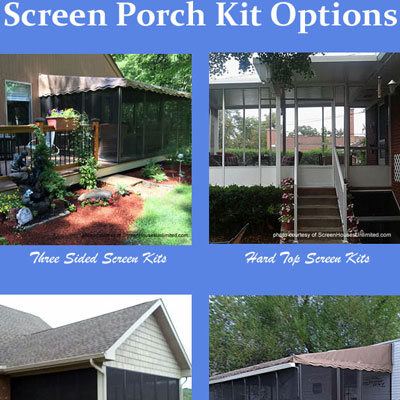 Install Screen Porch Kits
Use our tips for selecting a screen porch kit that will meet all of your needs... |
You Are Here:
|

Hi! We're Mary and Dave, lifelong DIYers, high school sweethearts, and we both love porches. You've come to the right place for thousands of porch ideas.
Our Sponsors


End Sponsors
Helpful Links
Enjoy shopping Amazon (affiliate link)Popular Pages
What's NewJoin Our Newsletter Family
Porch Designs
Porch Ideas for Mobile Homes
Build a Porch | Small Porches
Porch Columns | Porch Railings
Screened Porches
Porch Curtains | Porch Enclosures
Porch Landscaping | Vinyl Lattice
Porch Decorating | Porch Ideas
Shop
Navigation Aids
Home | Top of PageSite Search | Site Map
Contact Us
Policies
Disclosure Policy | Privacy PolicyLegal Info
Please Join Us Here Also

Find a Trusted Local Pro
Copyright© 2008-2025
Front-Porch-Ideas-and-More.com All rights reserved.
No content or photos may be reused or reproduced in any way without our express written permission.
At no extra cost to you, we earn a commission by referring you to some products on merchant sites. See our disclosure policy.
We, Front Porch Ideas and More, confirm, as stated on our privacy policy, that we do not sell personal information.
All content here is solely for presenting ideas. We recommend consulting with a licensed, experienced contractor before you begin your project.
We make no guarantees of accuracy or completeness of information on our site or any links to other websites contained here.
Thank you for taking your time to stop by. See what's popular and new here.
--- Our Wonderful Sponsors ---
--- End Sponsors ---
Our Newsletter, Front Porch Appeal
Learn more!Thank you for being here!
At no extra cost to you, we earn a commission by referring you to some products on merchant sites. See our disclosure policy.
We, Front Porch Ideas and More, confirm, as stated on our privacy policy, that we do not sell personal information.
All content here is solely for presenting ideas. We recommend consulting with a licensed, experienced contractor before you begin your project.
We make no guarantees of accuracy or completeness of information on our site or any links to other websites contained here.
Front Porch Home | Return to Top
Contact Us | About Us | Advertise with Us | Search | Site Map
Media | Privacy Policy | Disclosure | Legal Notice | What's New
No content or photos may be reproduced or copied in any way without our express written permission.