|
As an Amazon Associate we earn from qualifying purchases. If you make a purchase through affiliate links on our site, we earn a commission at no cost to you. See our disclosure policy. Building a Porch RoofBuilding a porch roof or screened in porch roof over an existing deck or patio can be fairly straight forward or very complex depending on the type of roof you choose.We show you how two different roofs are constructed so you will know what is involved. Most porch roofs are typically shed roofs or variations of hip roofs. The biggest challenge is determining the rise and run and cutting a "bird's mouth" at the outer end of the rafters that rests on the header. 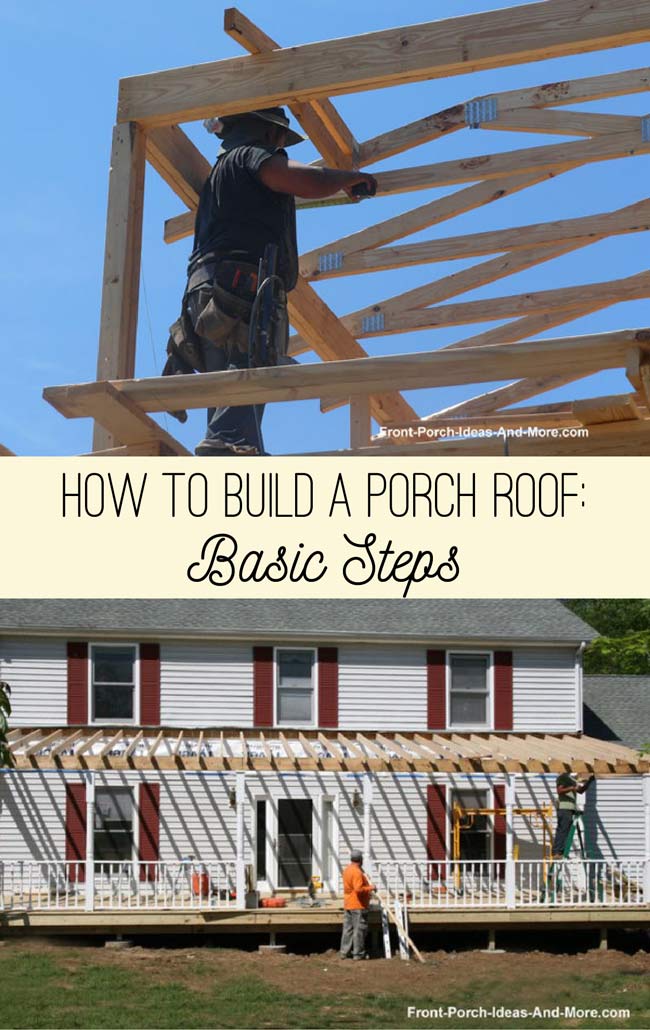

Consider These Before StartingConsiderations Prior to Building Your Roof
Anytime you are building a porch roof - or any roof project for that matter - keep your safety a main priority.
We highly recommend that you keep your safety and that of your workers of utmost importance.
We are not affiliated with the workers shown here in any manner. Here's an article about best practices for roof safety.
Before You Begin, a Short Lesson on Load Bearing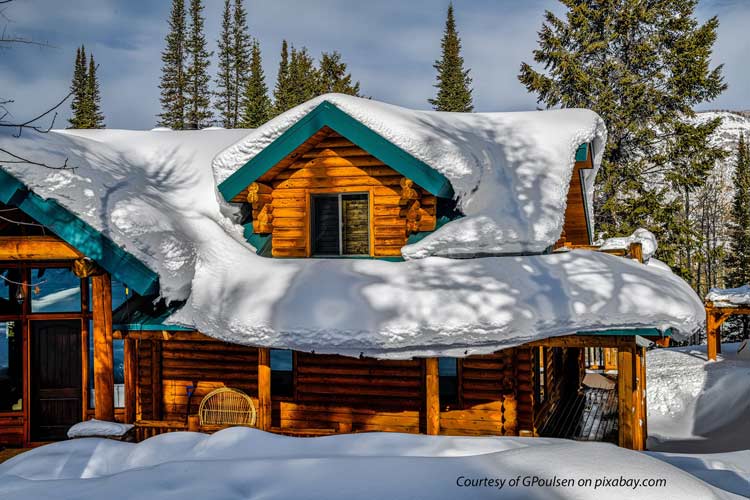
Imagine how much weight the snow adds to the roofLoad bearing refers to the ability of your porch roof to support a certain amount of weight without collapsing or failing. This means your porch roof and framing can support the weight of the roof itself, your selected roofing materials, and any additional weight from snow, ice, wind, and people.Before building a porch roof, you need to know the following terminology to adequately compute the load-bearing capacity of your porch roof:
However, your local building codes department has already calculated this information and will dictate the minimum slope and framing requirements for your geographical area alleviating you from having to do the calculations yourself. We highly recommend you consult with them prior to construction. Know These Basic Steps for Building a Porch Roof
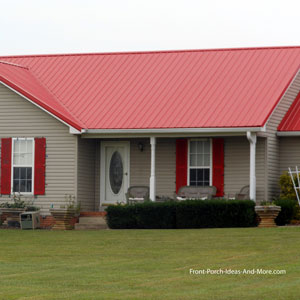
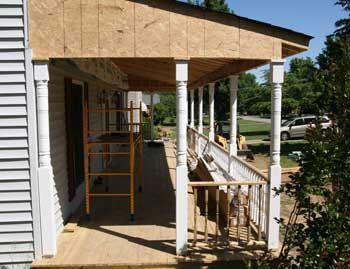
Typical shed roof construction
The following steps to building a porch roof like the one pictured above shed or hip-type roof) will give you a general idea of how it's done and what's involved.
We cannot cover every building method as they can vary widely from contractor to contractor.
We also do not cover every aspect in detail but we give you sufficient information to assess your own abilities or to be able to ask the right questions of a contractor. The information we present here is for informational purposes only, not a "how-to" guide. We highly recommend that if you are not 100% confident you can do the work safely and to code that you consult with a professional licensed contractor. We've also listed several books and tools, and products that will make your roof project easier and safer. Step 1: Do You Know Your Local Codes and Permit Requirements?Know and comply with your local building codes regarding roof construction in your area. In addition, pull the proper permits as required. Many people, especially DIYers, do not like to get permits due to time and costs.However, doing so ensures that your work is to code in order to protect you, your family, and your property. In addition, many insurance companies may not pay claims in situations where work was not to code. Words to the wise. Step 2: Determine Rise and Run (Say What?)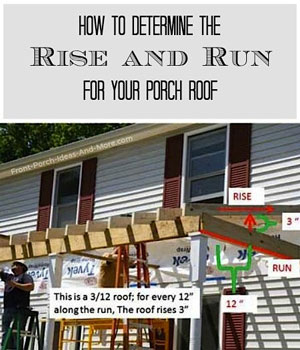 When building a porch roof you have to determine the rise and run of your porch roof.
Normally, you will want to replicate the same rise and run you have on the main roof of your home.
When building a porch roof you have to determine the rise and run of your porch roof.
Normally, you will want to replicate the same rise and run you have on the main roof of your home.
Sometimes this is not feasible due to window placement but you want to get as close to it as possible. Next, determine the location on your wall where you will attach the rafter plate to get the proper rise and run. Our basic rafter length calculator will give you a general idea of how long your rafters must be for a given rise and run. Step 3: Mark Rafter Plate Location and Remove Siding (if applicable)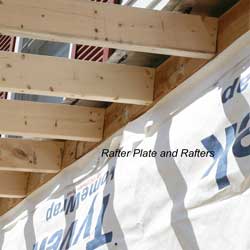 Now that you know the rise and run, you know where to place the rafter plate on your wall.
Make sure it is at least 3 inches below any windows allowing for the thickness of your roofing materials (at least 2 inches).
Now that you know the rise and run, you know where to place the rafter plate on your wall.
Make sure it is at least 3 inches below any windows allowing for the thickness of your roofing materials (at least 2 inches).
In our building project depicted by the photos on this page, the rafter plate and ledger board were already exposed after
we removed the old porch.
Snap a horizontal chalk line at this point a minimum of the length of the flooring below. This will be your "upper" line measurement for the rafter plate. Measure down from this line the width of your rafter plate. Usually, it is a 2x6 board, so in this case, measure down approximately 6 inches. Snap a horizontal line at the mark - it is your "lower" rafter plate line. These two lines represent the location of your rafter plate. Carefully remove the siding contained within those lines to expose the wall studs or other supporting material. Disregard if placing rafter plate on brick, etc. Step 4: Install the Rafter PlateFasten the rafter plate to the wall studs with lag screws. However, this may not always be the case. Sometimes you may run into an I-beam or truss situation. A different fastening system will need to be used in those cases.Step 5: Locate Column PositionsSnap a chalk line on top of your porch or deck on the outside line of the beam that supports your flooring. You'll have to locate the beam underneath (usually visible from each end).You will locate, as a minimum, one column on each end at least 3 inches in from the corners and one every 6 to 10 feet apart. Consider openings for stairs when determining the actual placement of columns. You will typically need one on each side of the stairs. As a rule of thumb, try to use an odd number of columns; it's more aesthetically pleasing to the eye. Check with your codes department to ensure you set the right amount based on the width and type of roof being constructed when building a porch roof. 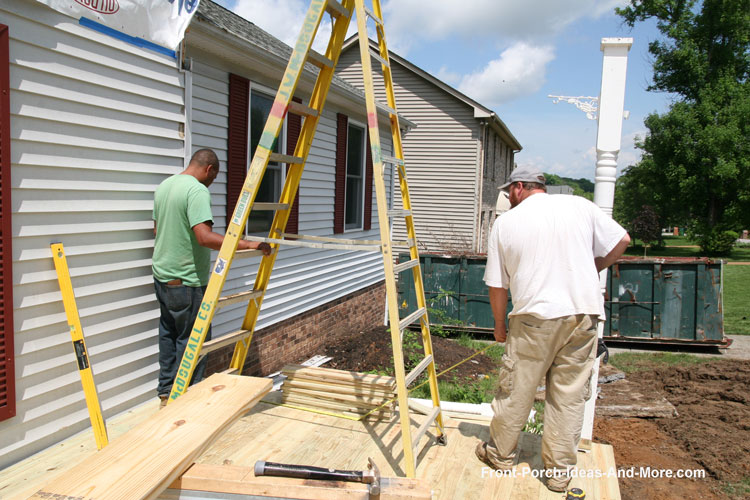
Setting the first column
NOTE: Everything outlined above also pertains to decks and patios.
However, you may need to make a few adjustments:
Decks: You still need to attach columns to the beam under your deck. Depending on how your deck was constructed you may need to reinforce the beam to carry the column and roof. Check local code requirements. Patios: For patios, attached your column anchors to the concrete with the appropriate fasteners. There are several different types on the market and your local home supply store should be able to assist. If you have other than a poured concrete patio, you should review our porch foundation section.
ASSUMPTION: We are making the assumption that your porch floor is level.
Care must be taken at every step to ensure all columns, beams, headers, etc., are level and plumb.
Step 6: Put Up the Columns (A Few Details to Think About)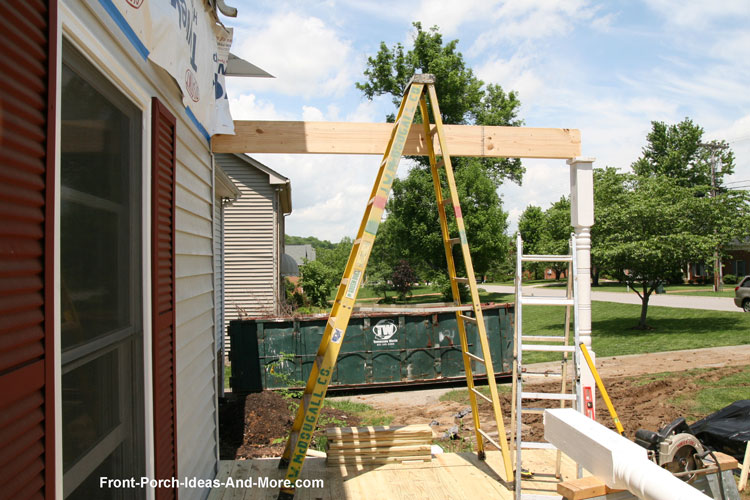
Before installing columns, be sure you've selected the right column design for your porch.
Check out our columns section to learn more about them.
Place a column in the anchor on one end of the decking, plumb, and secure properly. You may need to brace the column while you continue. On this building a porch roof project, a beam is placed against the ledger board and fastened to the top of the end column. Plumb and square the column. Brace as necessary. (This board may not be required in your situation. If you don't have a ledger board, you will need to create blocking to accept the beam. Use the same procedure for installing a rafter board above). Repeat this on the other end as well. I've seen and done this several different ways. One is to anchor and brace all of the columns. Another is to anchor and brace the outside columns and then anchor the header on each end. It depends on the length and height of your roof. When building a porch roof, an important goal to have is to make sure the columns are square to the house and the floor. On this particular project, we reused the old header and due to it's length, installed it on columns in sections as depicted below. Step 7: Set the Header and Why It's So Important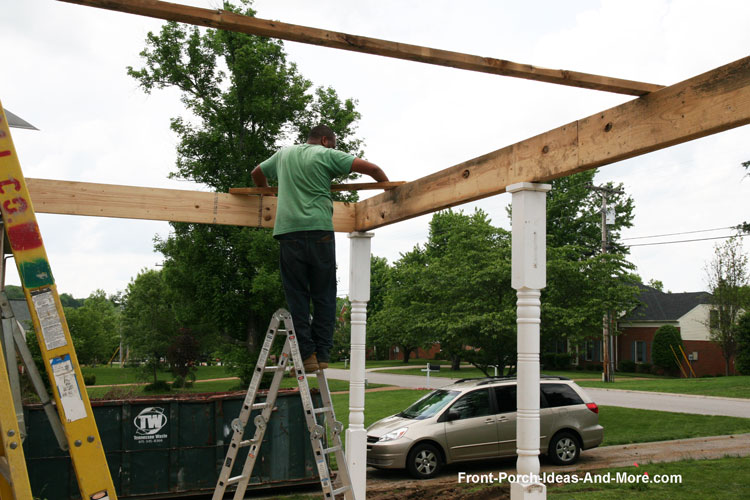
Installing the Porch HeaderYou will normally build a header out of 2x6 or 2x8 planks. Sandwich a piece of 1/2 inch plywood in between the boards and nail together. When building a porch roof, the header carries most of the weight of the roof.Ensure that it is substantial. Place the header on top of the columns and secure by toe nailing. Continue this process the length of the porch. Step 8: Cut and Install Rafters (What Are Tails and Bird Mouths?)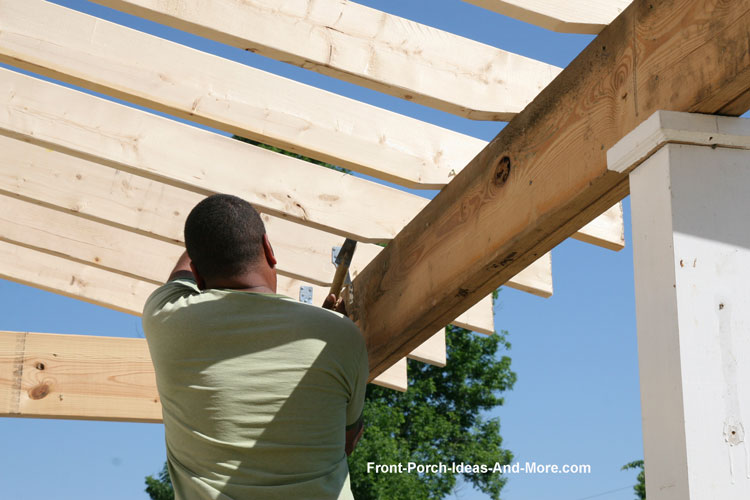
Before you install the rafters you will have to make special cuts called "tails" and "bird mouths". These notches are designed to fit against the rafter board and over the header. You will need a rafter square in order to lay out the cuts on the boards. Building a porch roof requires accurate measurements. Although not difficult, laying out the cuts to fit precisely requires practice and skill. We provide a link below to information regarding how to calculate and make these special cuts. Step 9: Install Supports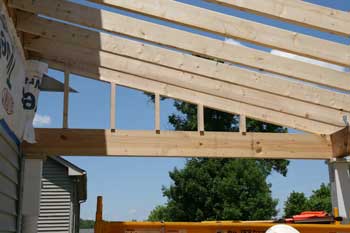
For this building a porch roof project, we needed to provide nailing support for siding and to enclose the ends. We did this by installing jack studs and plywood on each end of the roof. Step 10: Install Fascia BoardA fascia board is installed on the rafter tails. Gutters will be attached to this later. Although we did not use them on this porch roof, you could install "lookouts" that attach to the end of the rafter tail and the header. These provide a flat surface on which to nail the soffits.Step 11: Apply Sheathing and Roofing Materials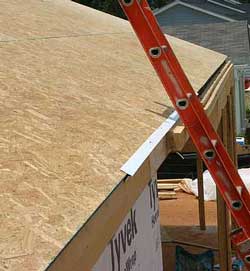

Sheathing (1/2 inch plywood or OSB) is nailed to the rafters. Once completed, roofing paper will be installed. Then attach drip edge over the roofing paper. When building a porch roof, asphalt shingles (or other roofing material) are then attached over the roofing paper and drip edge. An Often Asked QuestionWe are often asked how to integrate a new porch roof's shingles with those on an existing home if the roof line is extended over the porch. Here's an easy way to do it!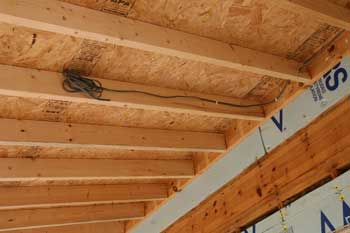
As you can see in the picture above, now is the time to install your electrical wiring for lights, fans, and receptacles according to your plan. Planning to install outdoor ceiling fans now or in the future. Now's the time to add additional blocking to support the fans! TIP: If building a porch roof (or any roof) in snow country you should consider using an ice and water barrier along the edge of the roof line. It usually comes in three-foot rolls and prevents damage from ice dams that may form on your roof. Step 12: Wrap Exposed Wood with Flashing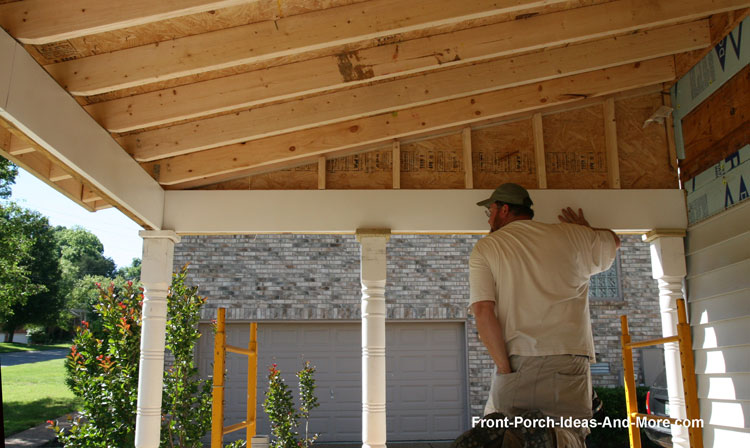
Aluminum flashing is used to wrap the exposed wood on the beams and sides. A special machine is needed to bend the flashing to fit over the wood. It really helps to have experience prior to attempting this to ensure it looks good on your home. See our porch ceiling section for construction, tips, and ideas! Building a Porch Roof Using Trusses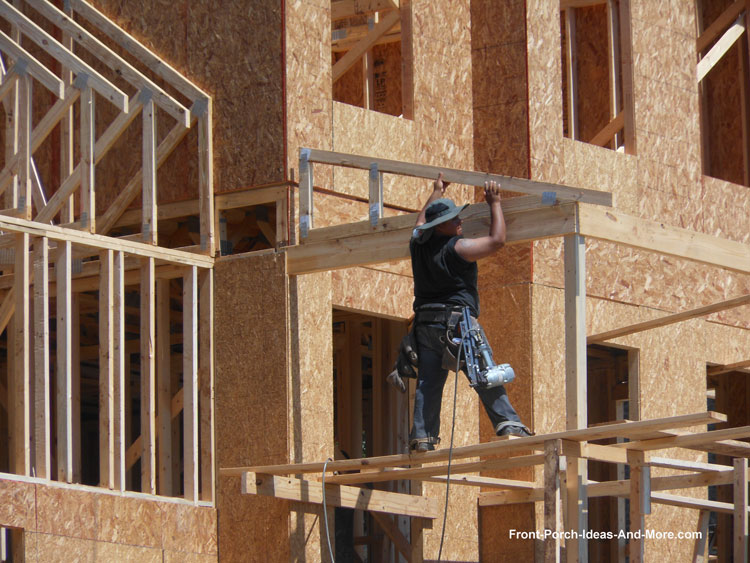
The simplest form of a truss is one single triangle with fixed sides.A planar truss, like the one above, lies in a single plane and is usually used together to form the roof support structure. They are extremely strong and normally constructed off site and made to specific measurements. Therefore, it is very important to ensure your measurements are correct before ordering.Porch roof construction using trusses is much like using basic rafter construction as outlined above with a few exceptions. Trusses definitely expedite the process. Install Beams to Support the Roof TrussesBeams need to be installed to support the roof trusses. In the photo below, beams are supported temporarily with bracing which will be removed later in the construction process.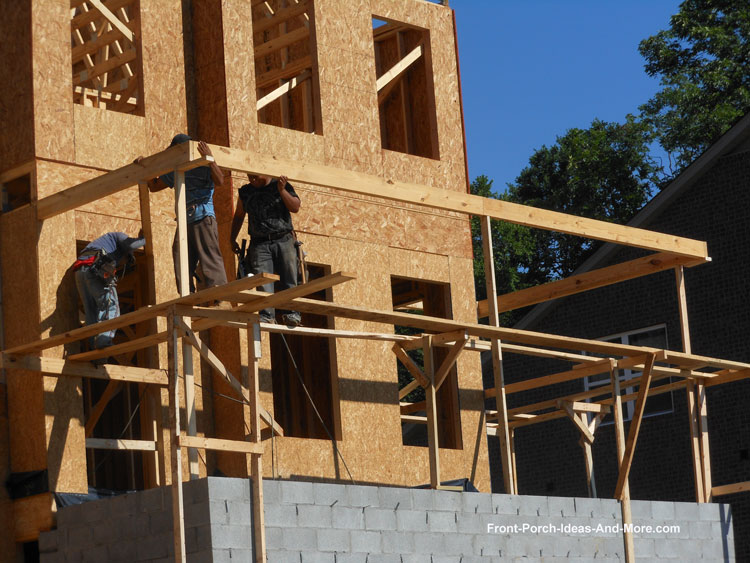
Squaring the beams and bracing them to ensure the maintain square is essential to the roof building process. Once the beams are in place mark the spacing for the trusses, normally 16 inches apart. Mark both the house wall and the carry beam. 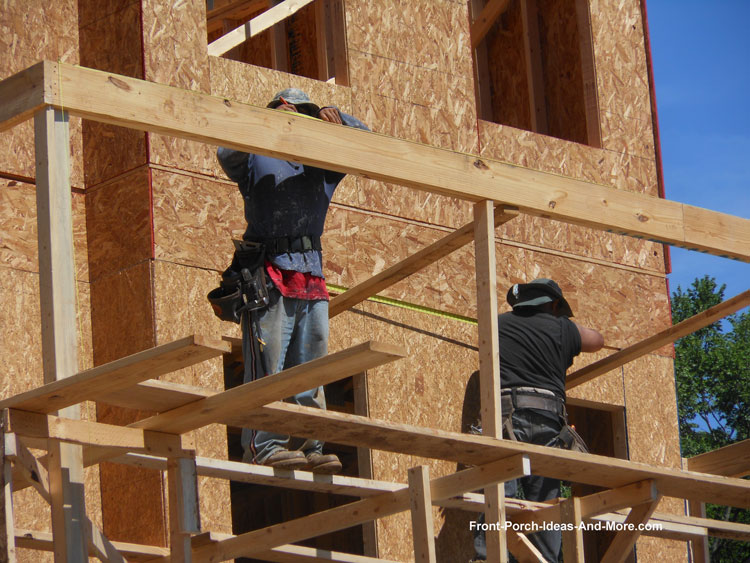
Now it is time to position the trusses. If everything is square and your measurements are correct, installing the trusses is fairly easy. 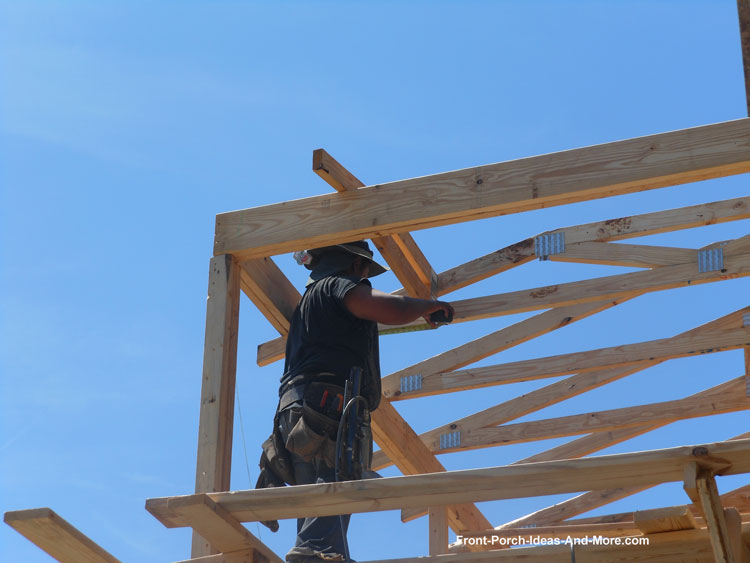
When building a porch roof with trusses on this type porch, the corner and subsequent trusses are built a little differently due to the slope of the roof. As you can see, the truss angles are constructed to maintain the same slope. 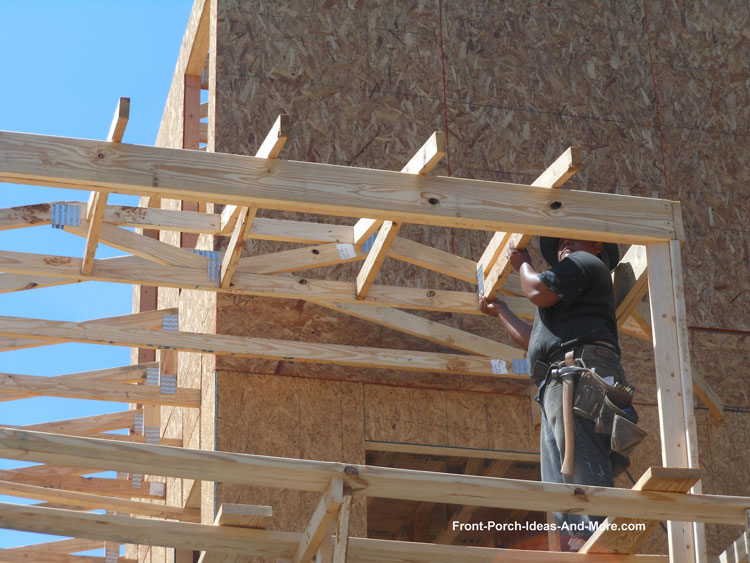
Next, soffit framing is installed along the roofs edge. 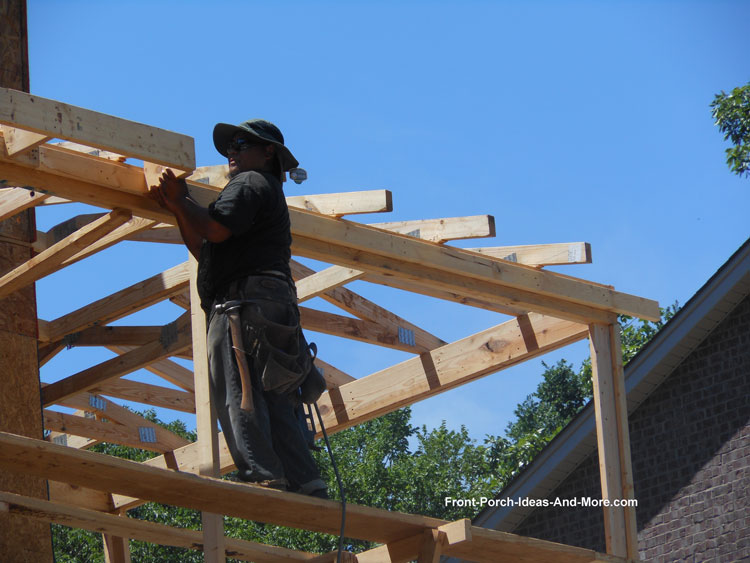
Finally, the framed roof is now ready for sheathing as outlined in the roof construction steps above. Now you have the basics of building a porch roof. Next comes the ceiling! Be sure to see the many porch ceiling options available and select the right one for your porch. We highly recommend the following books and tools if you are considering building a porch roof as they detail many of the steps we discussed above. We may receive a small commission on sales. Helpful ResourcesFraming Information and Cutting Rafters - Very good site that addresses all types of framing issuesPlease Look at These Books
As an Amazon Associate and Amazon Influencer, we earn from qualifying purchases.
We also earn commissions from other companies where are are participants of their referral programs.
Here is our full disclosure about affiliate marketing.

Ultimate Guide to House Framing (affiliate link for which we may receive a commission)Has an outstanding section on roofs, how to calculate rise and run, rafter lengths, and much more!
Decks: Plan, Design, Build - Ultimate Guide (affiliate link for which we may receive a commission)Has everything you need to know about foundations, types, construction methods and more.Try These to Make Your Roofing Job EasierMary and I discovered these products that we believe will make your porch roof project easier to complete. We may receive a small commission on sales.Don't Add the the 250,000+ Ladder Accidents AnnuallyLadders are one of the most dangerous tools you'll use. Take it from experience, falling off a ladder is not fun.I've made several home-made gizmos to level my ladder but thought the one we are featuring below is a sure bet. Easy to use, safe, and will level a ladder in seconds. It works on both step and extension ladders. Remember, it's not the fall that's hurt you but the sudden stop at the end! 
The Levelizer - available on Amazon (affiliate link for which we may receive a commission)Here's another ladder product that will definitely stabilize a ladder and can be used indoors or out. It is designed to not only stabilize your ladder from kick out but also reduce lateral movement.It can be used on grass, concrete, wood, sand, and even ice. This would make a great gift idea too. 
Ladder Lockdown - available on Amazon (affiliate link for which we may receive a commission)Use this slope indicator tool to determine the slope of your roof. It's also perfect for stair slope and drainage angles.I also use mine in my wood shop to determine the correct angle on my table saw. It's a very useful tool. 
Johnson Slope Locater- available on Amazon (affiliate link for which we may receive a commission)This short video shows you how to use it!Building a porch roof - do you have the appropriate DIY skills? Please don't tackle it if you don't.

Hi! We're Mary and Dave, lifelong DIYers, high school sweethearts, and we both love porches. You've come to the right place for thousands of porch ideas. Merchants We Love


Helpful LinksEnjoy shopping Amazon (affiliate link)Popular PagesWhat's NewJoin Our Newsletter Family Porch Designs Porch Ideas for Mobile Homes Build a Porch | Small Porches Porch Columns | Porch Railings Screened Porches Porch Curtains | Porch Enclosures Porch Landscaping | Vinyl Lattice Porch Decorating | Porch Ideas Shop Navigation AidsHome | Top of PageSite Search | Site Map Contact Us PoliciesDisclosure Policy | Privacy PolicyLegal Info Please Join Us Here AlsoCopyright© 2008-2026 Front-Porch-Ideas-and-More.com All rights reserved. No content or photos may be reused or reproduced in any way without our express written permission. At no extra cost to you, we earn a commission by referring you to some products on merchant sites. See our disclosure policy. We, Front Porch Ideas and More, confirm, as stated on our privacy policy, that we do not sell personal information. All content here is solely for presenting ideas. We recommend consulting with a licensed, experienced contractor before you begin your project. We make no guarantees of accuracy or completeness of information on our site or any links to other websites contained here. Thank you for taking your time to stop by. See what's popular and new here. |
--- Our Wonderful Sponsors ---
--- End Sponsors ---Our Newsletter, Front Porch AppealLearn more!Thank you for being here! |
|||||
|
At no extra cost to you, we earn a commission by referring you to some products on merchant sites. See our disclosure policy.
We, Front Porch Ideas and More, confirm, as stated on our privacy policy, that we do not sell personal information. All content here is solely for presenting ideas. We recommend consulting with a licensed, experienced contractor before you begin your project. We make no guarantees of accuracy or completeness of information on our site or any links to other websites contained here. Front Porch Home | Return to Top Contact Us | About Us | Advertise with Us | Search | Site Map Media | Privacy Policy | Disclosure | Legal Notice | What's New 
|
||||||
|
No content or photos may be reproduced or copied in any way without our express written permission. | ||||||