By the FPI team
As an Amazon Associate we earn from qualifying purchases.
If you make a purchase through affiliate links on our site, we earn a commission at no cost to you.
See our disclosure policy.
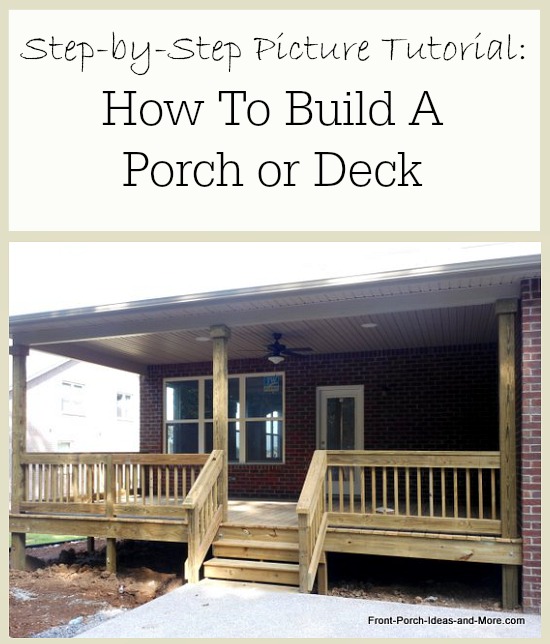
Pictorial: How to Build a Deck or Porch
To Guide You Through the Process
Our how to build a deck or porch pictorial is the perfect way to see, step by step, how a deck or porch's foundation and floor is constructed.
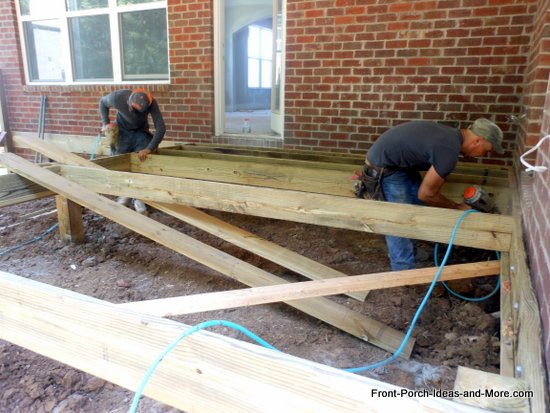
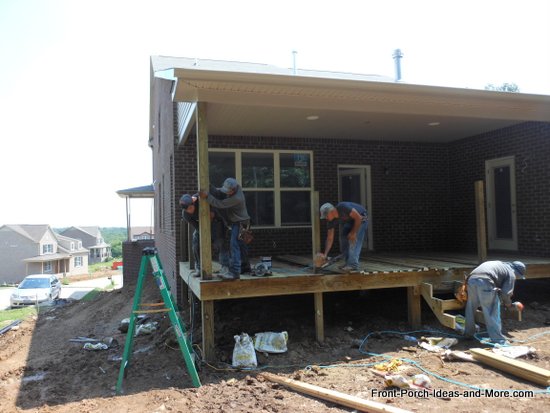
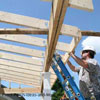
Mary and I had the opportunity to photograph professional porch builders constructing a covered porch's (or deck's) floor from the ground up.
Our pictures of building a deck give you a step-by-step visual representation of how it's done whether you are building a porch or deck.
Although I've built several deck and porch floors over the years, I still learned a few tricks of the trade that might help you too.

Disclaimer: This pictorial is for informational purposes only and is presented to give you an idea as to what is involved in
building a porch or deck structure.
Every construction project is different; there is no one-way-fits-all system.
Your results will vary depending on many factors. We recommend you consult with a reputable porch or deck builder in your area
Convention has it that porch floor boards run perpendicular to the house and so it was with this floor.
It measures 12 x 22 feet and was constructed with treated lumber.
It took four people approximately six non-stop hours to build the foundation and flooring structure.
The roof had already been constructed - to see how that's done, use our link at the bottom of the page.
Prelilminary Notes: How to Build a Deck
There are many ways to build a deck (or porch) and one way is shown below.
I've taken the liberty to add other ways along with some deck railing codes which are noted in What would Dave do? below.
Before we get started, here's a guide as to what features constitute a really good deck or porch and is well worth reviewing.
Solid Foundation
The foundation of the deck is by far the most important part of the structure.
Anchored footings and posts that provide a stable base for the deck or porch. Ensure they comply with local building codes.
Durable Materials
Use materials that can withstand the elements.
High-quality pressure-treated lumber, composite decking, or hardwoods like cedar or redwood are all good choices. Use joist
tape to protect and prolong the longevity of your strucure.
Proper Spacing
Space decking properly to permit proper drainage and airflow to prevent mositure buildup and mold and mildew growth.
Smooth Surface
Decking should be smooth and free of any rough spots or splinters to make it safer and more comfortable.
Strong Railing
Install railings to prevent falls and adhere to local building code height requirements.
Adequate Lighting
Ensure your deck or porch has sufficient lighting that illuminates the area at night and adds to the overall appeal of the deck.
Properly Installed Hardware Use high-quality hardware that is properly installed.
This includes screws, bolts, and anchors that are designed for outdoor use and able to withstand the elements.
Compliance with building codes
You deck should be built to comply with local building codes and regulations to ensure that the deck is safe and legal to use.
Pictorial: How to Build a Deck
Let's begin with the first step:
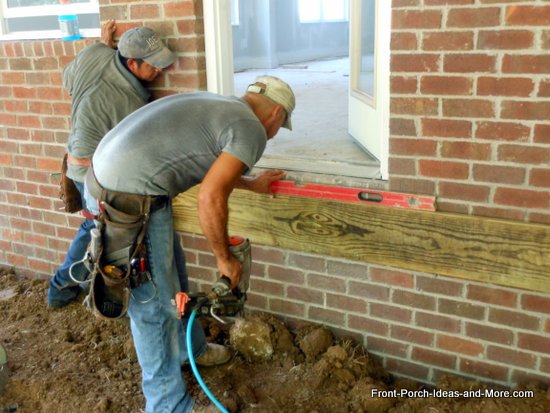
Attach the Ledger Board
The ledger provides strength for the deck; it attaches the structure to the house and supports one end of the joists.
So the first step is attaching the ledger board to the home.
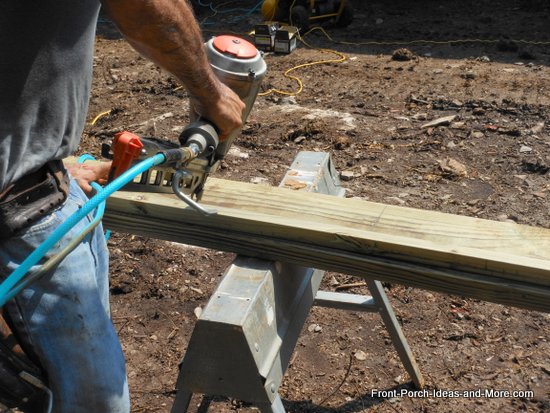
Temporarily attaching ledger board
They used pneumatic nails to temporarily hold the ledger board in place.
When attaching the ledger board ensure you account for the thickness of your floor boards.
This porch floor will be approximately 2 inches from the threshold;
however, if accessibility is an issue you will want to locate it within a half inch of the threshold.
They will install lag screws through the ledger board and into the sill plate or rim joist later in the construction process.
What Would Dave Do?
When constructing a deck or porch floor that is protected by a roof, flashing may not be required.
Always check your local codes.
However, flashing is relatively inexpensive and serves a very good purpose - it protects the ledger board.
I would have installed flashing over the ledger board; it really doesn't take long to install.
Be sure to see our section on installing flashing.
Please Note:
Failure of the ledger board is probably the most common reason decks and porches collapse.
Many jurisdictions have now changed the code now requiring the ledger board not only be attached to the home but also be supported with posts.
Be sure to check with your local building codes department regarding this requirement.
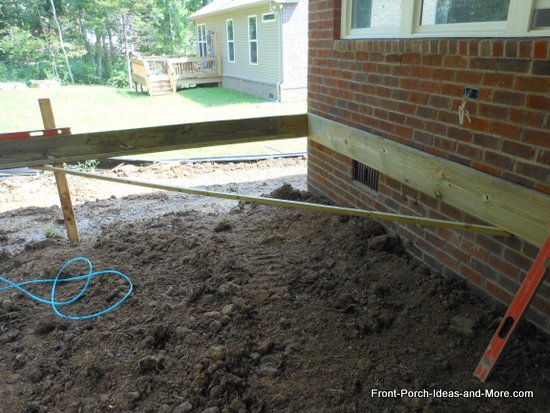
Installing Rim Boards on Our How to Build a Deck Project
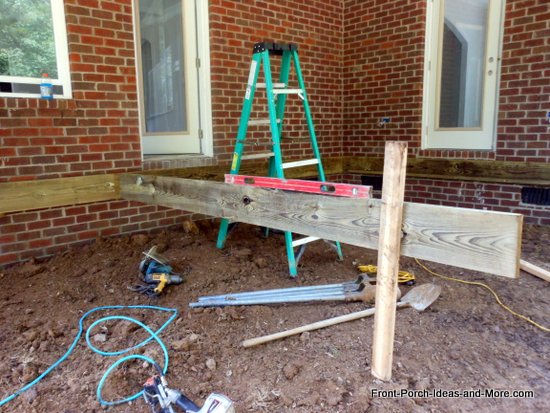
Temporarily attaching rim board and bracing
The side rim boards are cut to size and one is temporarily attached to the brick wall on one side.
The other is attached to the ledger board and temporarily held in position with a brace.
They used the 3-4-5 rule (see below) to ensure the board is 90 degrees to the ledger board.
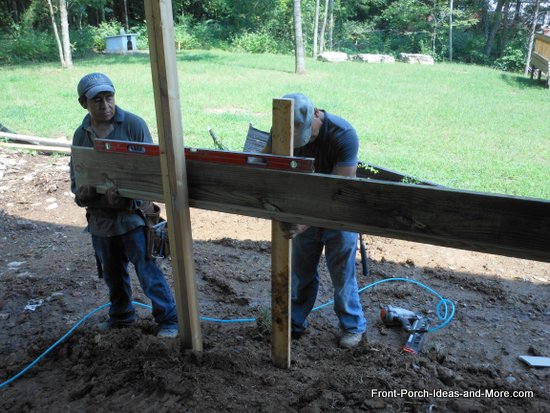
Leveling and bracing rim board
The "3-4-5- Rule" for How to Build a Deck
Use the 3-4-5 rule (which is actually an algebraic equation, A squared + B squared = C squared) when squaring a single corner of a porch or deck.
To ensure your boards are 90 degrees to each other, make a mark at 3 feet on one board from the end and mark the other at 4 feet from the same point.
The angle between the boards will be 90 degrees when the diagonal distance is 5 feet between the marks.
For greater accuracy and for larger decks or porches you can use the same ratio like 6-8-10 or 9-12-15.
To square the entire porch or deck measure the diagonals; if they are the same then the entire structure is square.
The outer rim board is constructed in two parts; it does not span the entire distance.
They will create additional structural support (or inner rim boards) at the mid-point to hold the joists.
This alleviates having to span the entire distance which tends to make the floor soft (move) unless additional blocking is installed between the joists.
A ledger strip is attached to inner rim board to hold the joists.
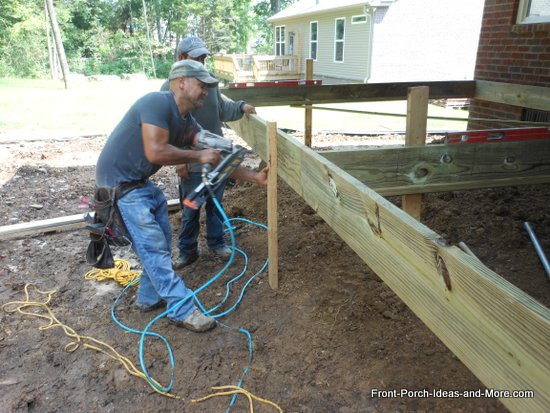
Attaching a support to the inner rim board
One of two inner rim boards attached and braced to ledger
What Would Dave Do?
I would have made a double rim board (two 2x10s fastened together) and set it on top of posts thereby creating a beam to carry the load.
The other rim board is actually a ledger board as it is also attached to the house.
Due to our local codes I would have also supported the ledger board(s) with posts.
Outer Rim Board Installation on
Our How to Build a Deck Project
The outer rim board consists of two pieces that span the distance to the outer rim boards.
These are cut and held in place with bracing.
Outer rim board positioned and braced
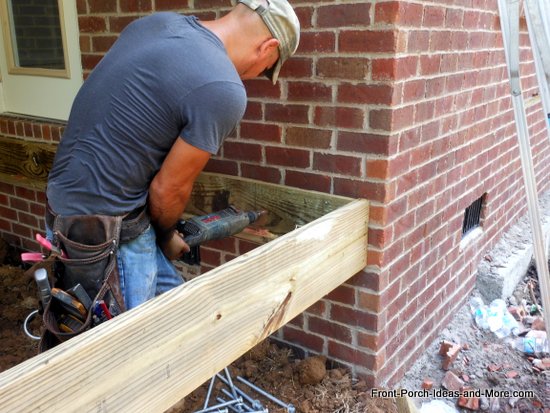
Installing Lag Screws
Holes are drilled through the brick into the band joist through which lag screws with washers are installed.
Holes drilled into which lag screws will be inserted
Note: Although this varies by local codes the rule of thumb for calculating the spacing of ledger fasteners is in inches:
100/joist length in feet. Always consult with your local building codes to ensure you are in compliance before you build.
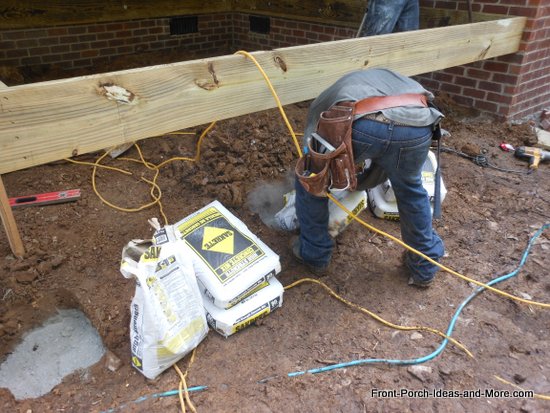
How to Build a Deck Project 101 - Digging Holes for Piers and Posts
Now for the fun part - digging holes.
The depth of holes varies by geographical region so be sure to comply with your local codes.
The crew dug holes for the piers and posts, cut posts to length, and secured them to the rim joists.
Once dug, the crew partially filled the holes with concrete.
Digging and filling holes with concrete for post posts
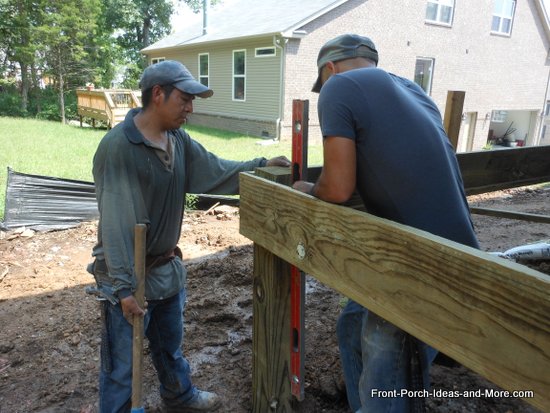
First, the posts were squared.
Posts were squared against rim joists and set in concrete mix
Posts were set in concrete
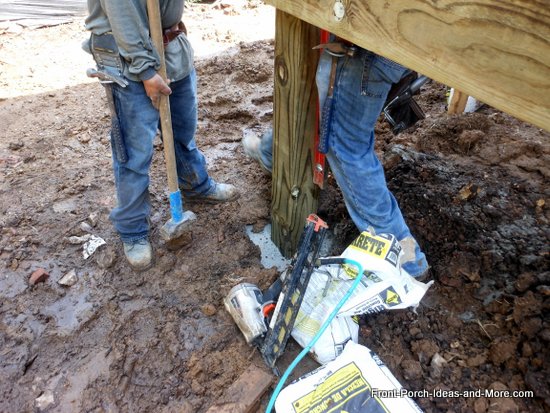
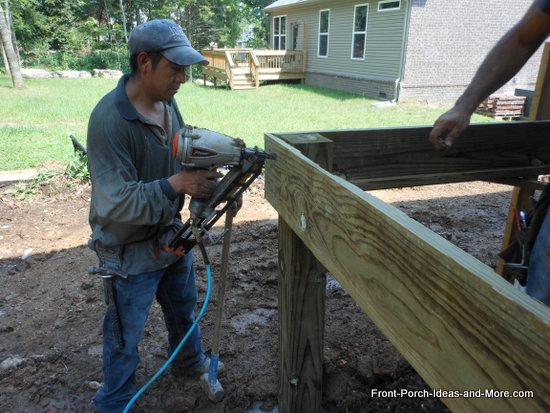
Then the posts were secured to rim joists.
Posts were secured to the rim joists using nailer
What Would Dave Do?
I've always dug holes and cemented piers and posts in place before I started installing beams or rim boards.
This ensures the concrete is thoroughly mixed and hardens without encasing areas of dry concrete.
In addition, I use post plates to keep the posts away from the concrete.
Concrete and wood do not mix as concrete retains moisture eventually rotting the posts.
Check with your local building codes to see what is required and/or expected before you begin building.
How to Build a Deck - Porch Columns Set
Next, porch columns were cut and positioned in concrete along rim board.
They will be cut to the right height later in the construction process.
Porch columns positioned against rim joist and set in concrete
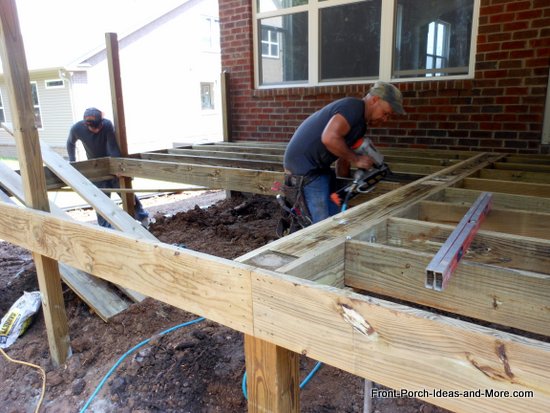
Time for the Joists
Joists were cut to length and nailed into position.
Important to note and a time saver as well, joist locations were marked on the rim joists prior to setting them in place.
Floor joists being secured to rim joists
Once the joists were secured to have the structure, an additional rim joist with ledger strip attached is secured adjacent to the other mid-rim joist.
Additional mid-rim joist attached
Once secured, the two mid-rim joists are attached together with blocking, thereby creating a solid flooring system.
Blocking attached to mid-rim joists
The remaining joists are secured
Remaining joists are secured
What Would Dave Do?
I use joist hangars.
Although more expensive than the method shown and more time consuming to install, joist hangars not only securely suspend the joist but also help keep it from twisting.
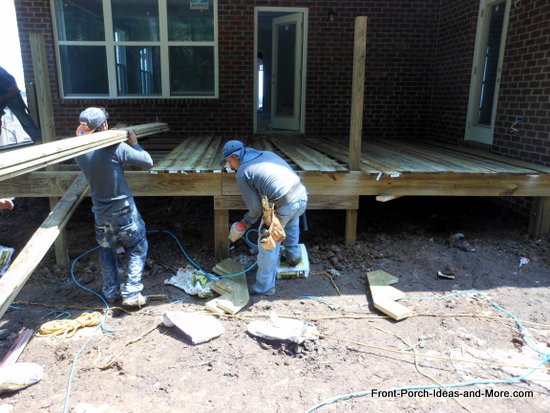
How to Build a Deck - Install Decking
Deck boards are laid over the joists and nailing begins to secure the boards.
Boards are positioned adjacent to each other as natural spacing will occur as the boards dry out.
Deck boards positioned over joists
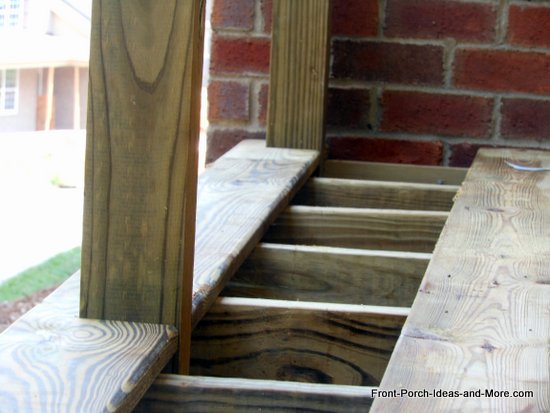
Deck boards have to be notched around porch columns and secured with nails.
Deck boards are notched and secured to joists
How to Build a Deck - Roof Column Supports
Six by Six inch columns are positioned on decking to support the roof.
Porch columns are positioned on decking to support the roof
Porch columns are cut to length
Porch posts are cut to length to accept porch railings
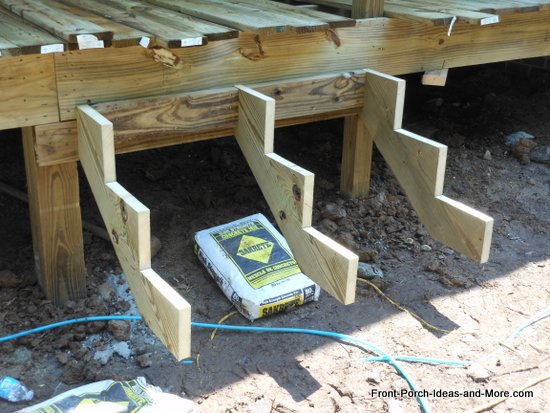
Stair Construction
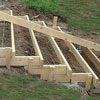
While the decking was being completed and the 6x6 inch columns were being secured, stair construction had begun.
Three stringers were cut an attached to the rim board.
Stair stringers attached to rim joist
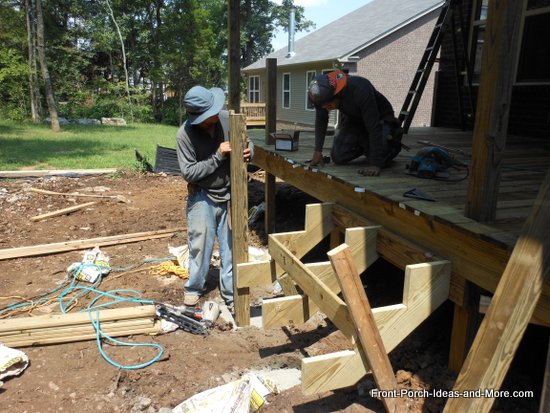
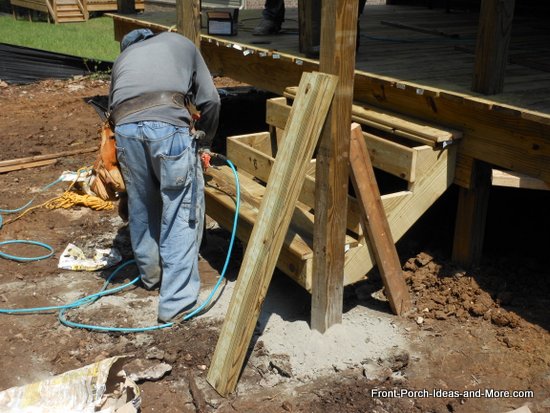
Newell posts are set in concrete. A third post is set in concrete for the middle stringer.
Stair treads are cut and attached
Treads are attached to stringers
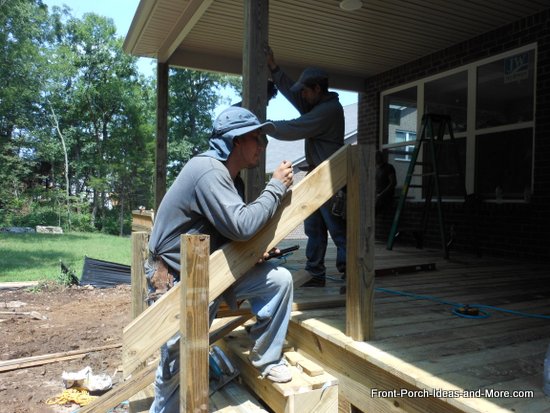
Stair railings are constructed
Stair railings are marked for cutting
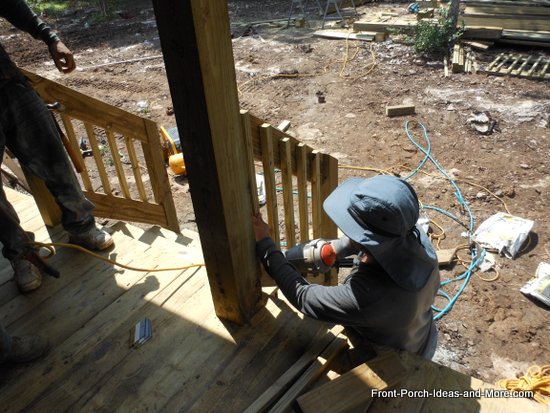
Pickets are attached to the stair rails
Porch railing pickets are added to stair rails
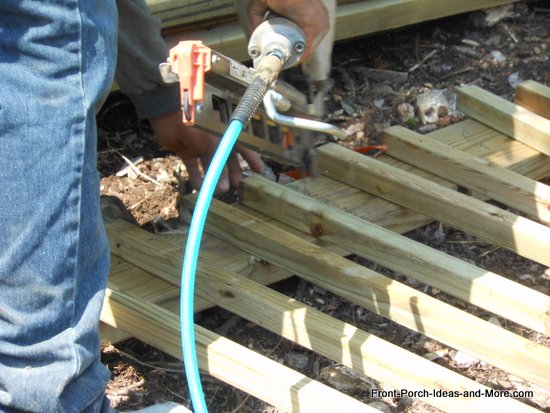
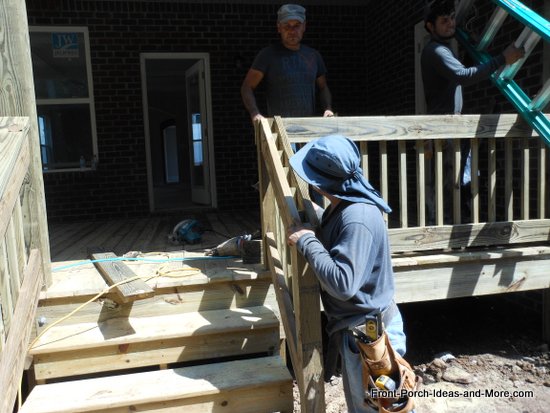
How to Build a Deck - Deck and Porch Railing Construction
The best deck railing patterns often consist of double top and bottom rails and sandwiched porch railing pickets.
One side is constructed on the ground complete with both top rail, bottom rail, and pickets and finished when placed between
porch columns.
Be sure to see our comprehensive best deck railings section which are perfect for porches too.
You'll find a myriad of ideas for railings in a variety of both designs and materials.
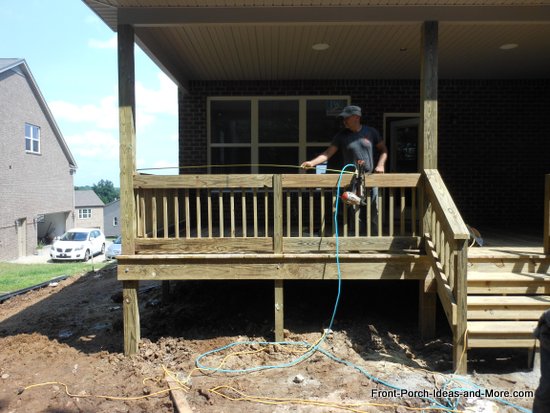
Once positioned and secured to porch posts the other top and bottom rails will be attached.
Once installed a top cap will be added to finish the porch railings
Porch railings being constructed
Porch railings being secured to porch posts
Additional top and bottom rails being added to complete railing
Measuring for the railing top cap
A hand rail is attached to the stair railing
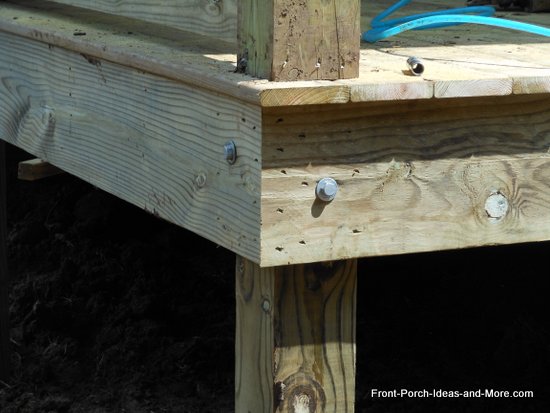
Rim Joists Lag Screwed to the Porch Posts
The rim joists are secured to the porch posts with lag screws.
Rim joists secured to porch posts with lag screws
What Would Dave Do?
Fastening the rim joists to the outsides of posts with lag screws or bolts is not usually sufficient to carry the weight of the structure
(and against building codes in some geographical areas).
As stated earlier, I would have created beams to sit on top of the posts giving them maximum support.
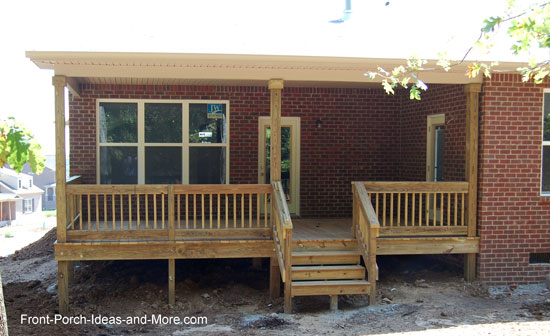
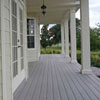
Completed Covered Porch
Covered back porch
Our sincere thanks to the crew who constructed this back porch deck and allowed us to photograph their work.
This is not the only way to build a porch or deck foundation and decking.
We encourage you to share your ideas for building porches and decks with us so we can let others benefit from your experiences too.
Send us your ideas and pictures - we'd love to see them.
Mary and I hope you enjoyed and benefited from this how to build a deck or porch pictorial.
But this is just the beginning - we encourage you to explore all of our porch and deck building sections where we have a myriad of ideas just waiting for you.
Did our page succeed on giving you tips for how to build a deck?
We truly hope it has.
Get Our Free Tutorial on Squaring Your Porch Foundation or Deck
We created a 14-page guide to help you get your deck or porch foundation square.
One of the most important factors to building a quality foundation is to be sure it is square to your home.
A square foundation makes the rest of the building process so much easier.
Sample Pages and Link to Our Tutorial
Get our free tutorial here
Hi! We're Mary and Dave, lifelong DIYers, high school sweethearts, and we both love porches.
You've come to the right place for thousands of porch ideas.
Our Sponsors
End Sponsors
|


 We created a 14-page guide to help you get your deck or porch foundation square.
 Constructing a Porch Roof
 Let's Build Steps
 Find the Right Porch Decking Materials