|
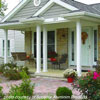
As an Amazon Associate we earn from qualifying purchases. If you make a purchase through affiliate links on our site, we earn a commission at no cost to you. See our disclosure policy. Replace a Porch ColumnKnowing how to replace a porch column is easier than you might think. Often times it is more prudent, if not easier, to replace a porch column than it is to fix it.If you have basic carpentry skills removing a decaying porch column can not only save you money but also make your porch safer. You must, however, understand what is involved and the precautions you need to take before you begin. Replacing a column requires at least two people to maintain a minimum of safety. We also cannot stress enough the importance of taking safety precautions and to not undertake such a project if you do not possess the necessary skills. Contacting a reputable contractor is always an option. Indicators for When to Replace a Porch Column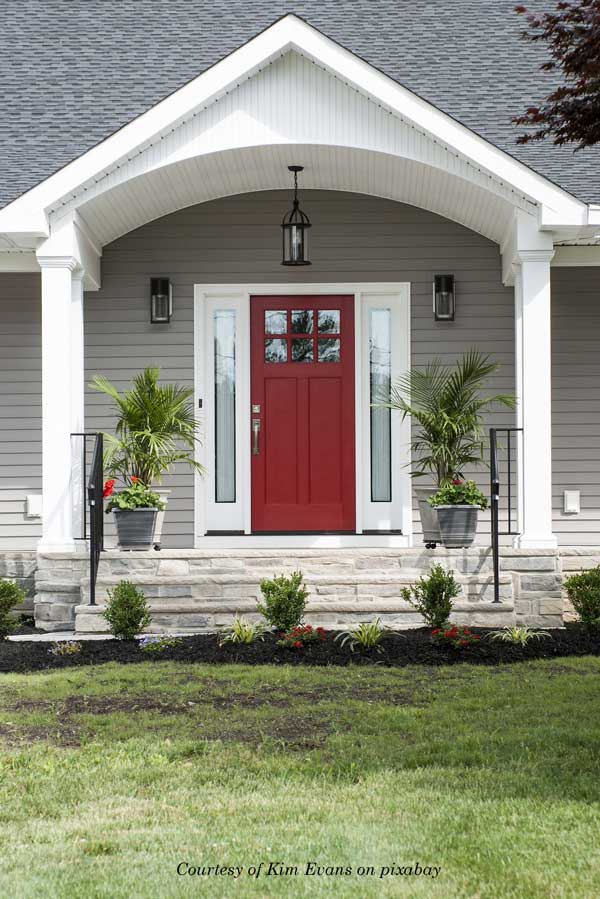
When is it time to replace a porch column?Sometimes it's very obvious when a porch column needs to be replaced. Maybe it's falling over or has a cracks in it. Maybe it's just very old.Here is a list of telltale signs that you should consider replacing your porch column(s):
New front porch column with trim piece being installedWe will describe what is involved in replacing a typical wood porch column. The process is basically the same no matter what type of porch column you choose.What You Need to Know Before You Begin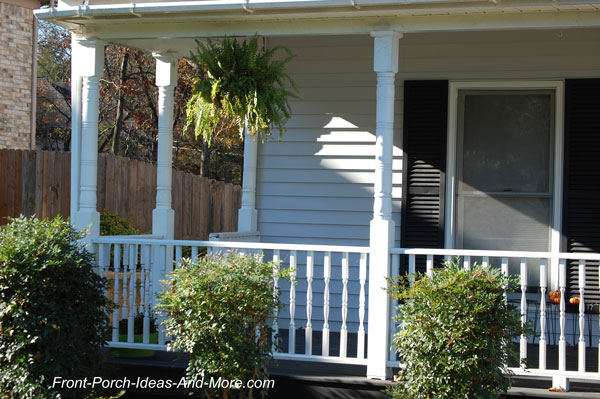
Front porch turned columnsCarry the LoadPorch columns are rated to support specific weights, i.e., your roof. When selecting a porch column ensure that it can carry the weight of your roof.It's a good bet that if you are using the identical columns to those already on your porch, your replacement column should be satisfactory. If, however, you are changing the columns we strongly encourage you to consult with a contractor or architect to ensure your columns you choose meet structural requirements. We also recommend columns be installed by a properly licensed and qualified professional. However, if you choose otherwise, be sure the selection of the column and subsequent installation is in accordance with your local building codes and local ordinances. Select the Right ColumnEnsure the type of column, whether it be wood, vinyl, steel, wrought iron, etc., is suitable for your porch. For example, vinyl porch columns can either be structural or non-structural.Ventilate If NecessaryIf you are using hollow wood columns (which are fairly typical porch columns), you need to ensure air flows throughout the column. Otherwise, they will rot from the inside fairly quickly.Be sure to vent them at both the top and bottom to prevent moisture buildup and wood-rot. To keep insects away cover any openings with screening material. Venting size is also important. A few little holes will not do it. To vent correctly, measure your column's diameter, divide that number by two. That's the number of square inches of ventilation you need at the both the top and bottom of the wood column. For example: if your column diameter is 15 inches you will need at least 7.5 inches of ventilation at both ends (15 / 2 = 7.5) Video: Replace a Porch ColumnIn this short slide show, Dave explains how he and Dan replaced Dan's porch column.Materials List to Replace a Porch ColumnHere are a few items you will need to make the job easier.
Steps to Replace a Porch ColumnStep 1 - Detach the Balustrade (If Applicable)Separate the porch balustrade (railings) from the porch column. To do so, use a hack saw or reciprocating saw to cut the screws or nails holding the balustrade to column. Take care not to damage the top and bottom rails.
Detach porch railings (balustrade) and gutter, if applicableSupport the "hanging end" of the balustrade by placing wood blocks underneath. In our case, we had to separate two separate balustrades as we were replacing a corner column.Now is also the time to detach gutters, etc., from the porch column if applicable. Step 2 - Prepare the New ColumnMeasure the distance from the top of the column to the porch floor. Use that measurement to cut (if necessary) the new porch column.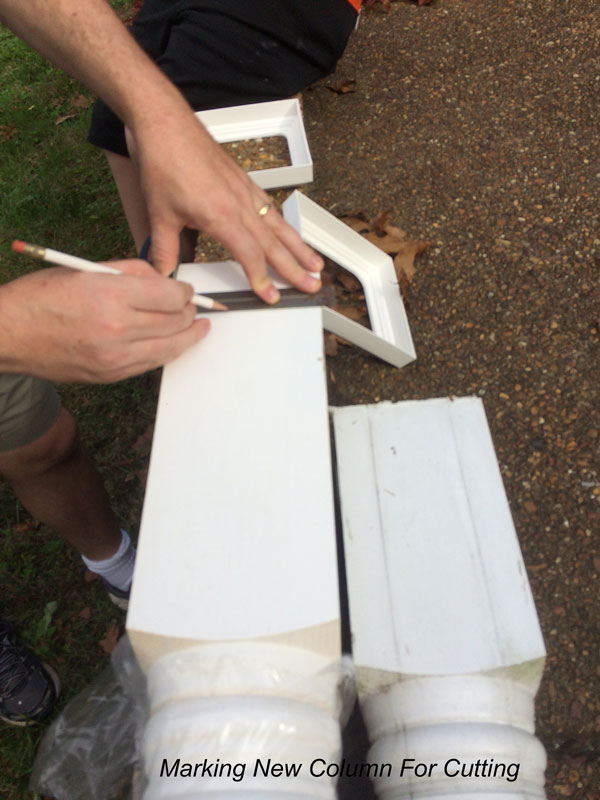
Replace a porch column by measuring and marking new column for cuttingMake sure you mimic your existing porch columns in design. You may have to cut from both ends of the column to match the design of the other porch columns. You may also have to carefully remove an column trim which can then be transferred to the new column.In our case, we also had to allow for a plinth, so be sure to mimic your existing column. Now is the time to ensure your porch column is ventilated properly. We drilled holes in both the top and bottom of the column. 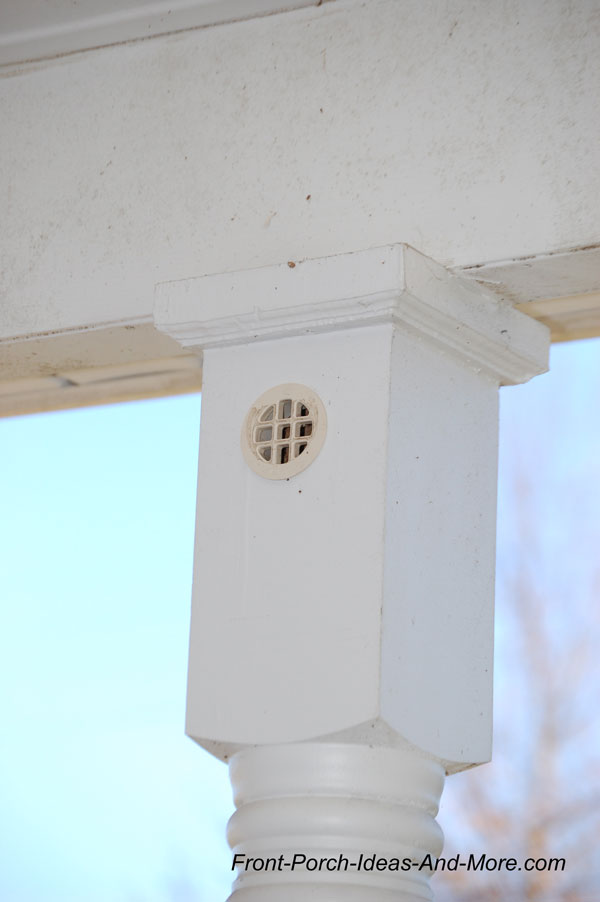
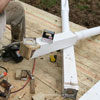
Ventilated porch columnStep 3 - Raise the RoofMeasure the distance between the floor and the top of your jack. Add 1 inch for clearance purposes.Subtract that measurement from the column height measurement you took in Step 1. Use this new measurement and cut the 4x4 post to length. Position the jack in close proximity to the column you are removing. Place the 4x4 on the jack. 
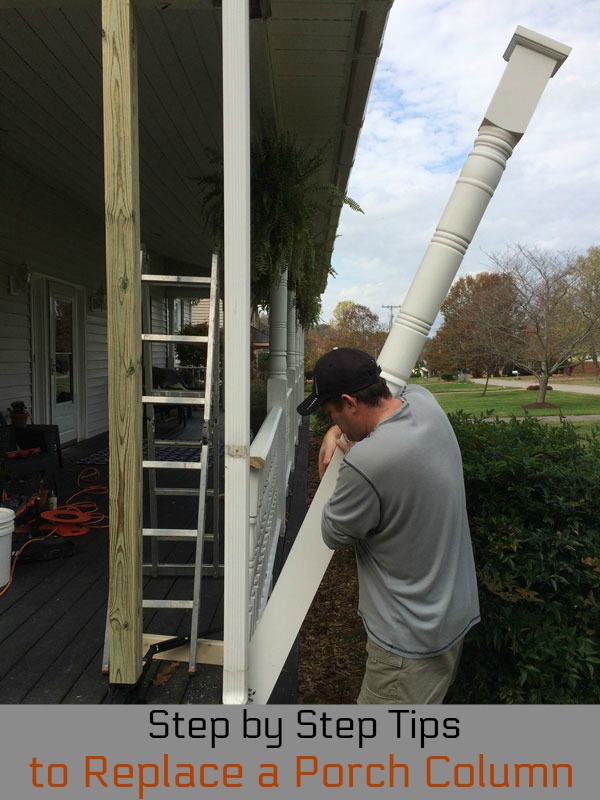
Using jack to lift beamSlowly raise the jack until the column is free from the roof (or beam). You may hear a little cracking sound which is normal. Do not raise the roof any further than necessary to remove the porch column.Slide the column out from underneath the roof. Step 4 - Replace the Porch ColumnAdd trim pieces at top and bottom of the column if applicable for your project.Add the plinth if applicable. 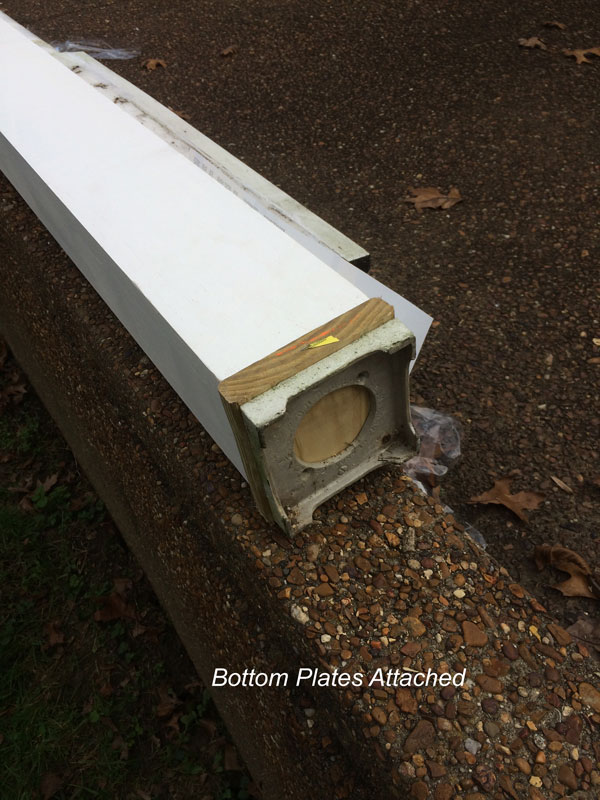
Bottom plates installedSlide the new column into place and use the level to ensure it is straight. Also make sure it is aligned properly in comparison to other columns on your porch.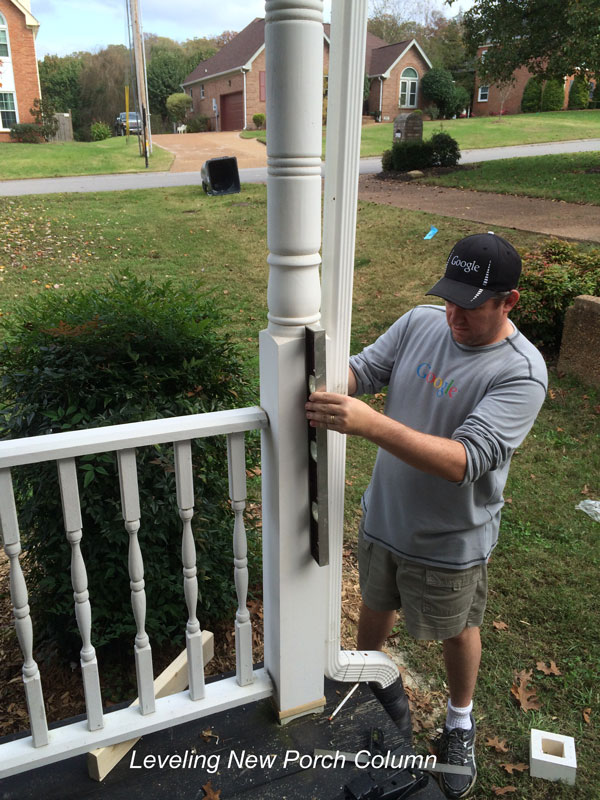
Leveling new porch columnSlowly lower the 4x4 post using the jack and secure with screws or nails.How to Attach Porch ColumnsThere are several ways to attach or secure a porch column to your roof and floor. Often times, the weight of the roof will hold the column in place. For our porch column replacement project, we toe-nailed the top of the column into the beam.
NOTE: Check with your local building codes department to see if there are any special restrictions for your geographical area. In some areas,
you will need to attach a hurricane strap from extending from the floor's beam through the porch column and onto the roof beam above.
Secure a Wood Porch Column to WoodYou can secure a wooden porch column using nails or screws. Toe-nailing them at the top and bottom of your column should be sufficient in most cases. Installing a plinth is highly recommended so as to keep the bottom of the column from getting wet.Here's a column installation guide from YellowWood® that should be helpful. Secure a Porch Column to ConcreteBecause wood wicks water from concrete easily, we recommend using a standoff base like a Simpson ABU44 post base (referral link) or similar product which will keep the post above the concrete.You can attach the base to the concrete using either Tapcon® screws or similar products. The preferred method is to use a single lag screw and washer. Drill a hole through the hole in the base plate, insert a lead anchor, and screw the lag screw into it but do not tighten. Plumb your porch column and then tighten the lag screw. How to Attach a Vinyl Porch ColumnAttaching a vinyl porch column is similar; however, you may need to install blocking. Here's an excellent guide from HomeDepot® that be of value to you.Step 5 - Re-attach the Balustrade (If Applicable)Use the level to assist in attaching the balustrade to the new porch column.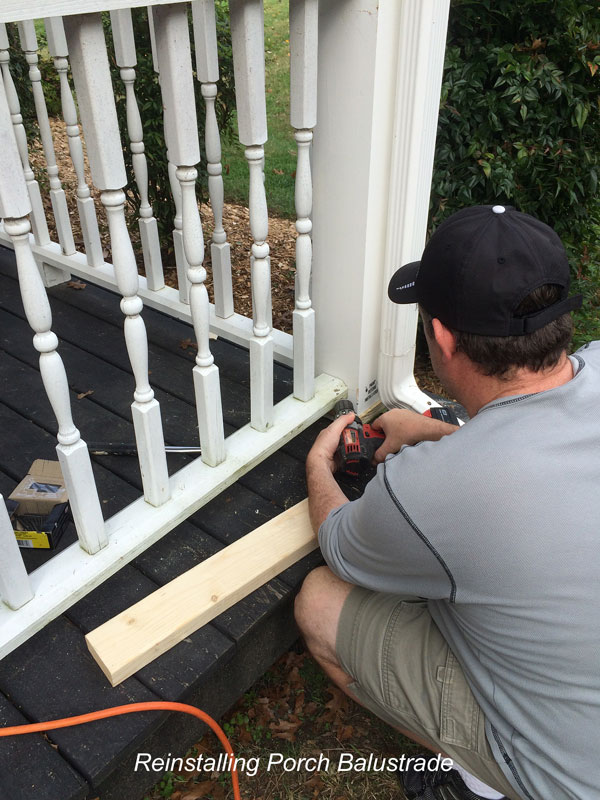
Installing balustrade on new porch columnStep 6 - Paint/Stain New Porch Column (If Applicable)Follow manufacturer's recommendations. Some porch columns need to be sealed soon after installation.In summary: Replacing a porch column is a fairly straight-forward process and although it may be a little different for other types of columns, the process is basically the same.

Hi! We're Mary and Dave, lifelong DIYers, high school sweethearts, and we both love porches. You've come to the right place for thousands of porch ideas. Merchants We Love


Helpful LinksEnjoy shopping Amazon (affiliate link)Popular PagesWhat's NewJoin Our Newsletter Family Porch Designs Porch Ideas for Mobile Homes Build a Porch | Small Porches Porch Columns | Porch Railings Screened Porches Porch Curtains | Porch Enclosures Porch Landscaping | Vinyl Lattice Porch Decorating | Porch Ideas Shop Navigation AidsHome | Top of PageSite Search | Site Map Contact Us PoliciesDisclosure Policy | Privacy PolicyLegal Info Please Join Us Here AlsoCopyright© 2008-2026 Front-Porch-Ideas-and-More.com All rights reserved. No content or photos may be reused or reproduced in any way without our express written permission. At no extra cost to you, we earn a commission by referring you to some products on merchant sites. See our disclosure policy. We, Front Porch Ideas and More, confirm, as stated on our privacy policy, that we do not sell personal information. All content here is solely for presenting ideas. We recommend consulting with a licensed, experienced contractor before you begin your project. We make no guarantees of accuracy or completeness of information on our site or any links to other websites contained here. Thank you for taking your time to stop by. See what's popular and new here. |
--- Our Wonderful Sponsors ---
--- End Sponsors ---Our Newsletter, Front Porch AppealLearn more!Thank you for being here! |
|||||
|
At no extra cost to you, we earn a commission by referring you to some products on merchant sites. See our disclosure policy.
We, Front Porch Ideas and More, confirm, as stated on our privacy policy, that we do not sell personal information. All content here is solely for presenting ideas. We recommend consulting with a licensed, experienced contractor before you begin your project. We make no guarantees of accuracy or completeness of information on our site or any links to other websites contained here. Front Porch Home | Return to Top Contact Us | About Us | Advertise with Us | Search | Site Map Media | Privacy Policy | Disclosure | Legal Notice | What's New 
|
||||||
|
No content or photos may be reproduced or copied in any way without our express written permission. | ||||||