|
By the FPI team
Front Porch Steps
Functional Yet Beautiful
What if porch steps weren't taken for granted? Most steps are built for function rather than beauty.
But it doesn't have to be that way.
What if your steps were designed to complement your home and add both interest and curb appeal?
Porch stairs can be built to make a statement, to make a small porch appear larger, and make
accessibility easier and visually appealing.

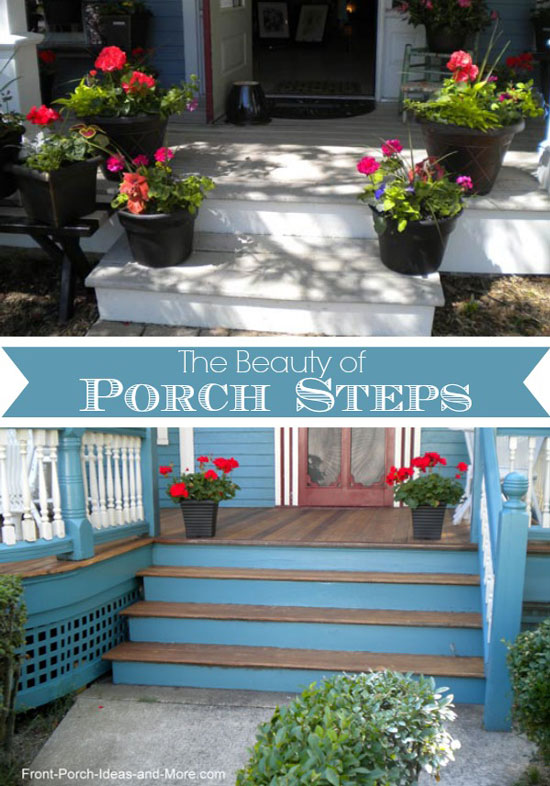
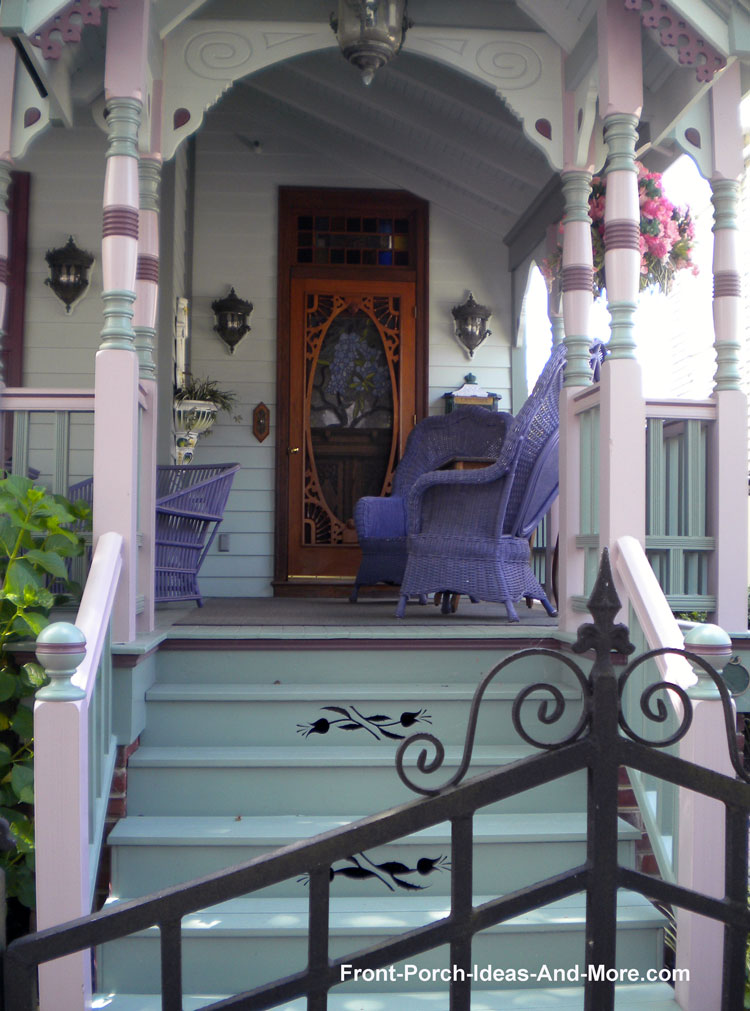
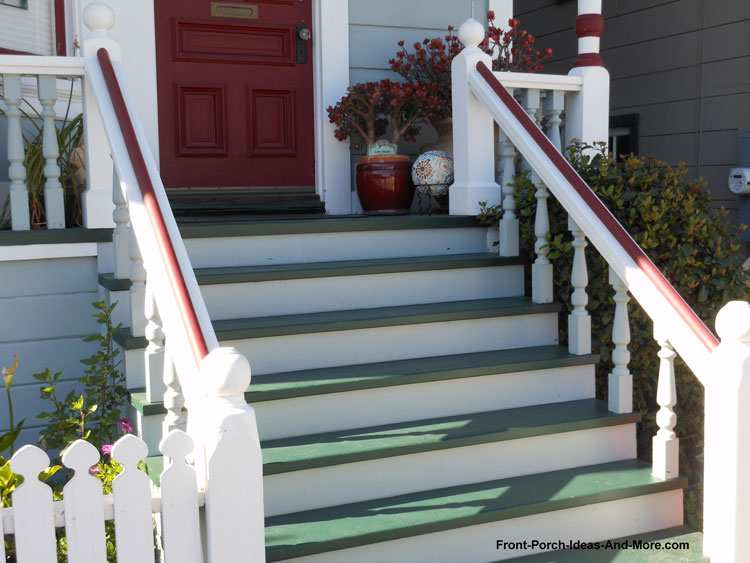
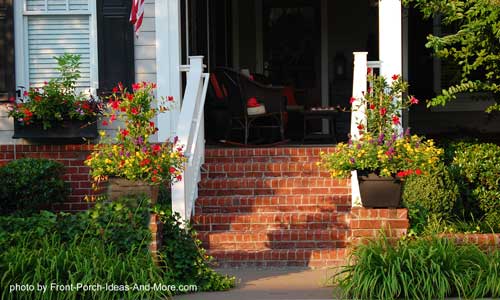
There is beauty in porch stairs. The steps above are painted to match the porch and the geraniums add a nice punch of color!
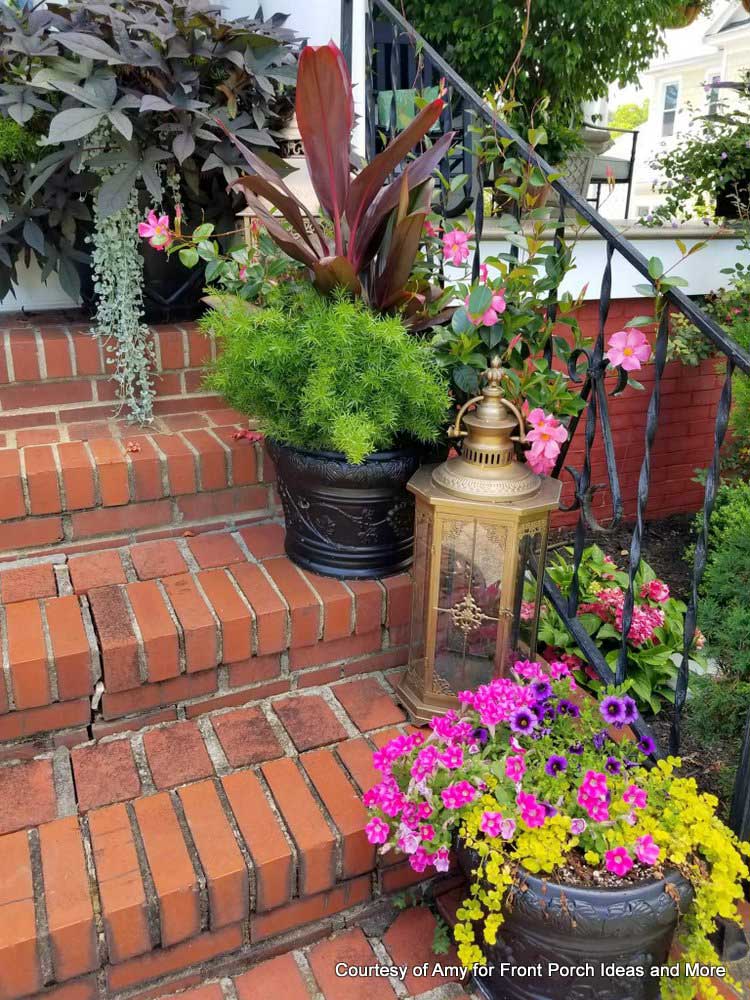
Amy's brick porch steps are beautiful with these gorgeous plants
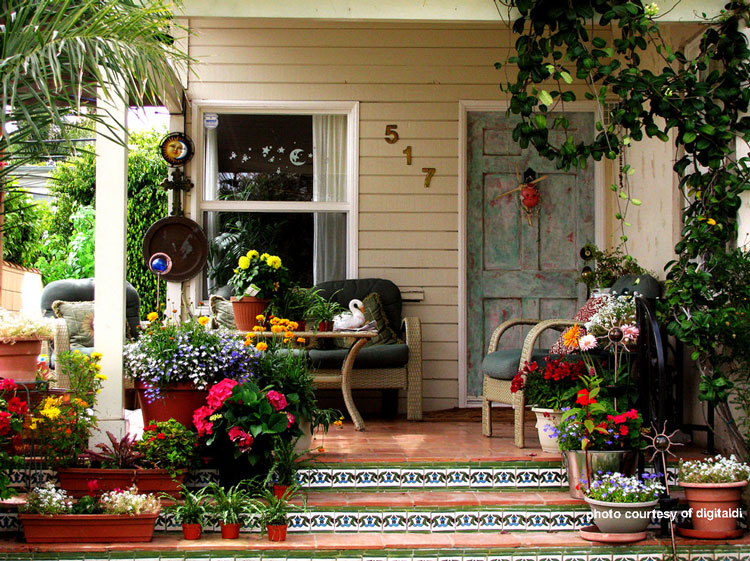
Photo courtesy of Dlgital Di
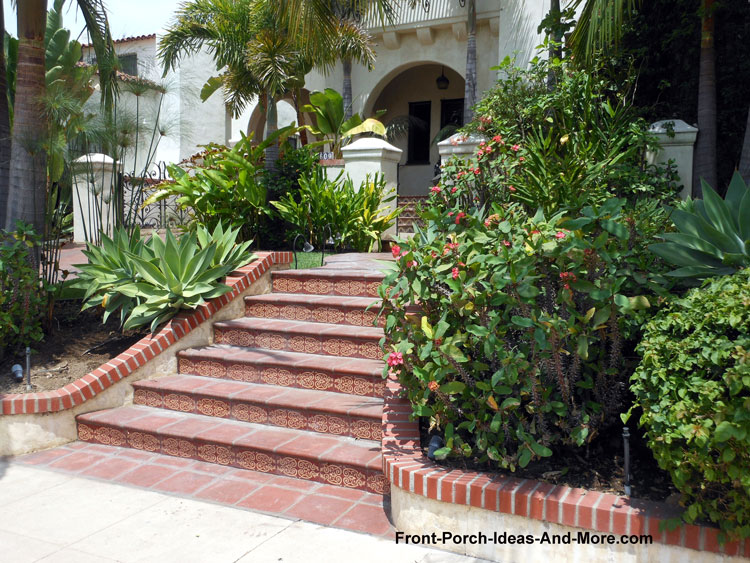
See how the beautiful tiles dress up the steps
Decorative front porch stairs
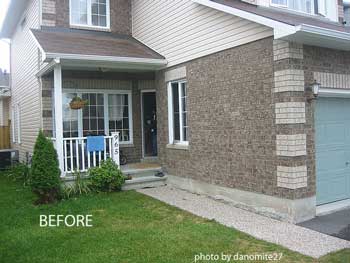
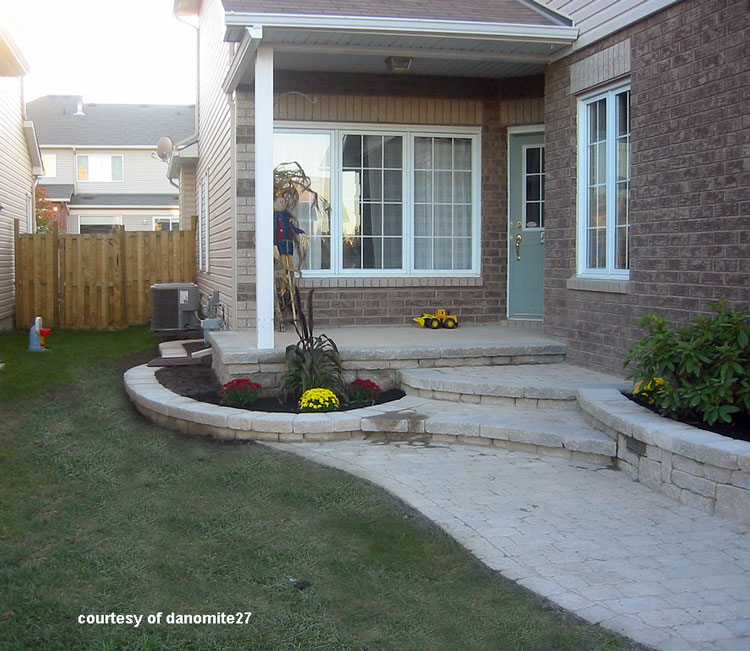
Porch Step Renovation
See how this small porch was transformed by a new sidewalk and curved steps!
Photos courtesy of danomite
The addition of built in curved planters softens the look and adds a whole new dimension to the porch.
Steps don't have to be ordinary.
Natural materials like slate not only look beautiful but last almost indefinitely without maintenance.
What Are the Most Popular Porch Step Designs?
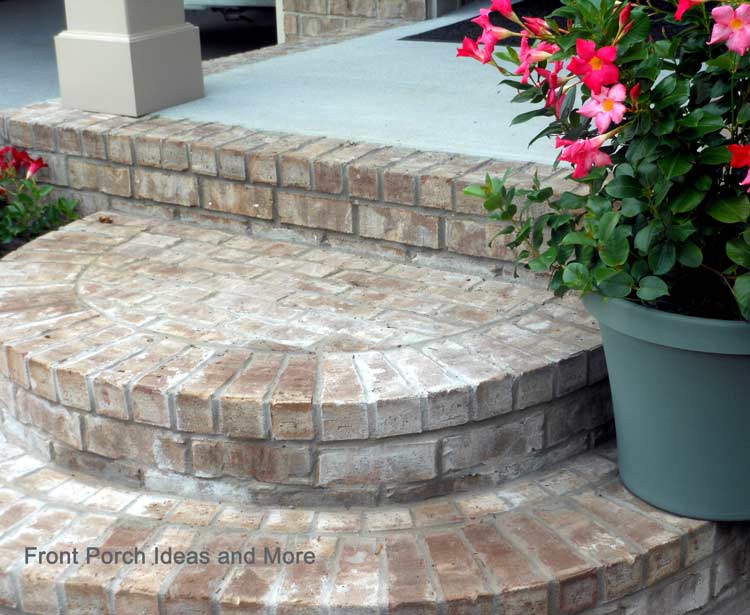
We like our rounded, brick porch steps
Want to make the most of your porch steps?
Which idea best suits your home and style?
- Classic and Timeless Wooden Steps:
Whether wooden steps are designed with straight lines or softly curved edges, they never go out of style.
You can stain or paint wood steps to add a pop of color as well as keep your steps protected from nature's elements.
- Concrete Steps:
Concrete steps are low-maintenance yet they can be classically beautiful when stamped with patterns, stained or painted.
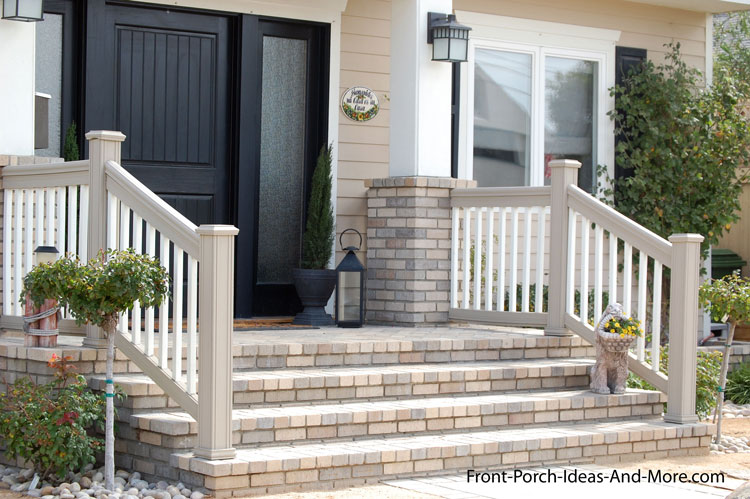
- Brick or Paver Steps:
Want a rustic, charming vibe?
Pavers can be arranged in beautiful patterns, such as herringbone or basket weave.
You can also extend the look with matching brick or a paver pathway.
- Curved Steps:
Curved steps add a touch of softness to your porch design.
While they can be crafted from brick, stone or wood, they add interest and beauty by following the natural contours of your porch.
Or quite simply, they can become a focal point to your porch design.
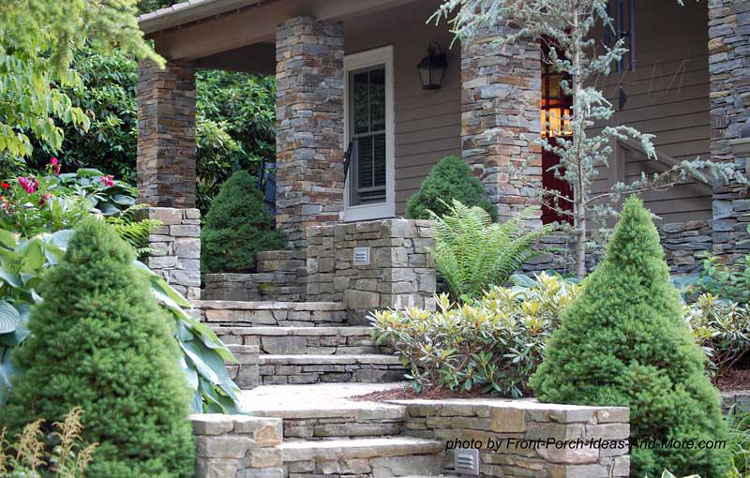
- Stone Steps:
If you're wanting an elegant, sophisticated look, natural stone is a tried and true solution.
With materials like granite, limestone, or slate, you can have a dazzling entrance, not to mention the interesting textures and irregular shapes.
Coordinate stone steps with the architectural style of your home.
- Floating Steps:
For a modern and minimalist option, floating steps are a natural.
Floating steps appear to be suspended in mid-air, attached to the porch structure or the wall, but they are mounted differently from traditional steps.
Typically made of materials like metal or concrete, floating steps are a contemporary, sleek design for porch steps.
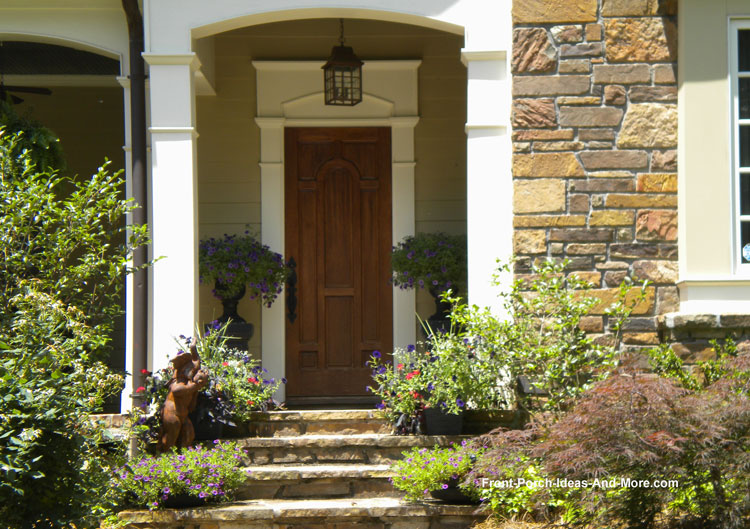
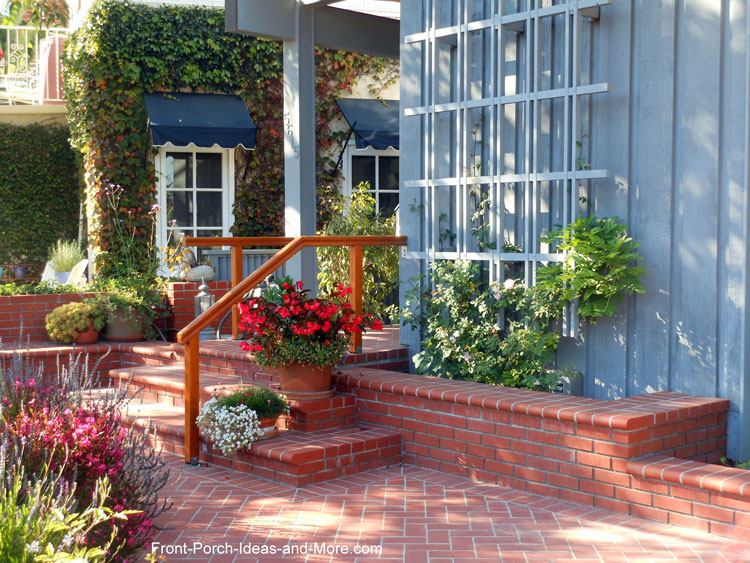
- Built-In Planters:
Incorporate built-in planters into your porch steps where you can showcase colorful flowers and greenery.
This design element adds beauty and a natural touch to your porch entrance.
Keep your home's overall style and architecture in mind as you choose your porch step design.
And please don't forget about safety too: good lighting, railings and non-slip steps.
Consult with a professional contractor or designer to determine the best options for your home.
Porch Step Options and Ideas
Slate is often made of clay and volcanic ash.
It can be split into sheets and is often used as roofing material.
Because of its texture, it is slip resistant making it a very good step material too.
The varied colors of slate make interesting patterns which makes it very appealing for exterior use.
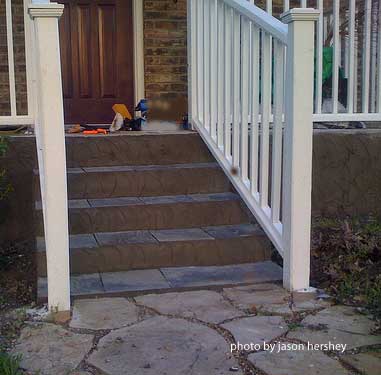
Photo courtesy of Jason Hershey
These steps were made from slate with stucco risers.
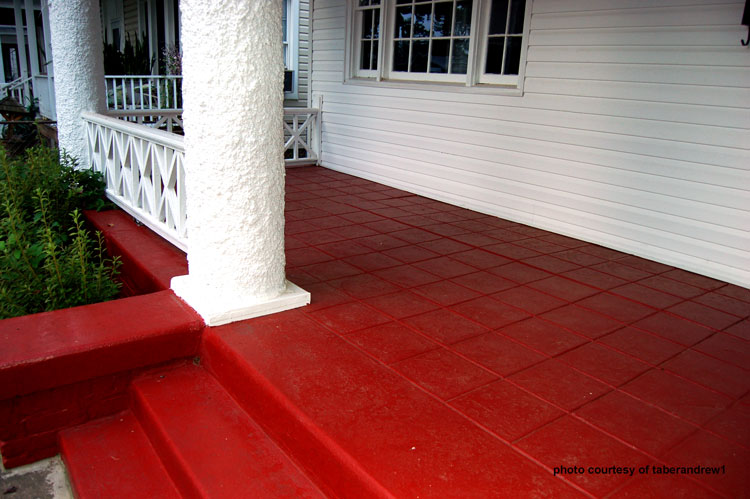
Concrete, a popular material for stairs, can be either be painted to match or complement your porch flooring.
Painting is easy to do and is probably one of the least expensive options.
photo courtesy of taberandrew1
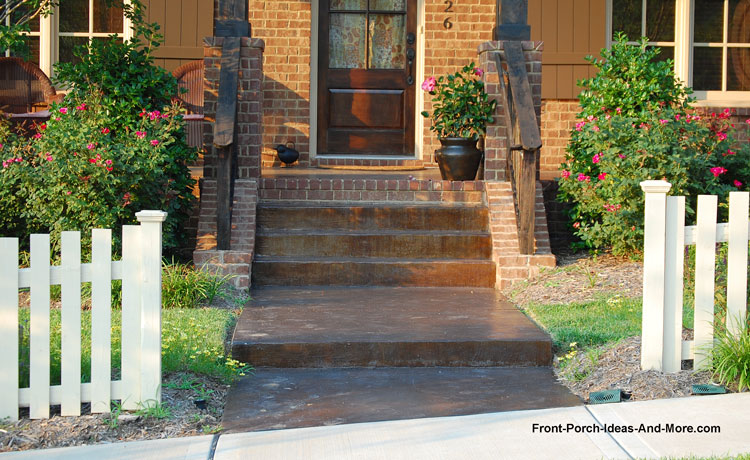
Because of its versatility, concrete can be stained, sprayed, or stamped. The stamped concrete steps shown below give
the steps a luxurious look.
Concrete can add a touch of elegance as well
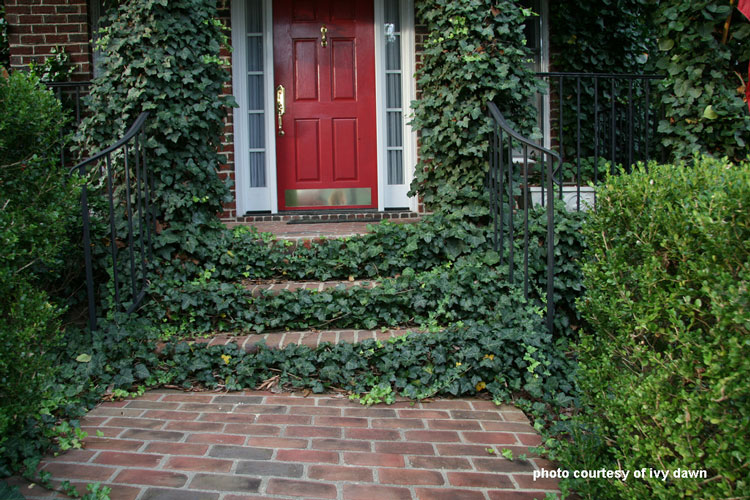
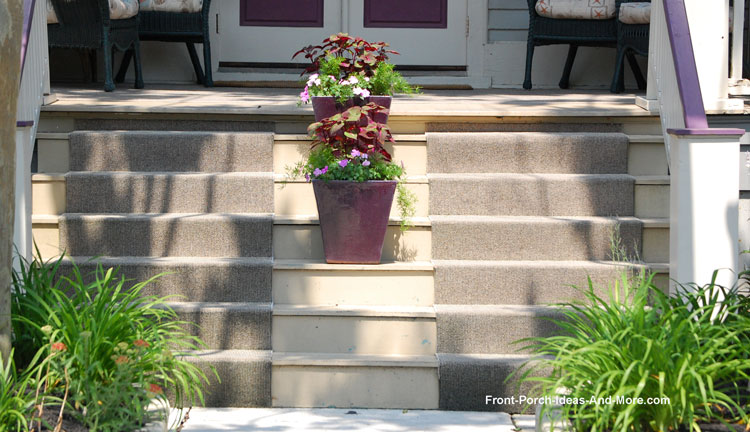
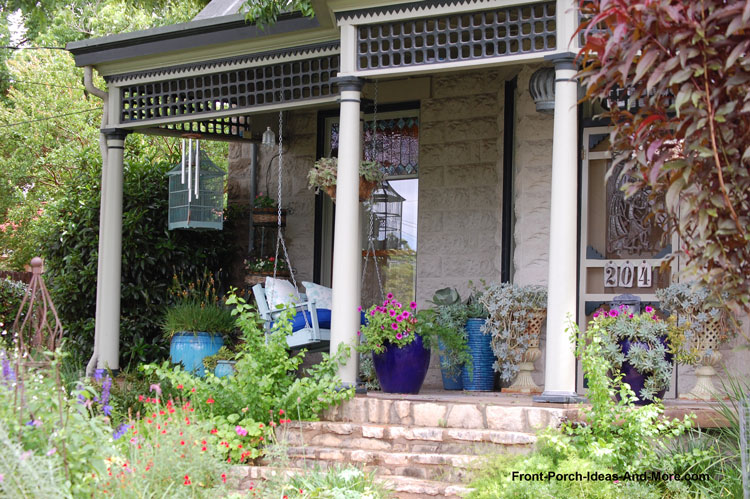
Incorporate Foliage to Soften the Look
Integrate landscaping into your step design. Although this needs to be maintained for safety reasons,
the ivy adds a new dimension to a traditional otherwise staircase.
Photo courtesy of ivy-dawned
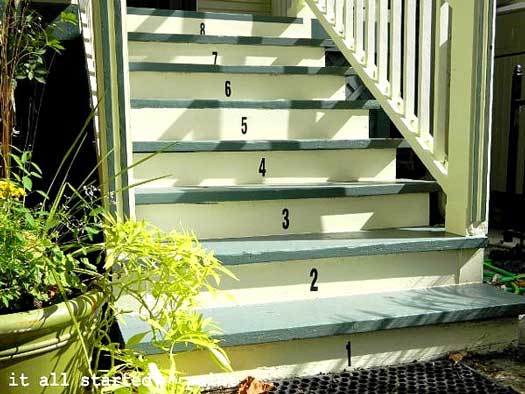
Dress Up Your Porch Stairs!
How about numbering your steps? Linda painted her steps and then numbered them.
See how she used porch floor paint and numbers to jazz her front steps.
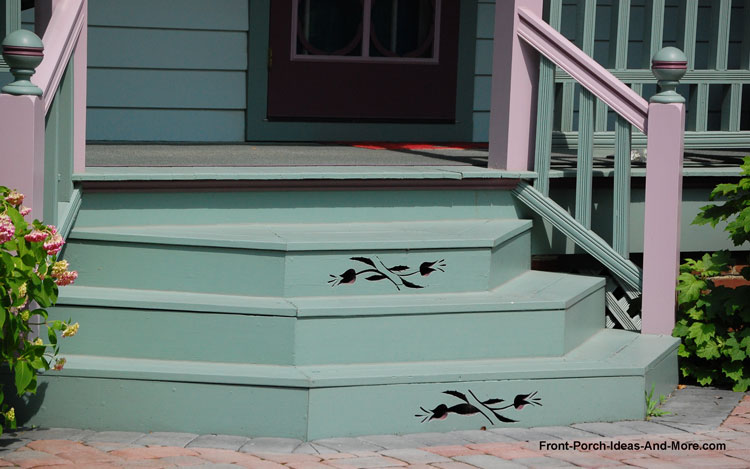
Porch stair case embellishment, like this pretty stenciling, adds extra appeal
Either paint or cut out designs
Porch stair embellishments add extra appeal
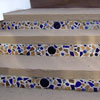
Use Tiles
No need to be subtle. Mosaic designs create a wonderful appeal and add a focal point to your home.
This is Mary's favorite!
Photo courtesy of seattle-daily-photos
Fabulous mosaics!
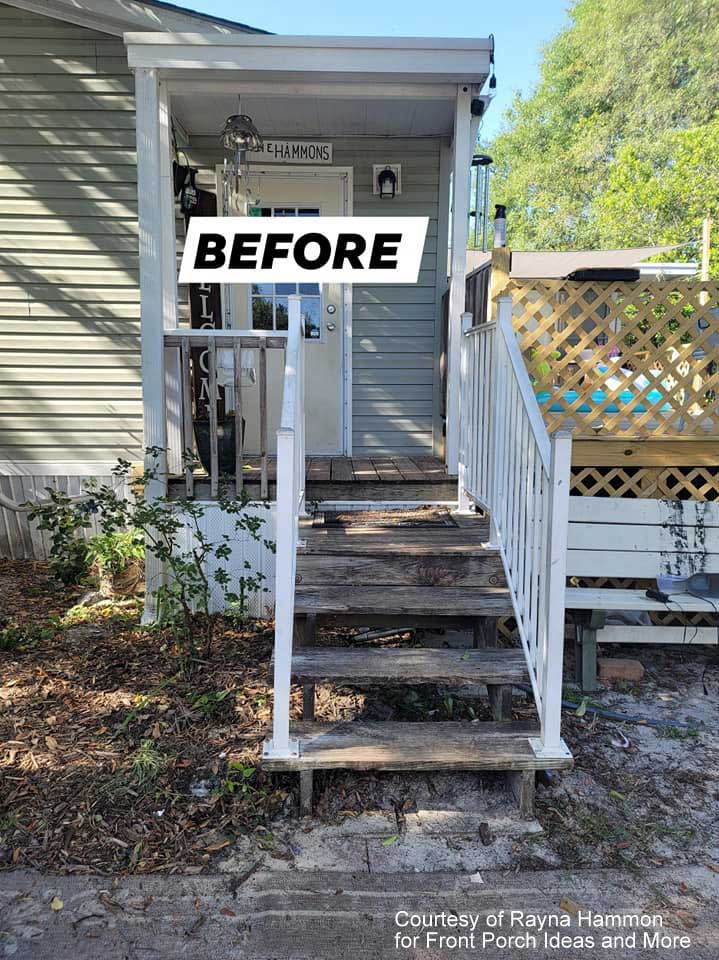
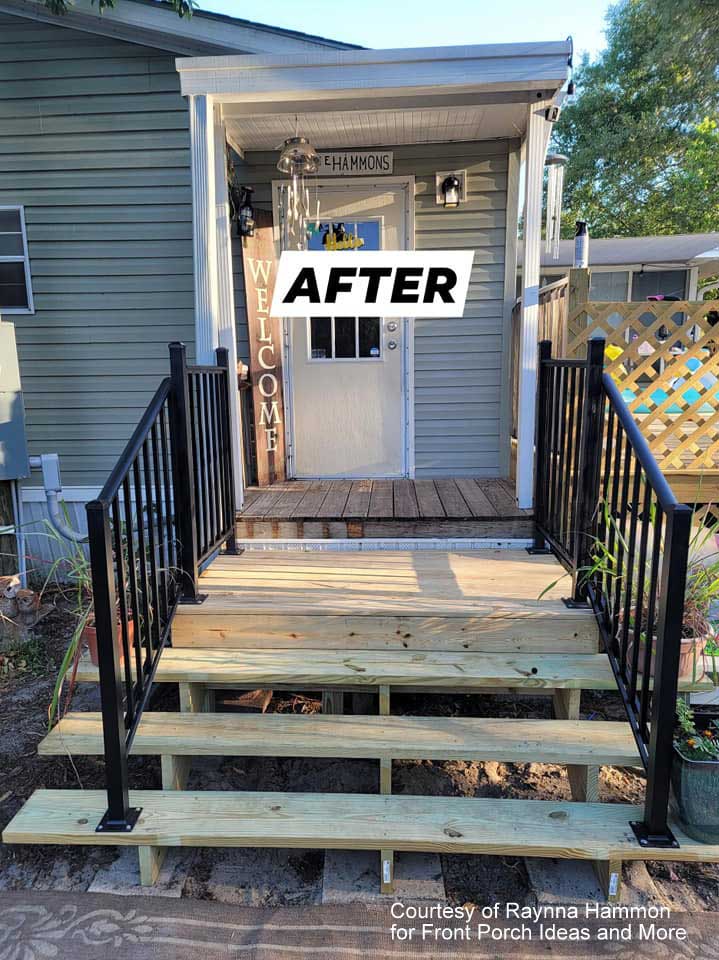
Widen Your Porch Steps
Before Raynna's porch step makeover
Raynna's porch steps were quite narrow before she decided to give them a makeover. And what a makeover it is!
After Raynna's porch step makeover
Raynna's much wider porch steps and painted handrails make for a much more inviting porch!
I love how the steps extend beyond the handrails, leaving a nice spot for potted plants.
Her painted handrails look like new, don't you agree? Such a tremendous difference.
Thanks to Raynna for sharing with us.
Paint Your Steps for Appeal
Steps can be painted or stained in colors to suit your own style and decor to add lots of curb appeal.
Whether they are made wood, concrete, or similar materials, paint can add a whole new dimension.
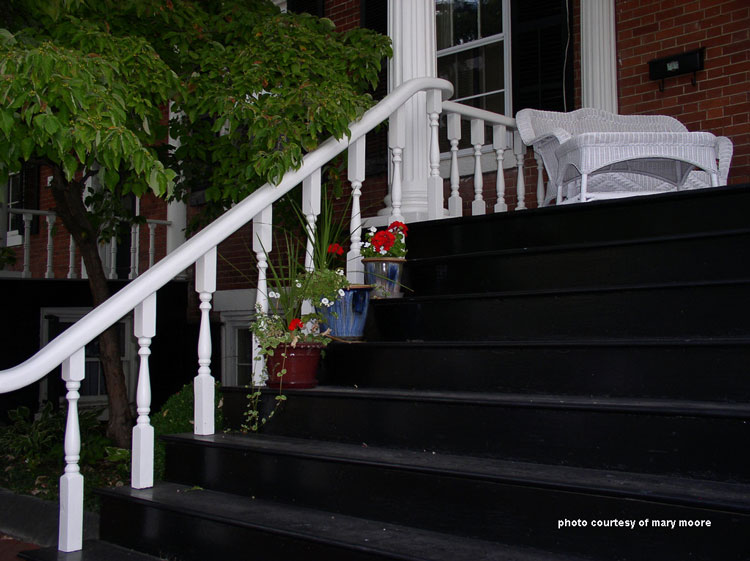
This striking set of wooden porch stairs adds a touch of elegance to the home. Wood steps give you options as well.
Photo courtesy of Mary Moore
Painted porch stairs with white risers
Painted steps and risers
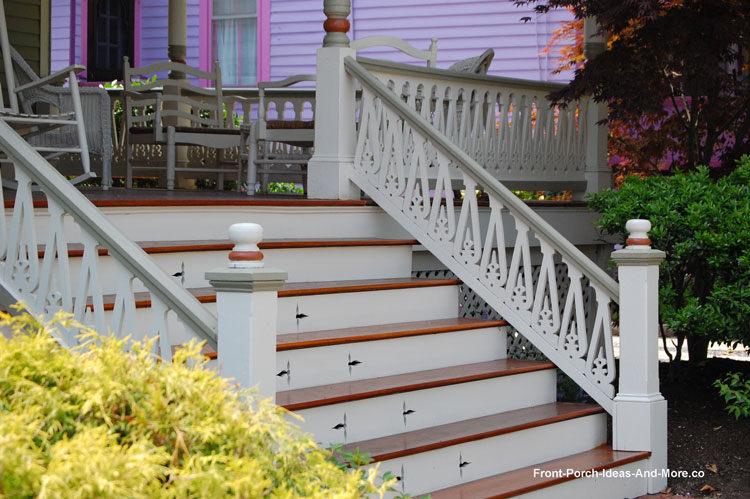
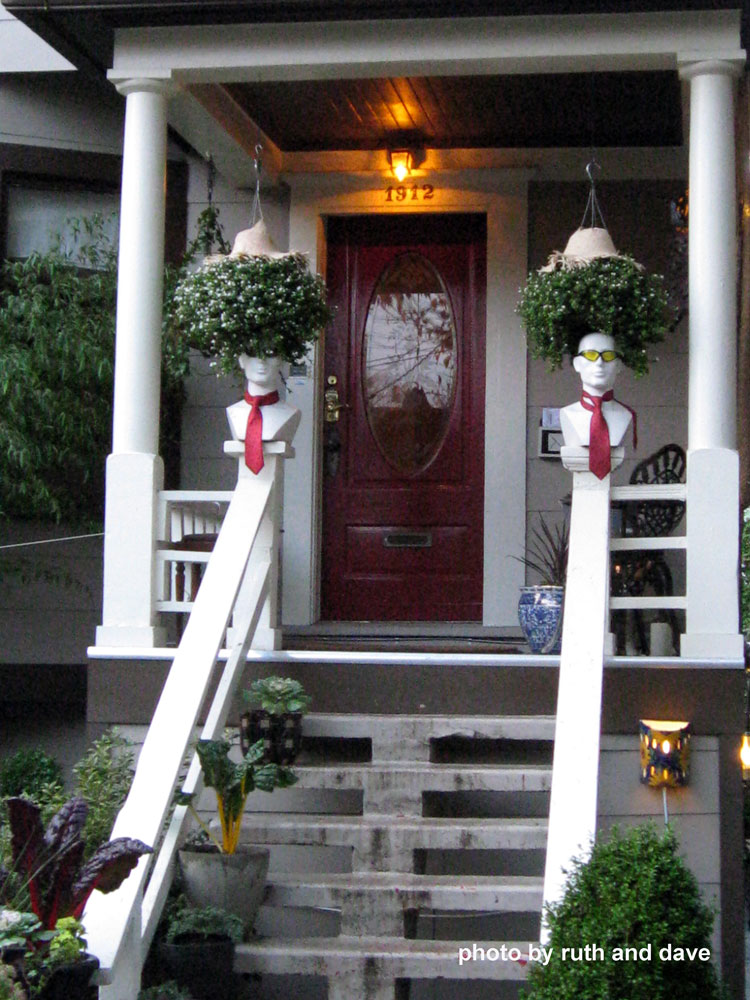
Novelty Can Be Fun!
This staircase works well with the "unique" post and railing design.
Imagine how different it would look if the risers were added.
Photo courtesy of Ruth and Dave
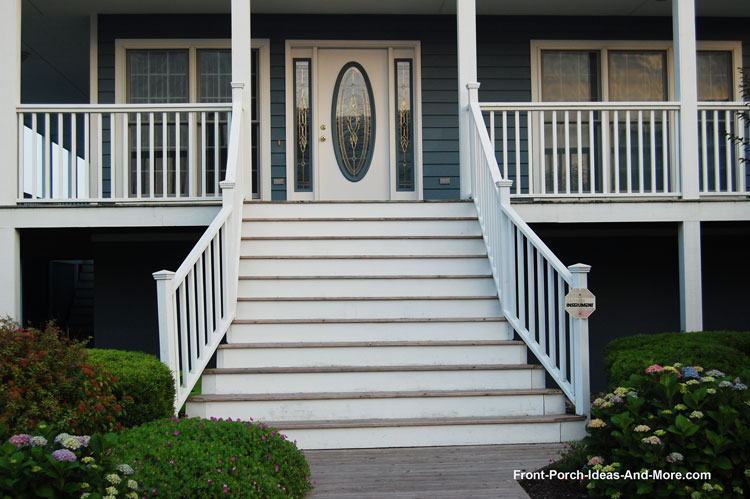
Tips for Front Porch Stairs
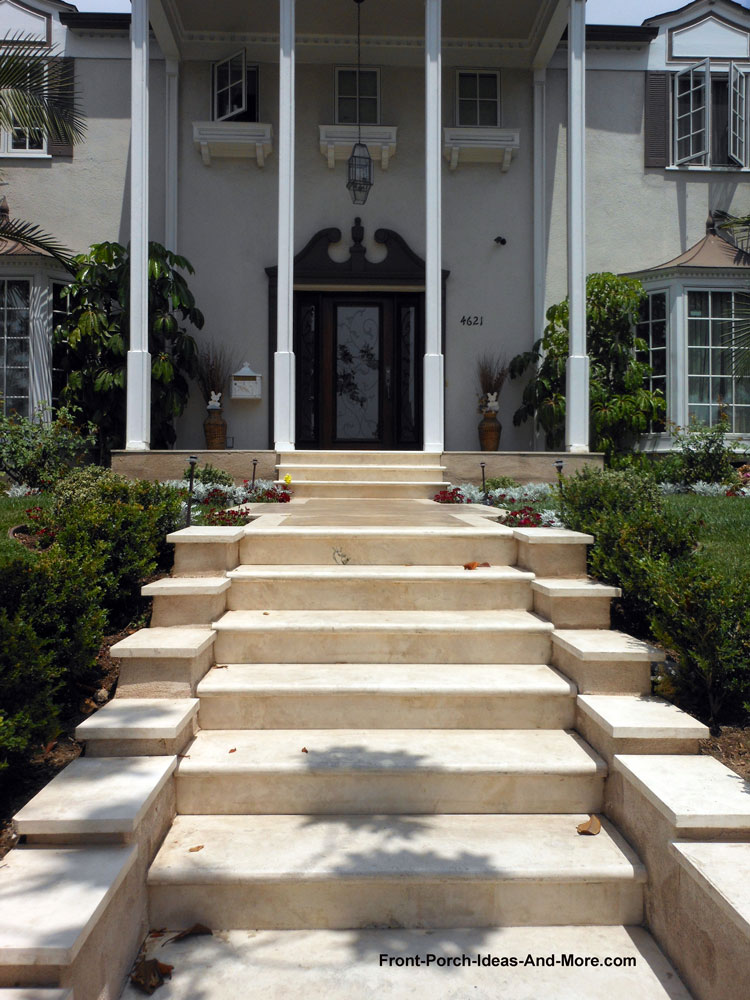
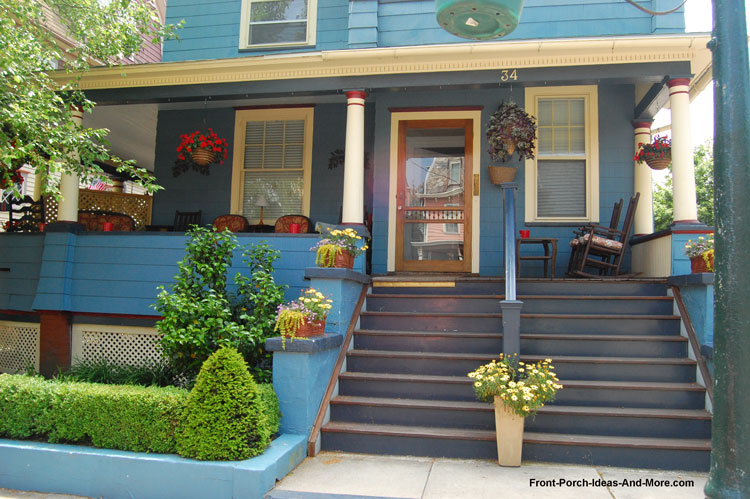
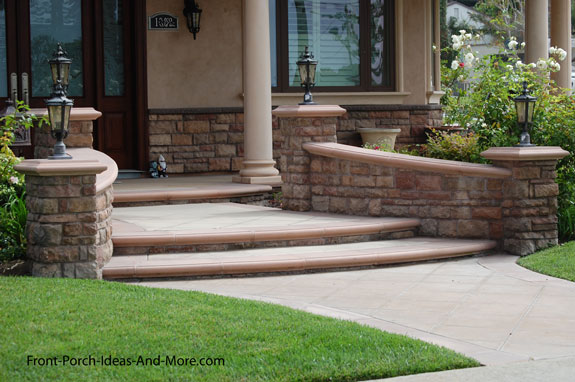
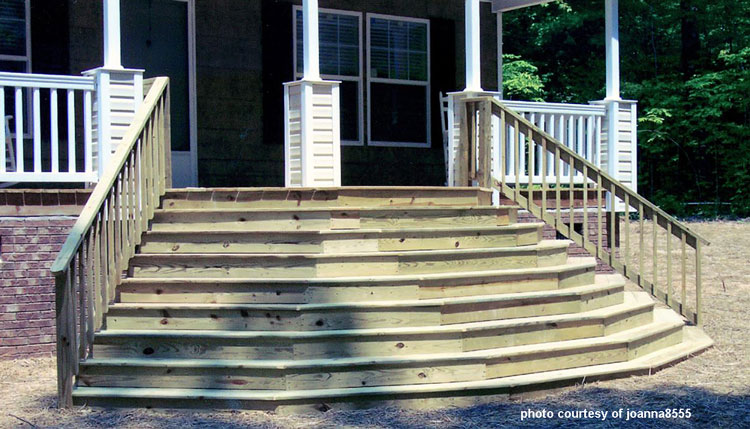
Width Matters
Make them as wide as possible.
It will make a small porch seem larger, a large porch more grand, and will so often enhance the look of any home.
This porch would look quite differently with a standard straight staircase.
Wide steps adds lots if appeal and makes your porch entrance appear larger
Make your porch more grand by constructing wide steps
Flairing your steps adds both increased functionality and appeal
Add a unique design feature as shown to enhance the look of your porch steps
Photo courtesy of joanna8555
The steps add an air of openness to the porch- photo courtesy of The Porch Company
Carpet May Be an Option Too
Outdoor carpeting may be another option you'd like to consider.
We recommend using a high quality outdoor carpet though.
Outdoor carpets come in a wide variety of styles and colors too
Choose the step material to match your home.
Many people opt for wooden steps due to costs, but if you can, consider other materials like concrete, stone, and slate.
Stone Steps
Beautiful stone front steps
Stone steps never go out of style
Stone steps are perfect for a cottage or garden look
Brick Steps
Can't beat the classic look of brick
The amazing look of brick steps
White-washed brick steps offer old world charm
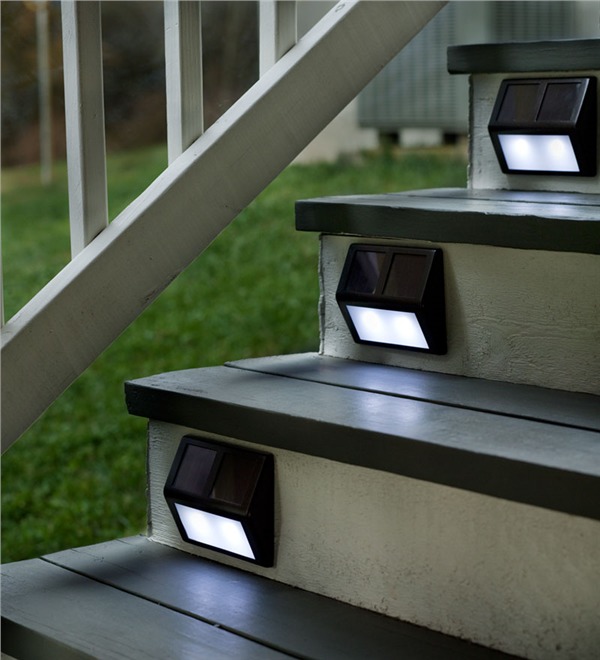
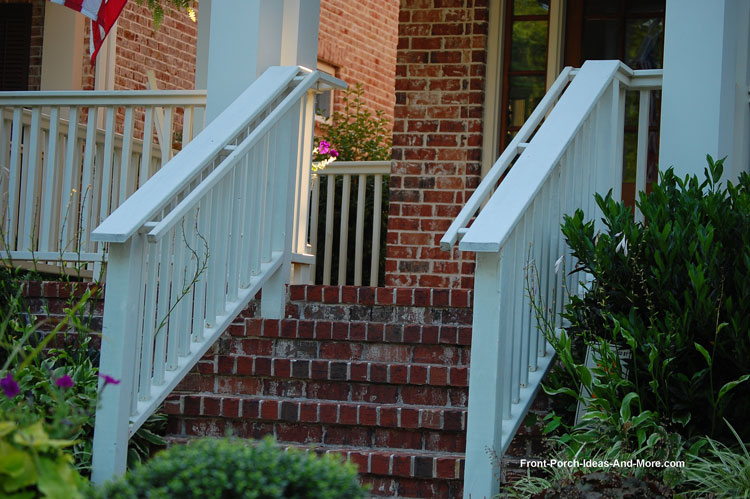
Porch Stair Handrails for Safety and Appeal
Your steps will probably require hand rails that will meet your local building codes.
Mary and I recommend you start by finding the right
design in case you have to modify your porch steps to accommodate the railings.
|
--- Our Wonderful Sponsors ---
--- End Sponsors ---
Our Newsletter, Front Porch Appeal
Learn more!
Thank you for being here!
|


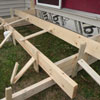 Build Your Own Steps
 Concrete Step Ideas
 Build Concrete Steps
 Stairway Landing Ideas


