Build the Best Porch Flooring StructureJoists, Bridging and Decking MaterialsYour porch flooring structure must be structurally stable to not only maintain functionality but also its beauty over the years. What may surprise you is that floor joists on a traditional front porch foundation, unlike decks, run horizontal to your home and support the actual flooring (see diagram below).By doing so, your decking material will be perpendicular to your home. For those who have built backyard decks, you are basically rotating the structure for a front porch. By doing so you eliminate the need for butt joints as you will normally be using shorter decking materials. We'll show you how porch flooring is constructed and offer some good tips along the way. 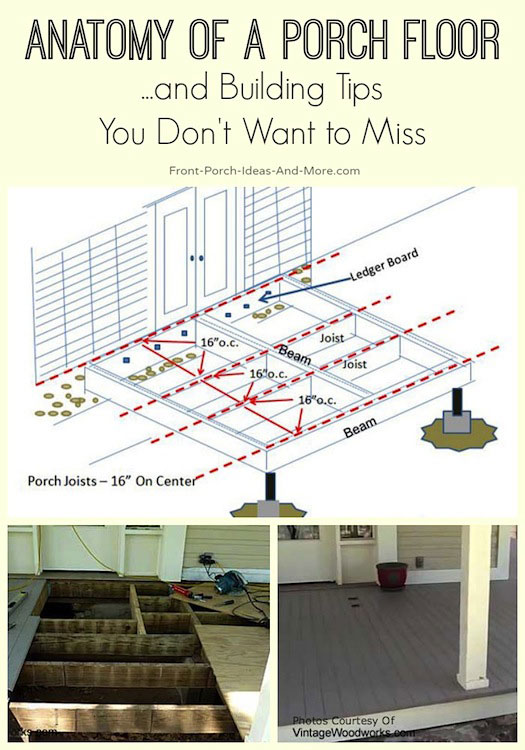

The anatomy of a porch floor. Time to learn about it!Enjoy Our Short Slide ShowOur slide show (2:44) is about the anatomy of a porch floor. I narrated it myself and hope you find it interesting.These pictures were taken at our son's home during their recent porch renovation. 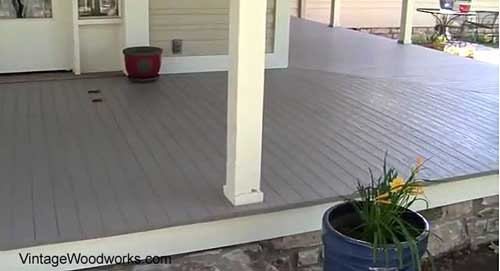
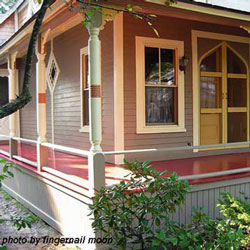
Traditional front porch with Azek porch decking materialPorch Floor Anatomy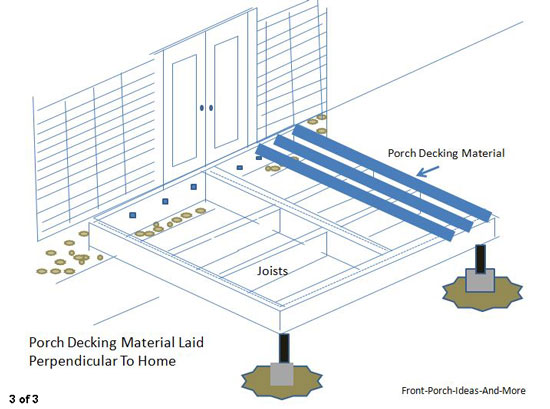
Front Porch decking materials laid perpendicular to houseAlthough traditional porch decking runs horizontal to your home many porches today run perpendicular. There is no distinct advantage to either. Remember; however, if building a traditional porch, it may change the number of beams you need and the direction of your joists. In this section; however, our porch flooring graphics will be shown from a traditionally constructed front porch perspective. Before we get started, you may want to explore our porch foundation section to see how to construction the footings, piers, posts, and beams. 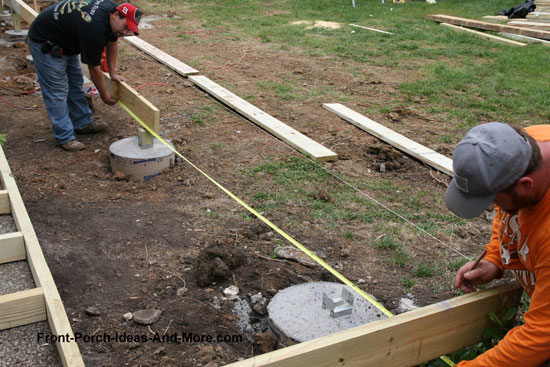
Constructing a front porch foundationFront Porch Floor Joist SpacingThere are a few different types of joists. The rim, band, or end joists are floor joists that are the outer most joists.These are typically the only joists you will see when looking at the porch. Typical floor joists connect to the beam(s) and directly support your decking materials. 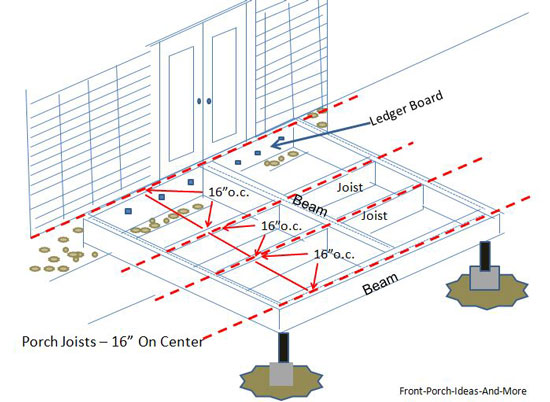
In the diagram above, an additional beam is shown to depict situations where the joist span is too long for the length of the joist. In those cases, installing additional beams adds stability to your porch. No matter which structure you choose, space your joists 16 inches on center (o.c.). Measure from the center point of one joist to the center of the next. You could also choose to space them 12 or 24 inches apart. (If you space them 24 inches apart you may need to add bridging to keep the platform from swaying). The closer together, the more stable your platform. Check with your local codes department to determine specific requirements for your area. Calculating Joist Spacing and SpansFor DIYers, no matter whether you are buildng a front porch or back deck, it is really important to understand joist spacing and spans. Exceeding the limits of your chosen wood can be disasterous, so avoid any problems by adhering to local building codes and making the right calculations.Here are a few common planning factors from a floor joist span table:
There are a myriad of factors involved in the calculations so to make it easy use this link to the American Wood Council's free joist spacing and span calculator where you can even download an app for your phone. Attaching JoistsThe easiest way to attach joists is by using joist hangars like those pictured below. Y ou can either use galvanized nails or deck screws (which I prefer).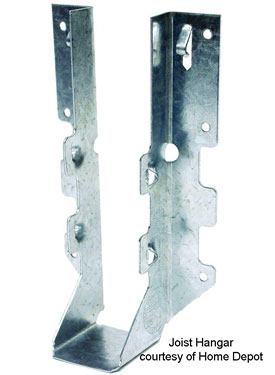

For decks you would attach the joists to the ledger board and if you are making your porch the same as a deck you would do the same. If building a traditional front porch, you would attach the joists to the band joists or to the band joist and beam (if you installed additional beams - see our foundation section). 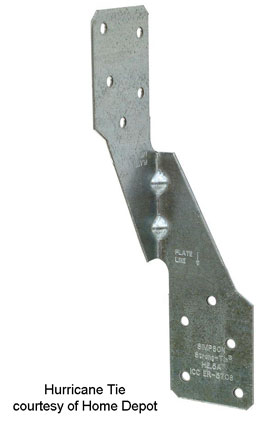 In some cases you will lay the joist over the beam to create an overhang. In those cases, use a hurricane tie (photo
at right)to attach the joist to the beam.
In some cases you will lay the joist over the beam to create an overhang. In those cases, use a hurricane tie (photo
at right)to attach the joist to the beam.
Start by marking your band or end joist in 16 inch increments. (I recommend you use a double end joist for stability). Measure from the back edge of your ledger board as shown in the diagram below. Place a mark every 16 inches. You may have to add an additional joist if the last segment exceeds 16 inches. Continue marking through to the beam. 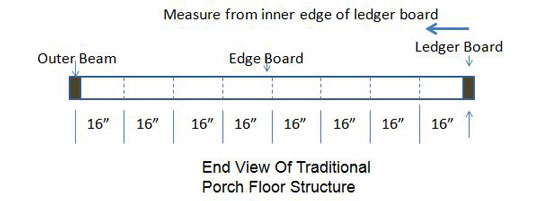
Measuring for joist locationsMake a Joist Hanger JigJoist hanging can be fairly easy if you make a jig first. As a woodworker I make lots of jigs for use in my shop and know how useful they can be. If working alone, a jig is a must. Jigs will ensure you are consistent throughout and make the job a lot easier.This joist hanging jig is quick and easy to make: 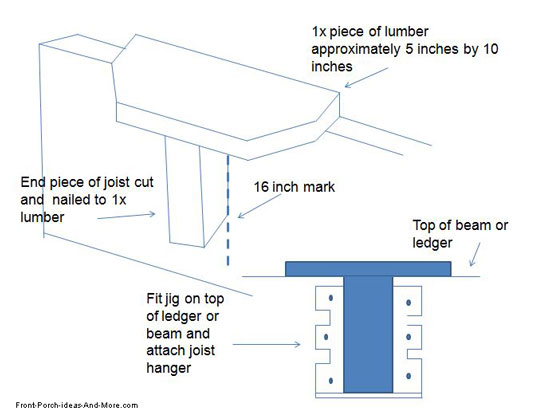
Quick and easy joist hanging jigWatch Your CrownsPay attention to your lumber too. It is almost impossible to purchase joist lumber without crowns, that is, they tend to have an inherent curve in them as depicted by the graphic below.You will want to install your joists with the crown side up. By doing so the weight of the decking materials will "flatten out" your porch floor. Otherwise, you will have an uneven porch floor. 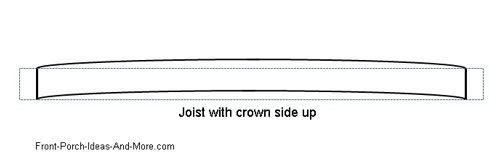
Why Won't It Fit!?No matter how careful you are installing the joist hangers, some joists will extend above the beam or ledger or even be a bit short. Not to worry. If too tall just chisel out the bottom of the joist so it sits lower on the hanger. For joists that are too short use shims to raise them a bit.
Don't Make This Mistake
When building the porch framing, i.e., the joists, be sure to allow sufficient time in which to install the joists and lay the decking materials within a reasonable time. While building a large deck for a neighbor, I had to stop construction due to an emergency just after I installed twenty-one 16 foot long joists. Because I couldn't install the decking boards before I left, I knew I was going to encounter problems when I returned. Needless to say almost all of the joists had warped considerably. It took many hours of measuring, cutting, clamping, and installing blocking between the joists to rectify the problem. If faced with a similar situation in the future, I will lay boards perpendicular to the joists (on top and below) and temporarily fasten them in place to keep the joists from warping. I'm also going to reconsider volunteering to help build decks for neighbors! Recommend you start by hanging your end joists (or double end joists for the traditional porch structure). That, in essence will form your framework upon which you will hang the remaining joists. Be sure to allow extra length for the end joists to cover both the ends of the ledger board and the outer beam. Floor Joist BridgingFloor joist bridging is added between the floor joists to add strength and to prevent the porch from swaying or bouncing. I also use bridging to ensure the joists run parallel.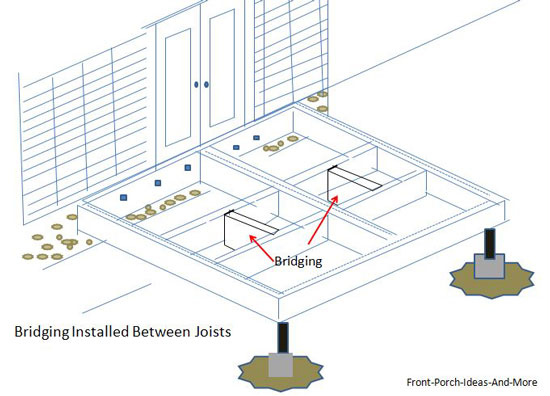
Bridging installed between joistsSelect Your Porch Decking MaterialNow's the fun part as you will get to see all of your hard work paying off. You probably have a good idea as to your porch flooring; however, we encourage you to visit our porch decking section to learn all of your options. You will discover materials you may not have previously considered like
the mahogany wood porch floor pictured at right. (photo courtesy of Ryan Dingman)
You will discover materials you may not have previously considered like
the mahogany wood porch floor pictured at right. (photo courtesy of Ryan Dingman)
You have lots of options ranging from many different types of wood to stone, brick, concrete, interlocking deck tiles, and more. Installing Your Porch DeckingUnlike your backyard deck, wood porch flooring runs perpendicular to your home (if you so choose).
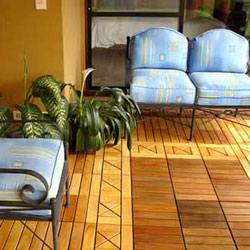
Front porch decking materials laid perpendicular to houseWood applications range from nailing (or screwing) you wood boards to the joists or installing traditional tongue and groove flooring to using your structure to hold a myriad of stone-type flooring as illustrated in the photo below.
Use brick, stones, or other decking materials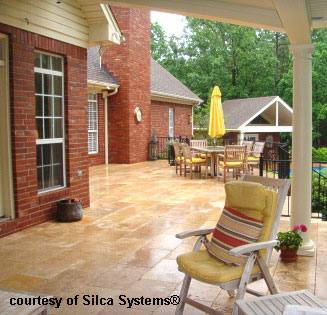 The Silca System® (above photo) allows you to install their special grids over your joists.
The grids will support all kinds of decking materials transforming an ordinary porch floor into an exquisite one!
The Silca System® (above photo) allows you to install their special grids over your joists.
The grids will support all kinds of decking materials transforming an ordinary porch floor into an exquisite one!
Learn more and see the possibilities for your porch or deck. Installation Tips
Porch Flooring Installation Series - Step by StepMary and I recommend you see our videos and accompanying information, and tips courtesy of Vintage Woodworks, detailing how they repaired and installed a new porch floor. They are highly instructive and no matter your porch situation, we are sure you'll glean some great tips.Handle Corners, Rim Boards, and Thresholds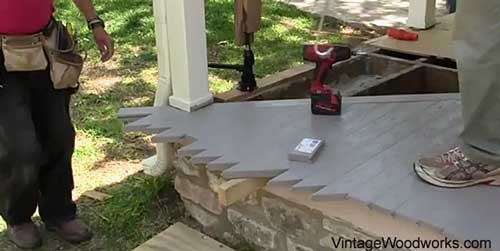
See how to install around corners, rim boards, and thresholdsSquare Your Porch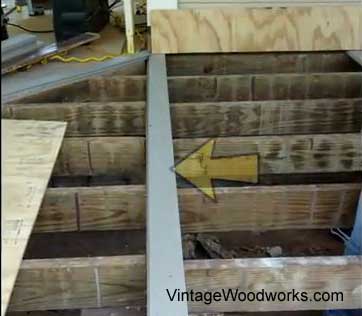
Square your porchInstall Porch Boards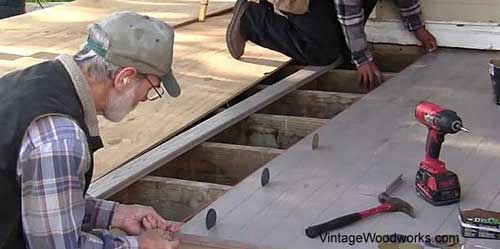
Installing your porch boardsFinish Your Porch Flooring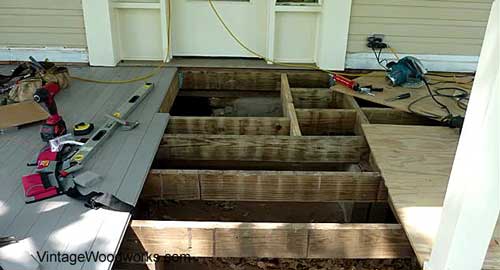
Finish your floor to perfection
Other Porch Floor Construction ConsiderationsDon't Forget Your Electrical RequirementsIf you haven't already, now's the time to plan for your porch electrical requirements. If you have to run cable to electrical outlets, now would be the time to do so. We highly recommend you use our porch electrical section as a starting point for determining all of your electrical needs like lights, fans, receptacles, etc.Keep Your Porch DryOften times porch owners encounter water issues whether on or under the porch or the surrounding area. If you believe you may have such issues, be sure to see our waterproofing a porch floor and our lawn drainage problem resolution.Repairing Your Porch FloorNow that you know your flooring anatomy, pay particular attention to the porch's structural components, i.e., existing porch decking, joists, rim joists, footers, and support posts.Pay attention to these:
Have a porch flooring height question. See our response to a recent inquiry about floor height for a porch.

Hi! We're Mary and Dave, lifelong DIYers, high school sweethearts, and we both love porches. You've come to the right place for thousands of porch ideas. Our Sponsors


End Sponsors Helpful LinksEnjoy shopping Amazon (affiliate link)Popular PagesWhat's NewJoin Our Newsletter Family Porch Designs Porch Ideas for Mobile Homes Build a Porch | Small Porches Porch Columns | Porch Railings Screened Porches Porch Curtains | Porch Enclosures Porch Landscaping | Vinyl Lattice Porch Decorating | Porch Ideas Shop Navigation AidsHome | Top of PageSite Search | Site Map Contact Us PoliciesDisclosure Policy | Privacy PolicyLegal Info Please Join Us Here Also
Find a Trusted Local Pro Copyright© 2008-2025 Front-Porch-Ideas-and-More.com All rights reserved. No content or photos may be reused or reproduced in any way without our express written permission. At no extra cost to you, we earn a commission by referring you to some products on merchant sites. See our disclosure policy. We, Front Porch Ideas and More, confirm, as stated on our privacy policy, that we do not sell personal information. All content here is solely for presenting ideas. We recommend consulting with a licensed, experienced contractor before you begin your project. We make no guarantees of accuracy or completeness of information on our site or any links to other websites contained here. Thank you for taking your time to stop by. See what's popular and new here. |
Hi! We're Mary and Dave, lifelong DIYers, high school sweethearts, and we both love porches. You've come to the right place for thousands of porch ideas. --- Cute Mushroom Mug ---
Wouldn't this be an adorable mug for your porch? It's for sale in my Etsy shop! --- Our Wonderful Sponsors ---
--- End Sponsors ---Our Newsletter, Front Porch AppealLearn more!Thank you for being here! |
||||
|
At no extra cost to you, we earn a commission by referring you to some products on merchant sites. See our disclosure policy.
We, Front Porch Ideas and More, confirm, as stated on our privacy policy, that we do not sell personal information. All content here is solely for presenting ideas. We recommend consulting with a licensed, experienced contractor before you begin your project. We make no guarantees of accuracy or completeness of information on our site or any links to other websites contained here. Front Porch Home | Return to Top Contact Us | About Us | Advertise with Us | Search | Site Map Media | Privacy Policy | Disclosure | Legal Notice | What's New 
|
|||||
|
No content or photos may be reproduced or copied in any way without our express written permission. | |||||