Decorating with Burlap for the 4th of JulyPatriotic Flags and BannersWhen Dave and I came across some beautiful Americana burlap in patriotic colors, we knew that decorating with burlap was going to be the foundation for our 4th of July porch decorating this year.We wanted to decorate our porch columns with homemade patriotic banners and this burlap, with its Americana feeling, is a nice fit for our cottage-style home. Burlap, because of its design, durability and body, is a great material for banners and wall hangings. Making these burlap banners for our porch was one of those fun projects that we are very proud how they turned out. 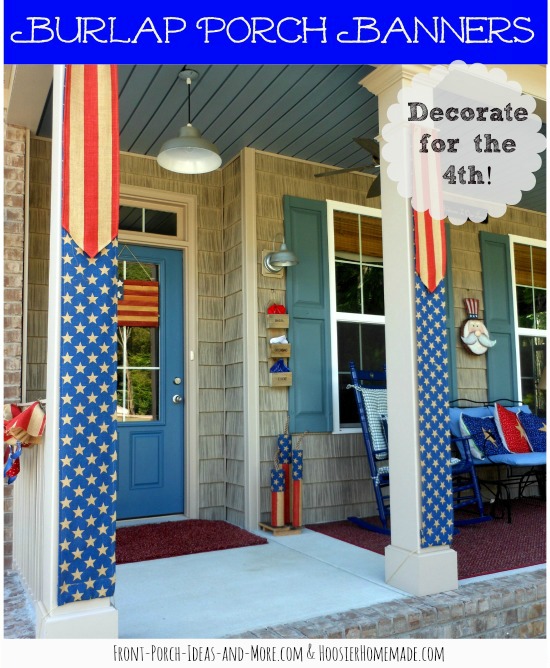

We enjoy these patriotic burlap banners on our porch columnsSo let's get going... Video: Making Our Patriotic BannersPlease watch our 2 minute videoTutorial for Our Stars and Stripes Banners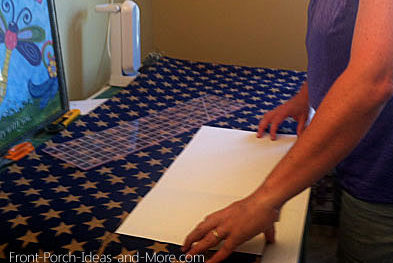 Measure the front of your porch columns, that is, the part that you want to cover with the banner.
We wanted our banners to be approximately 8" wide by 81" tall.
Measure the front of your porch columns, that is, the part that you want to cover with the banner.
We wanted our banners to be approximately 8" wide by 81" tall.
Then add two inches to the width and four inches to the height. This will give you a generous 1" hem on each of the sides and 2" hem on the top and also on the bottom. So for our columns, we cut our burlap to be 10" wide by 85" tall. Cutting the burlap with a rotary cutter Hem the Sides of the Starry Blue Burlap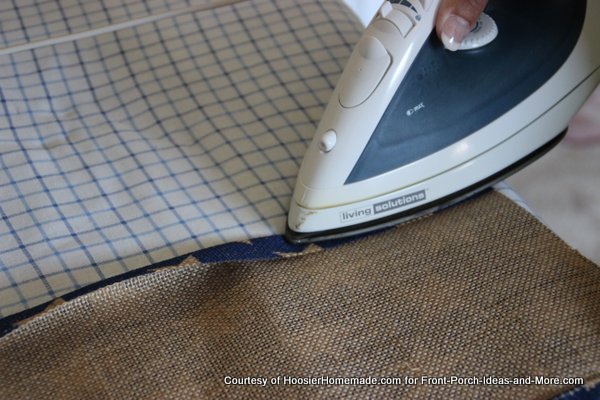
Hem the sides first and you will finish the top and bottom later. Fold over a half inch and then another half inch. Iron and pin well. Liz graciously did all the ironing and pinning. Here you see her just getting started. 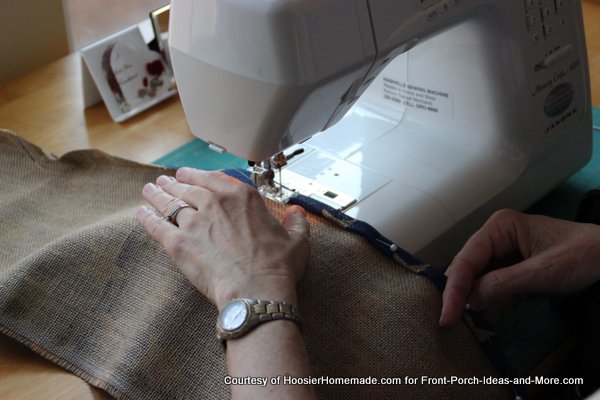
Once she had the sides ironed and pinned, I took the burlap over to my sewing machine and sewed the hems on both sides. If you don't like to sew, you may be able to glue the edges down or use hem tape. Try it on a small piece first. Once you have the sides hemmed on the starry blue burlap, you are ready to work with the red burlap. Again the top and bottom hems will be done in a later step so no worries. Prepare the Red Striped Burlap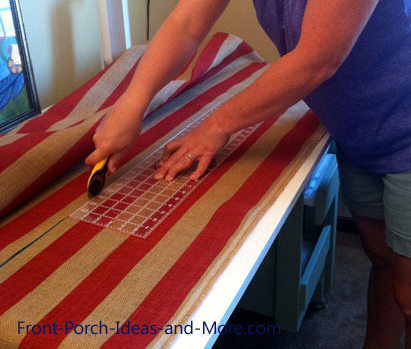 Cutting the burlap to size...
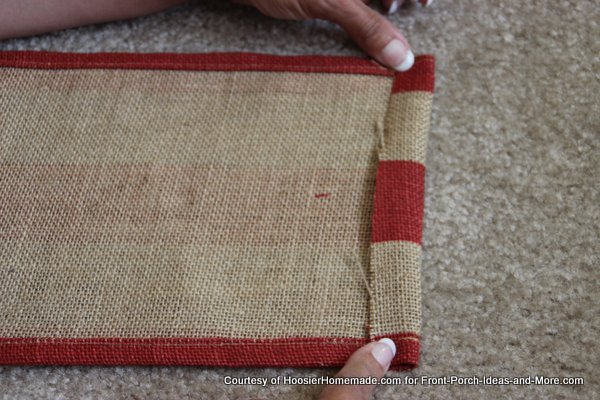
For this part of the banner, the red striped portion, cut the burlap the same width as the blue layer but only about 1/3 the height of the blue layer. So in our case, we cut the red burlap to be approximately 10" wide by 30" tall give or take. Nothing scientific about this - whatever looks nice to you. Hem the sides just the same as you did for the blue layer. Forming the "Point" on the Stripes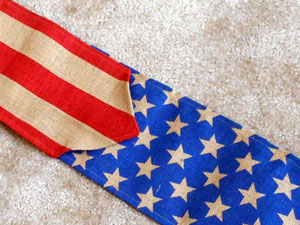 Once the red burlap is hemmed on both sides, it's time to form the point - like you see here - the to give it a "pennant" look.
So take a look at how Liz made the point... 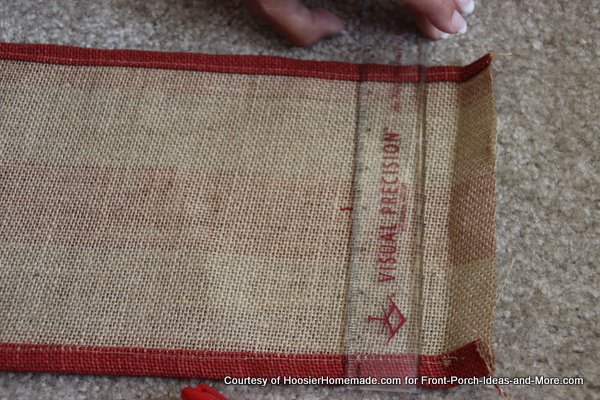
Liz is forming the "pennant" point on the red striped burlap. First she marked the center of the width and marked it with a pen. Then she folded over the edge about a half inch. 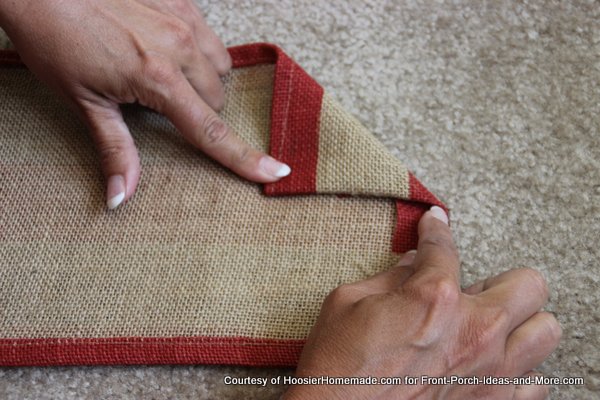
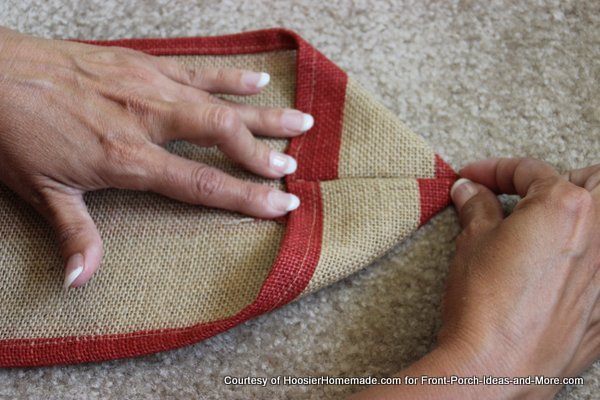
Then she folded the first side to the center point. And then the other side to meet the first. 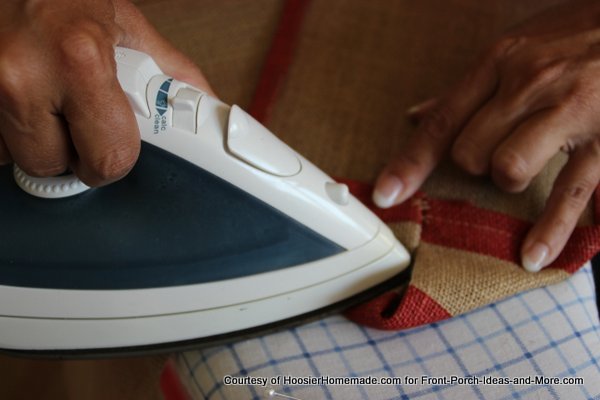
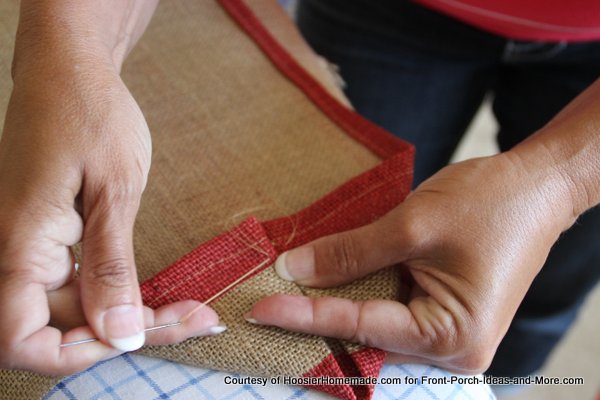
She ironed the point and then sewed a few stitches in it to keep the sides of the point together. 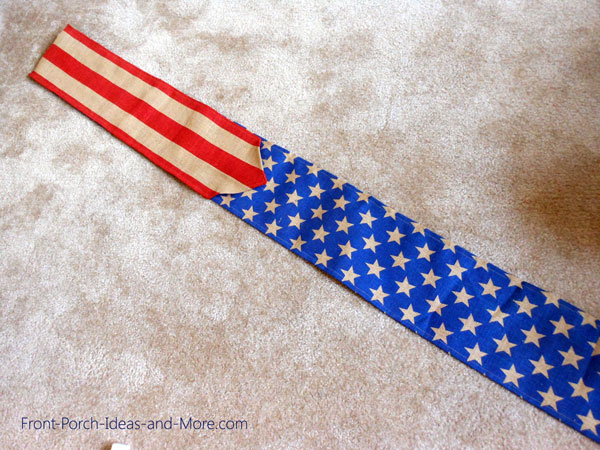
Then we laid it all out on the floor just to gauge how it looked. Liz and I decided it looked pretty great; I will enjoy decorating with burlap again. Time to Finish and Hang the BannersTo finish the banners, we hemmed the bottom and the top. On the top, I sewed the blue and red layers together as I hemmed them. The hems not only finished off the banners but also serve as channels that you thread the twine through to hang the banners.I also tacked down the red point onto the blue stars so that it wouldn't get caught in the wind too much. 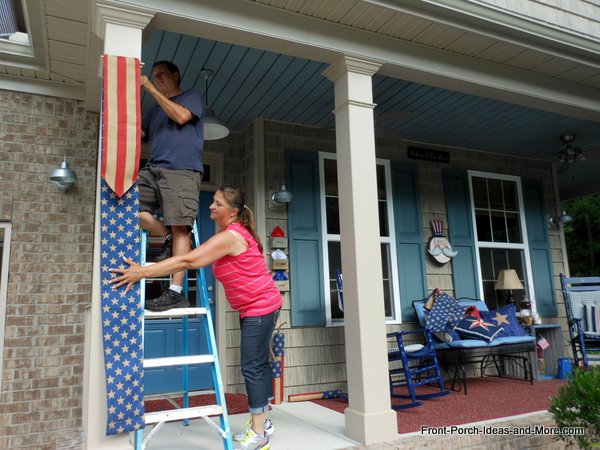
Liz helping Dave hang the bannersTo hang, we threaded twine through the top and bottom channels that were created when he hemmed the tops and bottoms.You can use a safety pin or crochet hook to pull the twine through the hem. Be sure to leave a generous tail of twine on either side so that you can pull it around the column and tie it securely. It was windy when we hung the banners so Liz helped hold them while Dave fastened them to the tops of the porch posts. 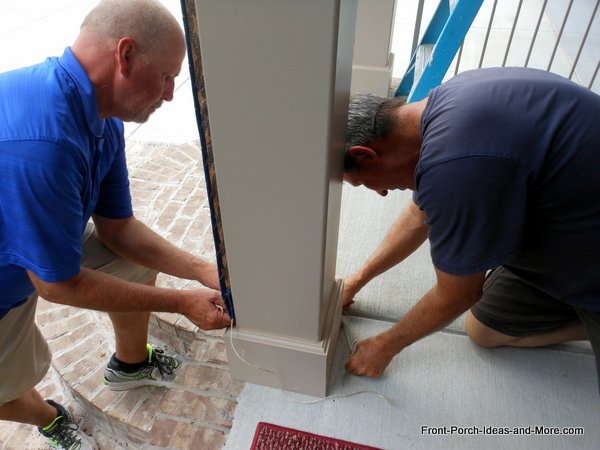
Dave and Doug wrapped the twine around the base of our porch column to secure the banners. 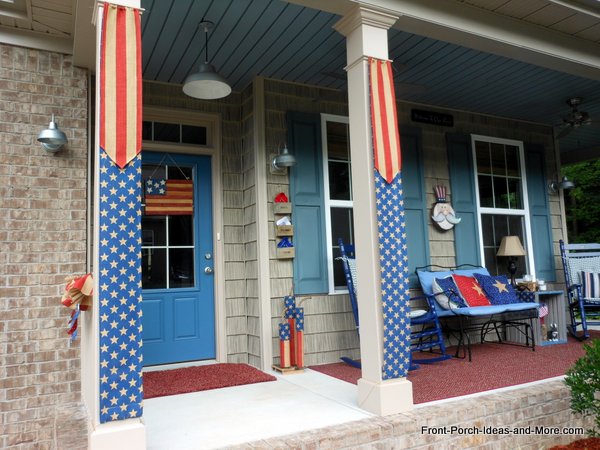
And here they are. We are all delighted with how everything turned out. Happy 4th of July! Decorating with Burlap LeftoversWe had a few pieces of burlap left from the banners so we put it to good use on our porch.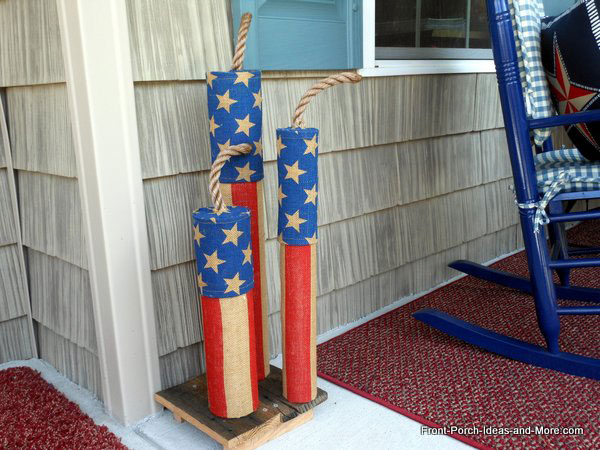
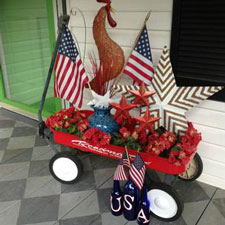
Liz came up with a great idea to use the remnant burlap to cover our homemade firecrackers rather than paint them. Did we give you some 4th of July decorating ideas? I hope so. Oh, and Did You See This?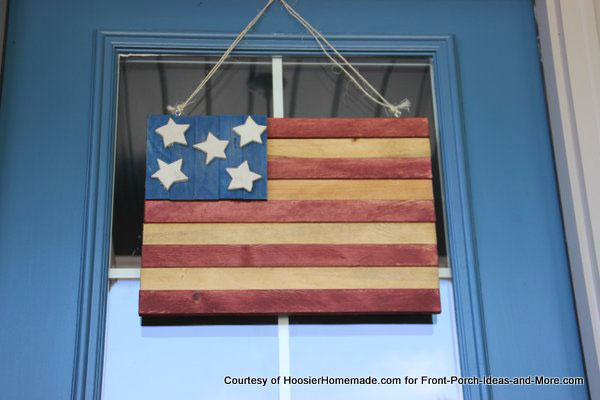
We share with you how we made a rustic Americana flag for our front door. You'll be surprised at how easy this is - and how great it goes with our patriotic burlap banners.

Hi! We're Mary and Dave, lifelong DIYers, high school sweethearts, and we both love porches. You've come to the right place for thousands of porch ideas. Merchants We Love


Helpful LinksEnjoy shopping Amazon (affiliate link)Popular PagesWhat's NewJoin Our Newsletter Family Porch Designs Porch Ideas for Mobile Homes Build a Porch | Small Porches Porch Columns | Porch Railings Screened Porches Porch Curtains | Porch Enclosures Porch Landscaping | Vinyl Lattice Porch Decorating | Porch Ideas Shop Navigation AidsHome | Top of PageSite Search | Site Map Contact Us PoliciesDisclosure Policy | Privacy PolicyLegal Info Please Join Us Here AlsoCopyright© 2008-2026 Front-Porch-Ideas-and-More.com All rights reserved. No content or photos may be reused or reproduced in any way without our express written permission. At no extra cost to you, we earn a commission by referring you to some products on merchant sites. See our disclosure policy. We, Front Porch Ideas and More, confirm, as stated on our privacy policy, that we do not sell personal information. All content here is solely for presenting ideas. We recommend consulting with a licensed, experienced contractor before you begin your project. We make no guarantees of accuracy or completeness of information on our site or any links to other websites contained here. Thank you for taking your time to stop by. See what's popular and new here. |
--- Our Wonderful Sponsors ---
--- End Sponsors ---Our Newsletter, Front Porch AppealLearn more!Thank you for being here! |
|||
|
At no extra cost to you, we earn a commission by referring you to some products on merchant sites. See our disclosure policy.
We, Front Porch Ideas and More, confirm, as stated on our privacy policy, that we do not sell personal information. All content here is solely for presenting ideas. We recommend consulting with a licensed, experienced contractor before you begin your project. We make no guarantees of accuracy or completeness of information on our site or any links to other websites contained here. Front Porch Home | Return to Top Contact Us | About Us | Advertise with Us | Search | Site Map Media | Privacy Policy | Disclosure | Legal Notice | What's New 
|
||||
|
No content or photos may be reproduced or copied in any way without our express written permission. | ||||